I have come to see many users are willing to get Press running in their own cloud and be able to run their own Frappe Cloud.
I am writing this tutorial to help any one install and get Frappe Press up and running on their own servers.
Disclaimer: These steps worked for me but it could vary for you. I suggest you take expert advise for any major issues. I am in no way associated with Frappe Team. So, these steps are unofficial but based on official documents released by Frappe.
Edit 1: Also note that this will work for Press before the below commit on evelop branch of frappe press repo. I have noticed that the way servers are created in newer versions have changed abit.
Commit Hash: 7c2069324ea20c40fd54e2d37a42e08ec3179a27 (Aug. 12, 2025)
In case you want to follow the official document, here’s the link: Local Development Environment Setup. Also, here’s another resource, a video by Arun Mathai: https://www.youtube.com/watch?v=TjrQsHHeRqk&ab_channel=ArunMathai. Although very detailed, this video and the frappe cloud doc assumes that you already know what you are doing and have already setup basics. It is not always the case.
So, I attempted to write everything down to help anyone willing to install Frappe Cloud with all detailed step by step breakdown.
Keep in mind, this is going to be hectic.
Lets begin:
Lets assume these:
- Your public website/base url for this tutorial is
example.com. Your users when they enterexample.comon the browser, they will see something like infrappecloud.com. - Press UI will be accessible to users at
example.com/dashboardafter they signup in your example.com. - Users will get their sites accessible at
subdomain1.example.com,subdomain2.example.com,subdomain3.example.comand so on. - You are using AWS EC2 instances for all servers.
FYI: You will need 4 EC2 instances (2vCPU and 4GB RAM with each 40GB disk space should work for testing purposes). We will cover creation of these instances later in this guide.
Prerequisites:
- AWS account with root user.
- AWS IAM User with full access to ECR.
- Access to AWS Route 53.
==========================================
Preparation:
A. Create an IAM user in aws. Lets name the IAM user: press-user. And provide a permission/policy AmazonElasticContainerRegistryPublicFullAccess.
If you don’t know how to create IAM user:
- Login to your AWS account with root user.
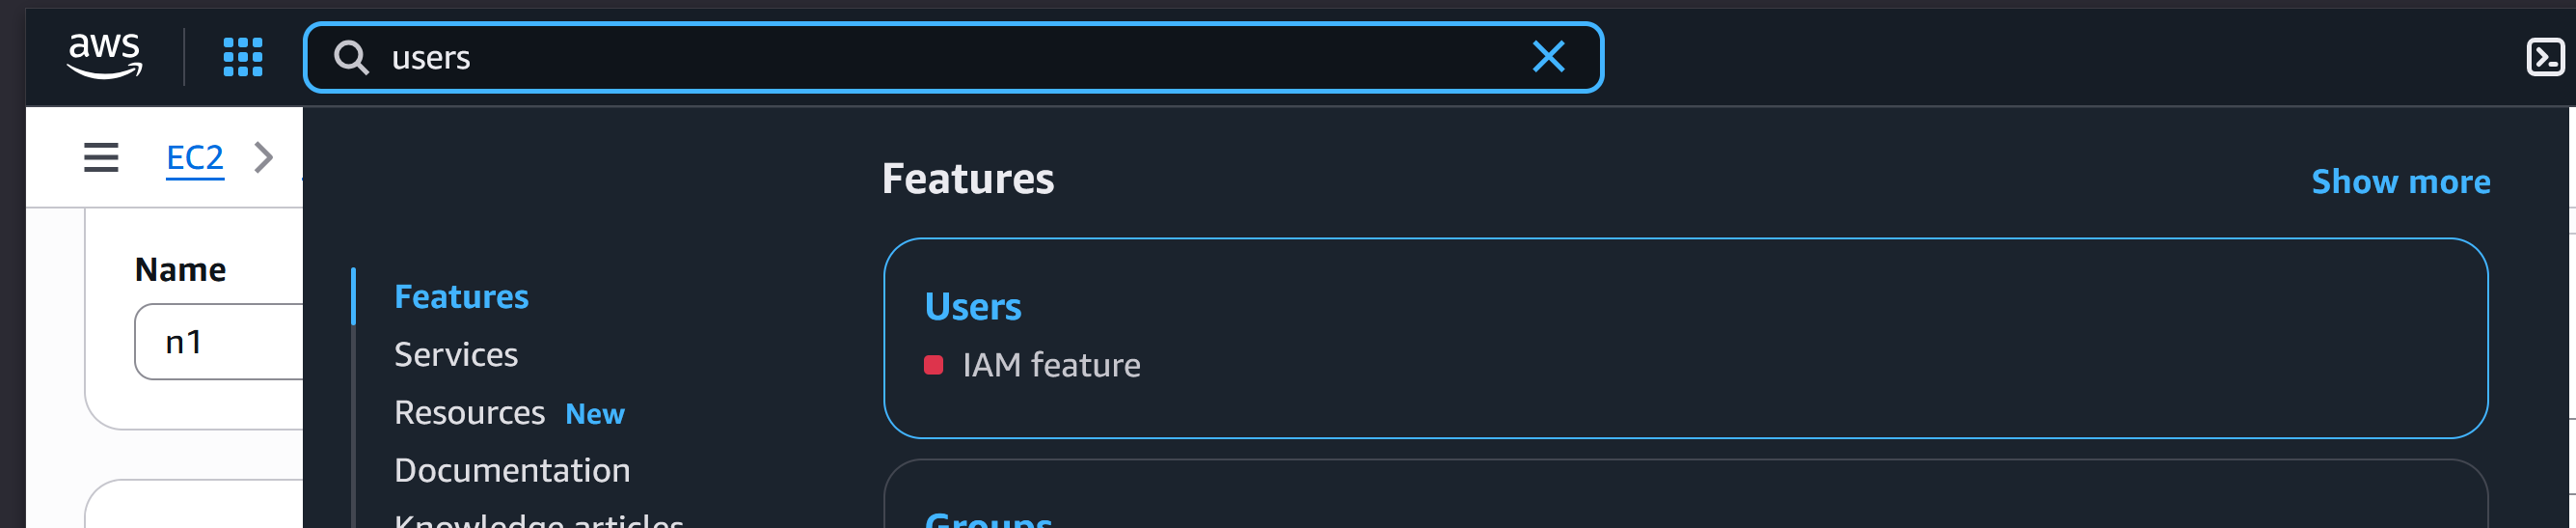
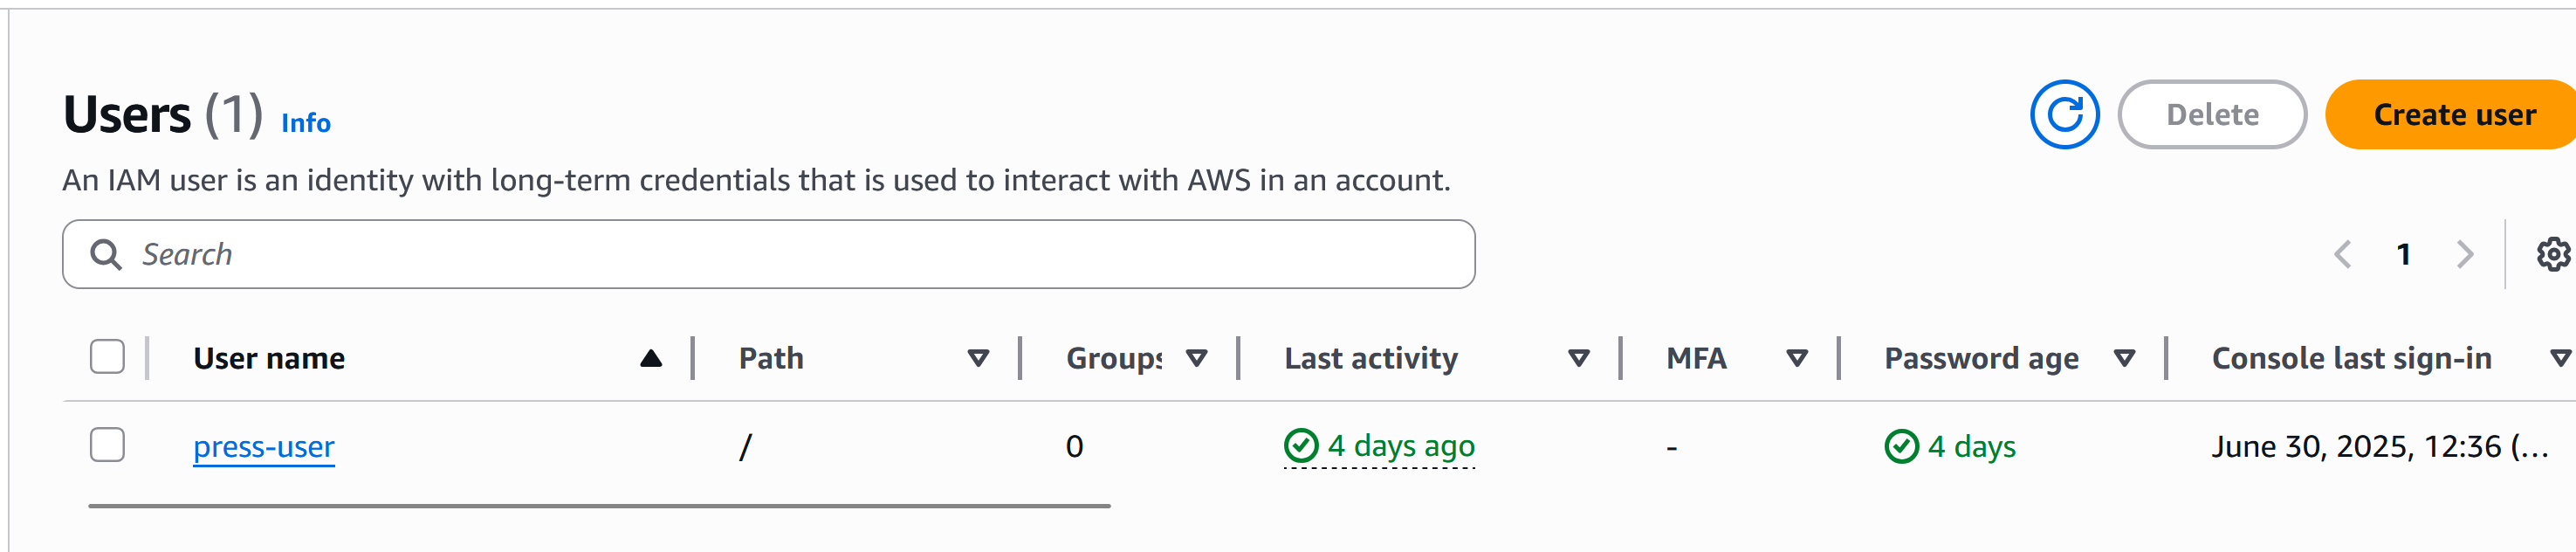
- Search for Users and select Users.
- Click on
Create User.
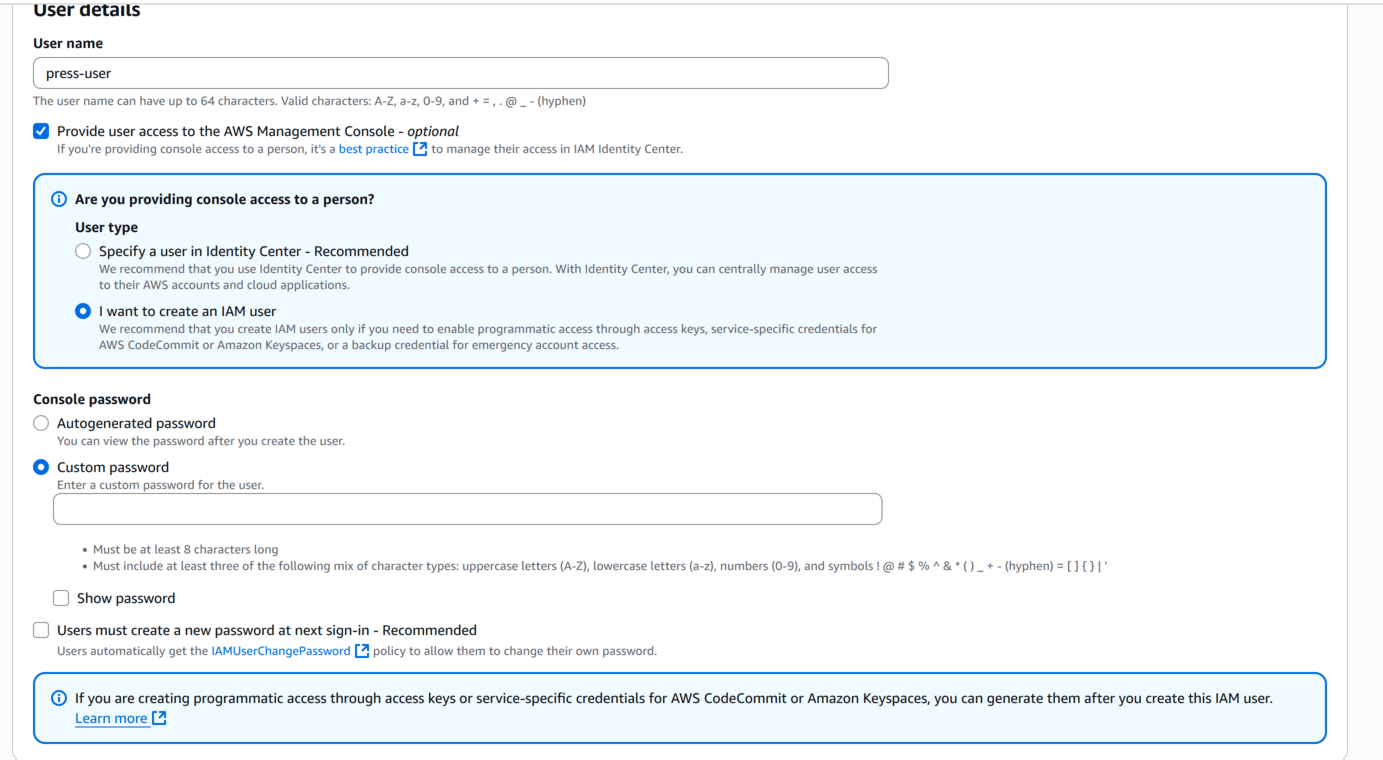
- Name it
press-user,
checkProvide user access to AWS Management Console,
selectI want to create and IAM user,
selectCreate passwordand create your password for the userpress-userthat you are currently creating and
check offUsers must create and new password at next sign-in
then select Next.
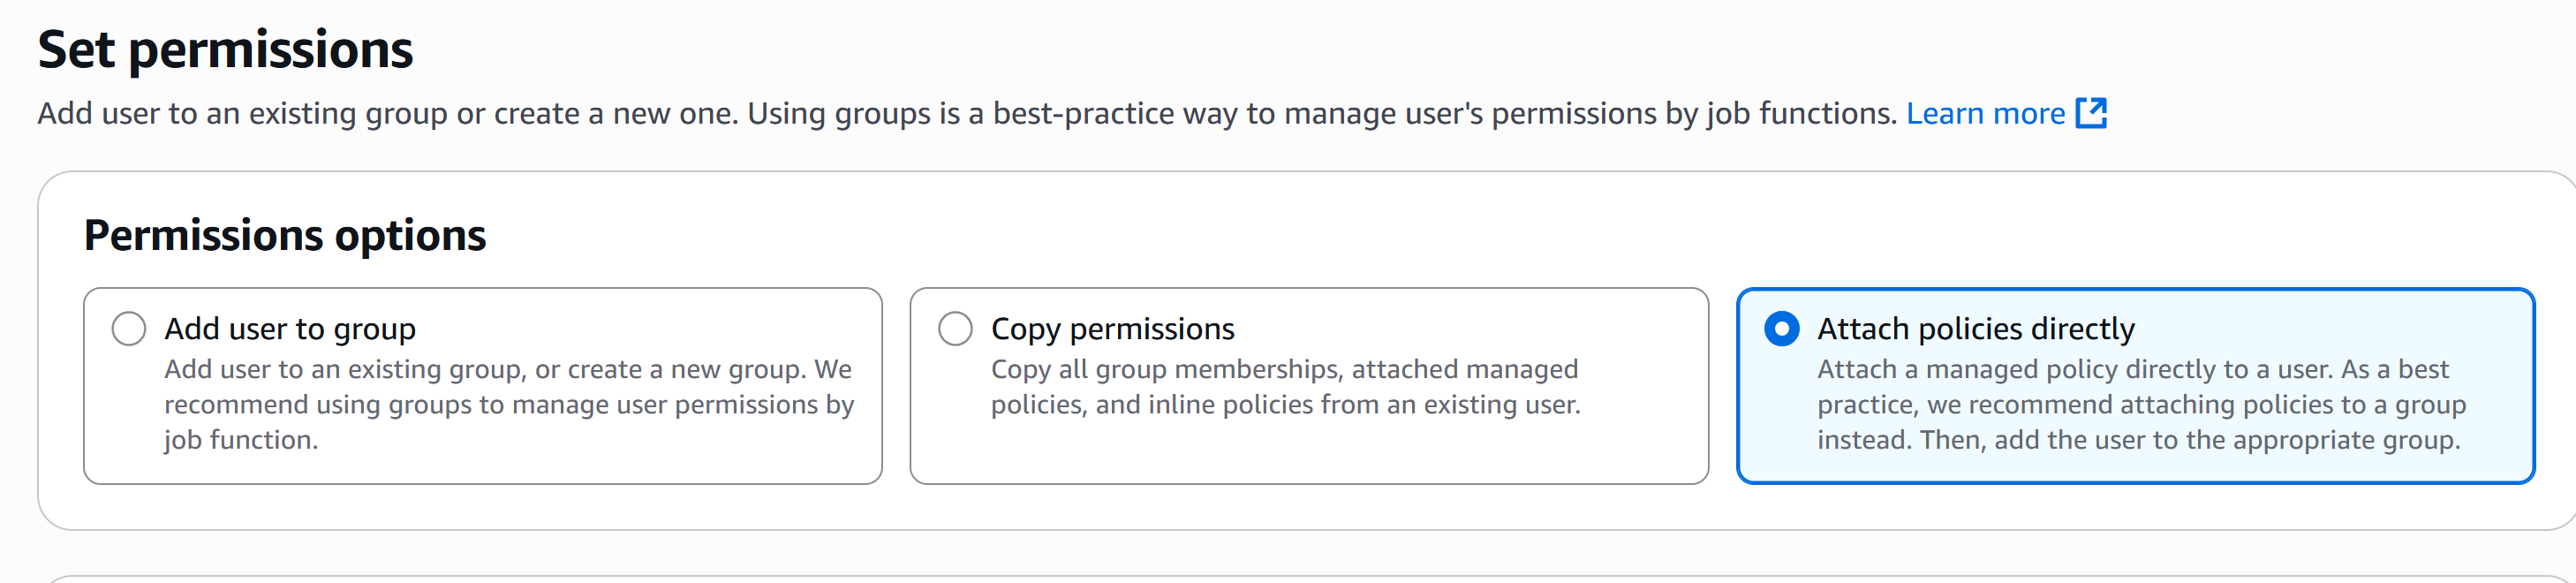
- In the next page, select
Attach policies directly.
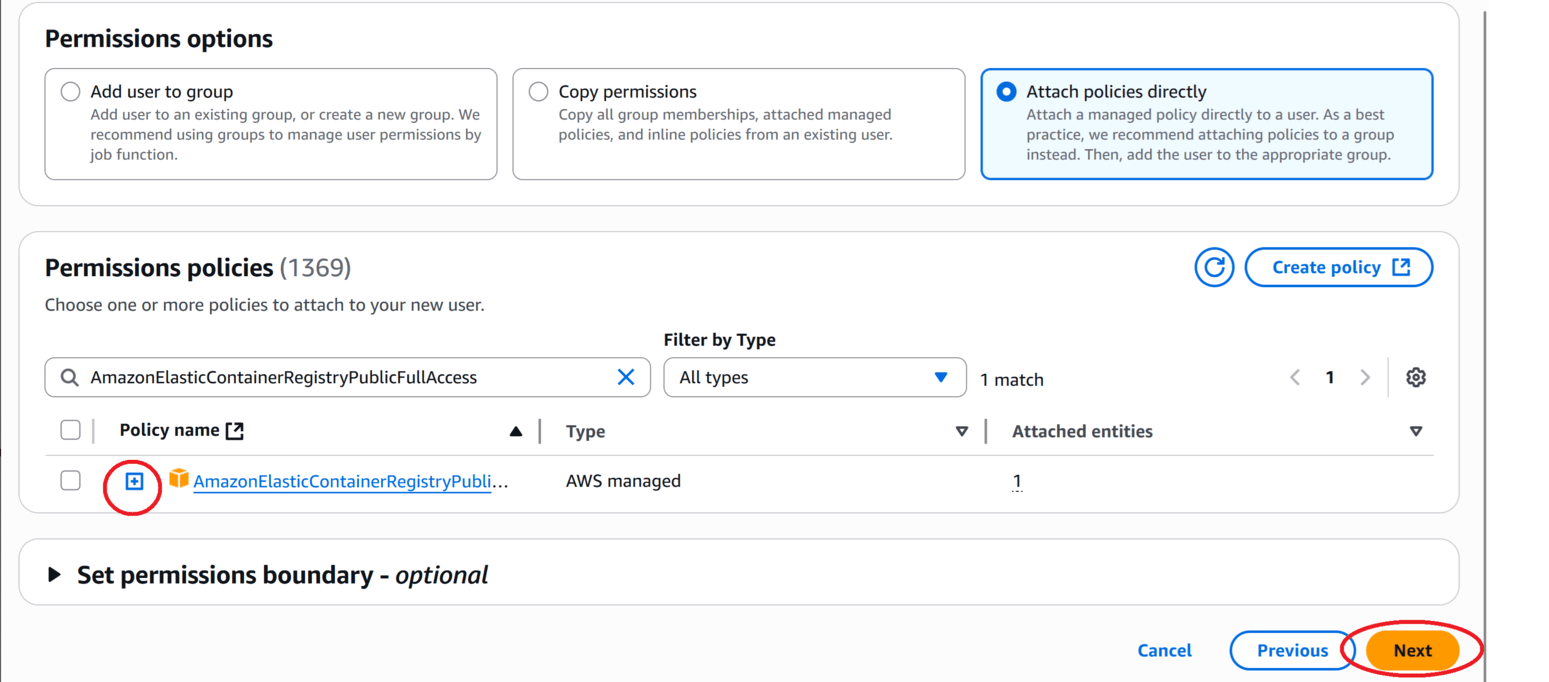
- Then just below that, type this in search:
AmazonElasticContainerRegistryPublicFullAccess. Click on little plus icon and select Next.
- Click on
Create User. And you are done.

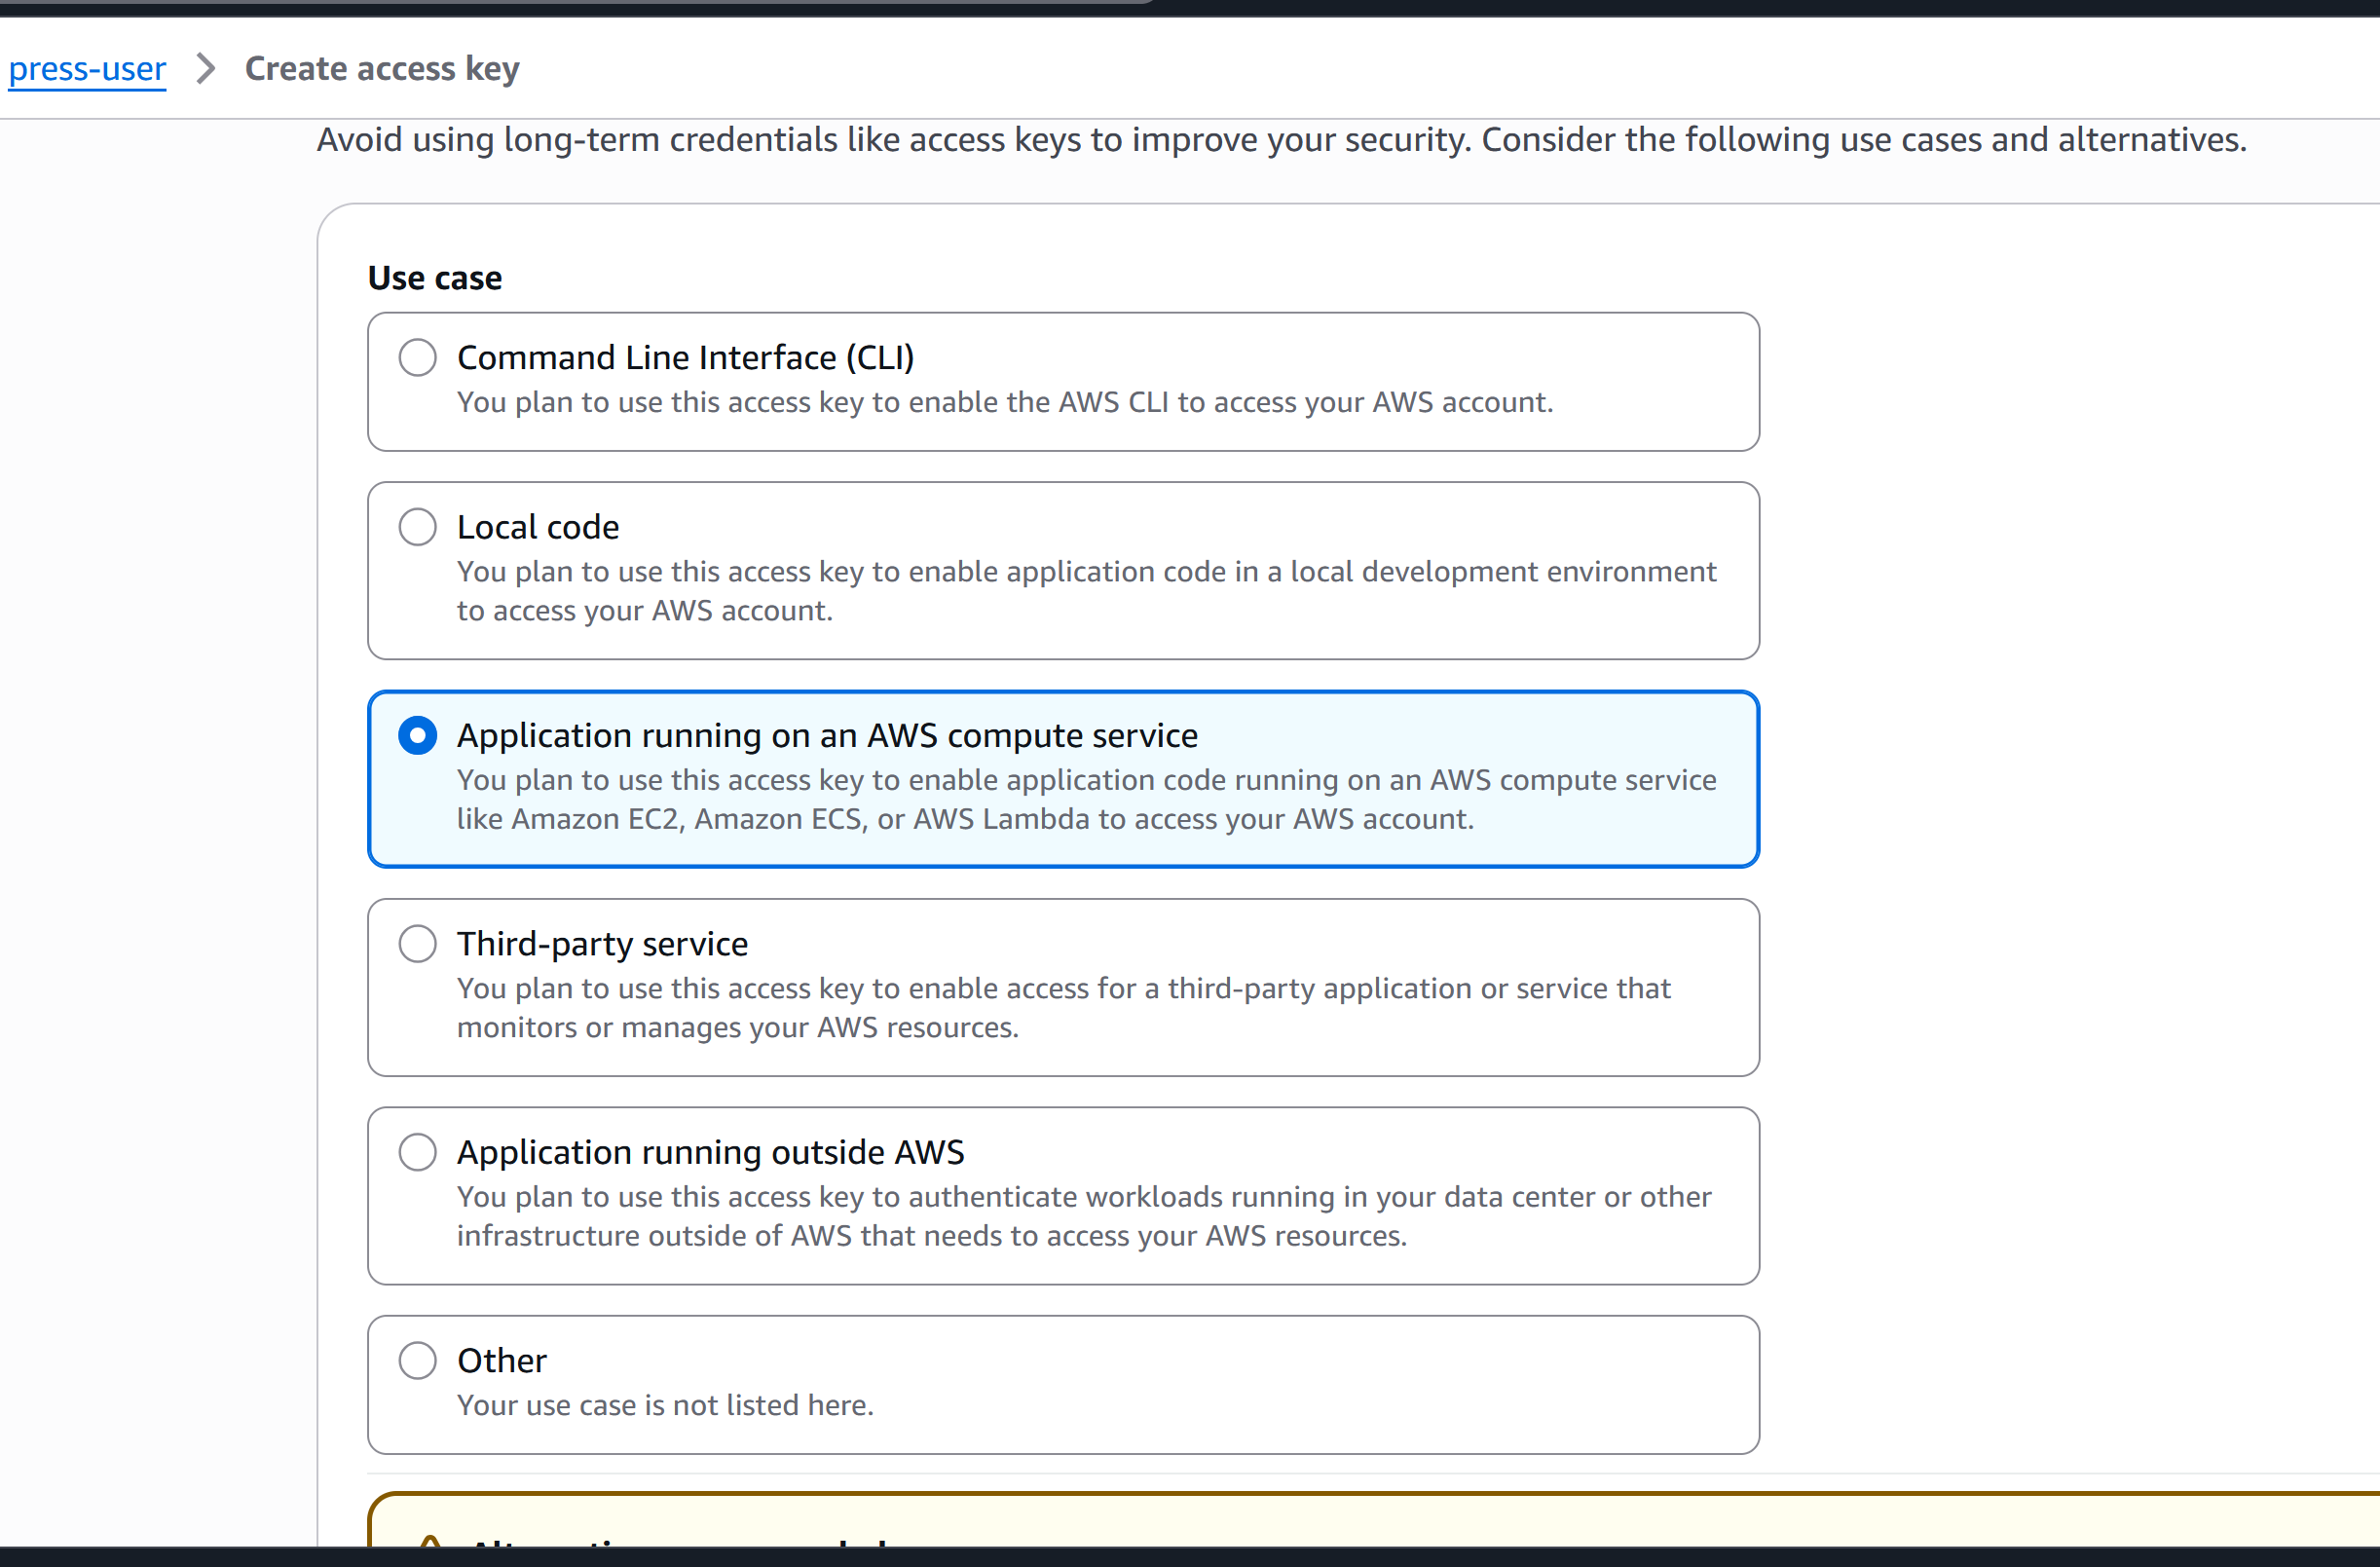
B. Create Access key for programmatic access.
Steps:
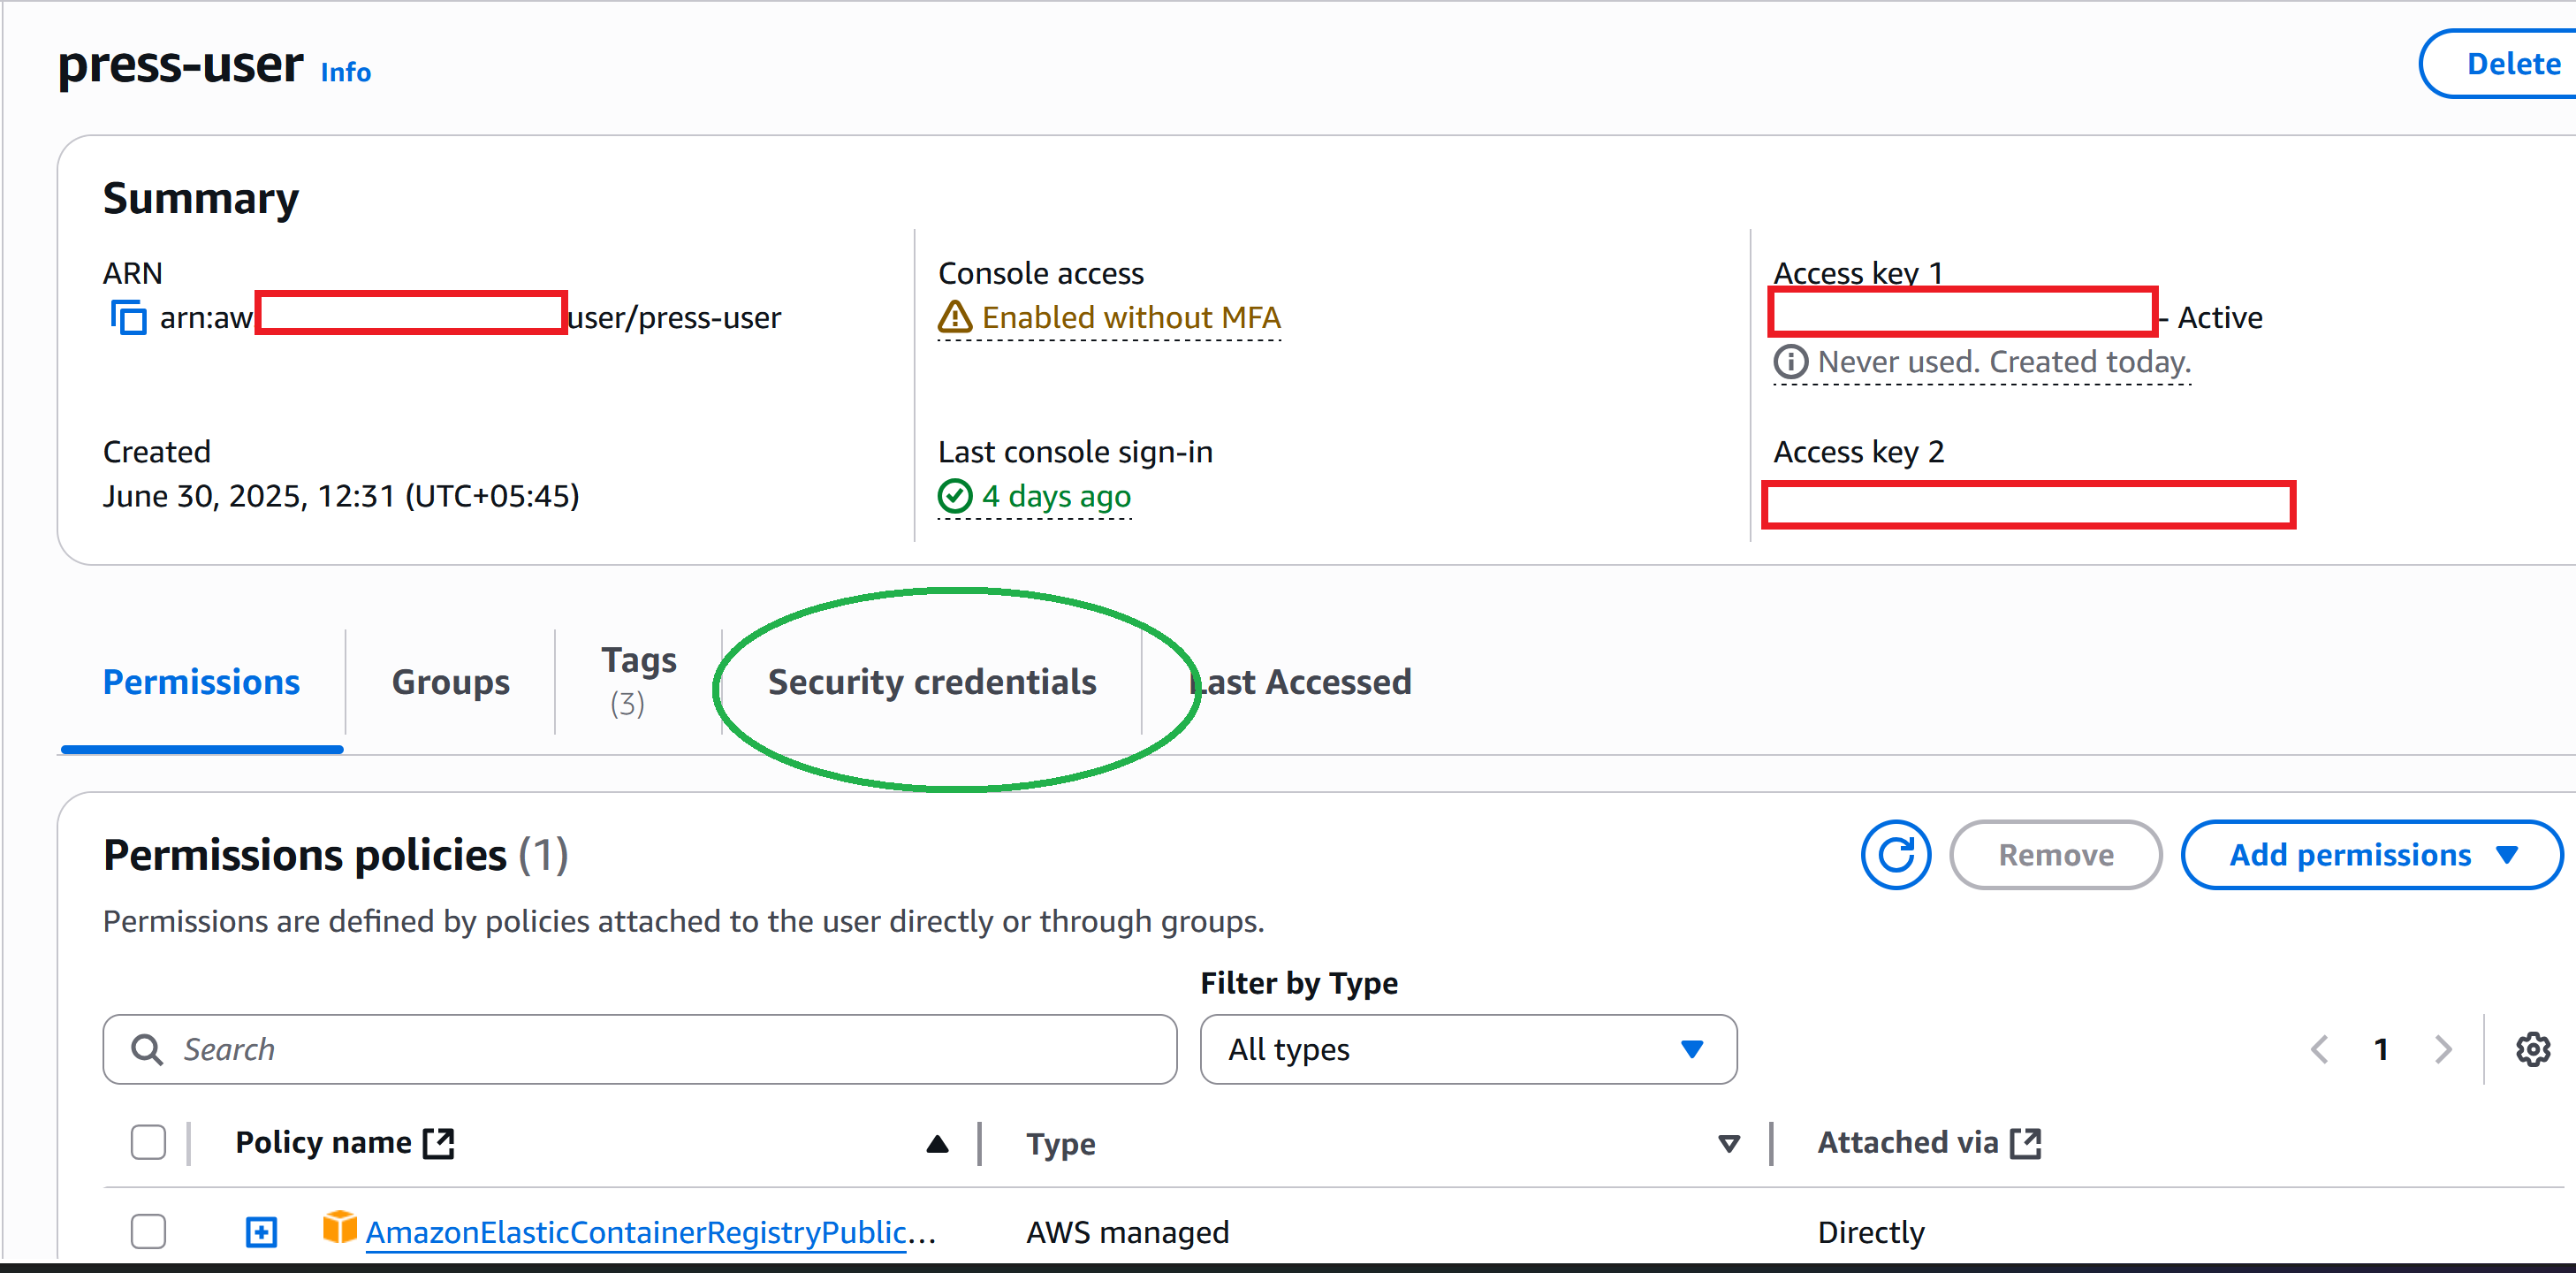
- Click on newly created IAM User and go to
security credentials.
- Scroll down to Access Keys and Select
Create access key.
- Select as shown and click on Next.
Note: If your Press server (base url) is running from other service providers you have to select the option:Application Running outside AWS - Provide a description for future reference and click on Create access key.
- Access key and secret will be created. Make sure you download the .csv and save it somewhere safe. You can’t access it later. We will need these later. Make sure to recall it later when I say something like “IAM user access key and secret”.

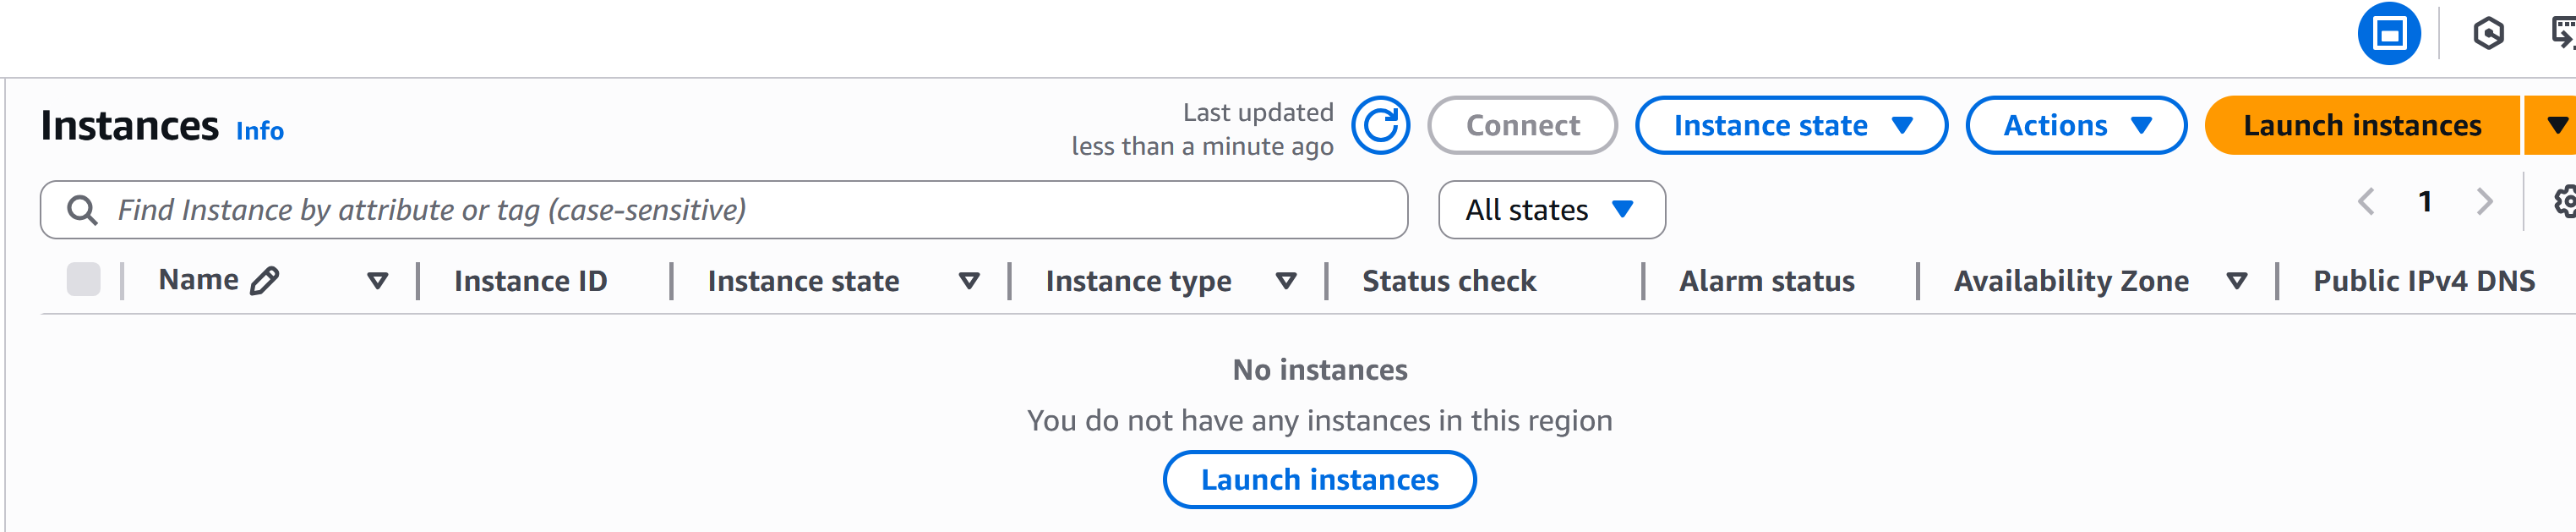
C. Create EC2 instances.
Here we will create 4 EC2 instances - 1 for installing Press, and 3 for n, m and f servers as described here.
Steps:
-
Go to AWS EC2 and click on launch instances.
-
Name it
press, selectUbuntuin OS images section and select Ubuntu 22.04 LTS. Click onconfirm changesif prompted.
-
Scroll further down and select
t2.mediumort3.medium. You can select others as required.
-
Under key-pair section, click on create new key pair.
Name itkey_pair_for_pressand settings as shown below and Click onCreate key pair. Key pairs are required for ssh access to servers. A file “key_pair_for_press.pem” will automatically be downloaded that contains private key for the server you are creating. Make sure you keep it safe. -
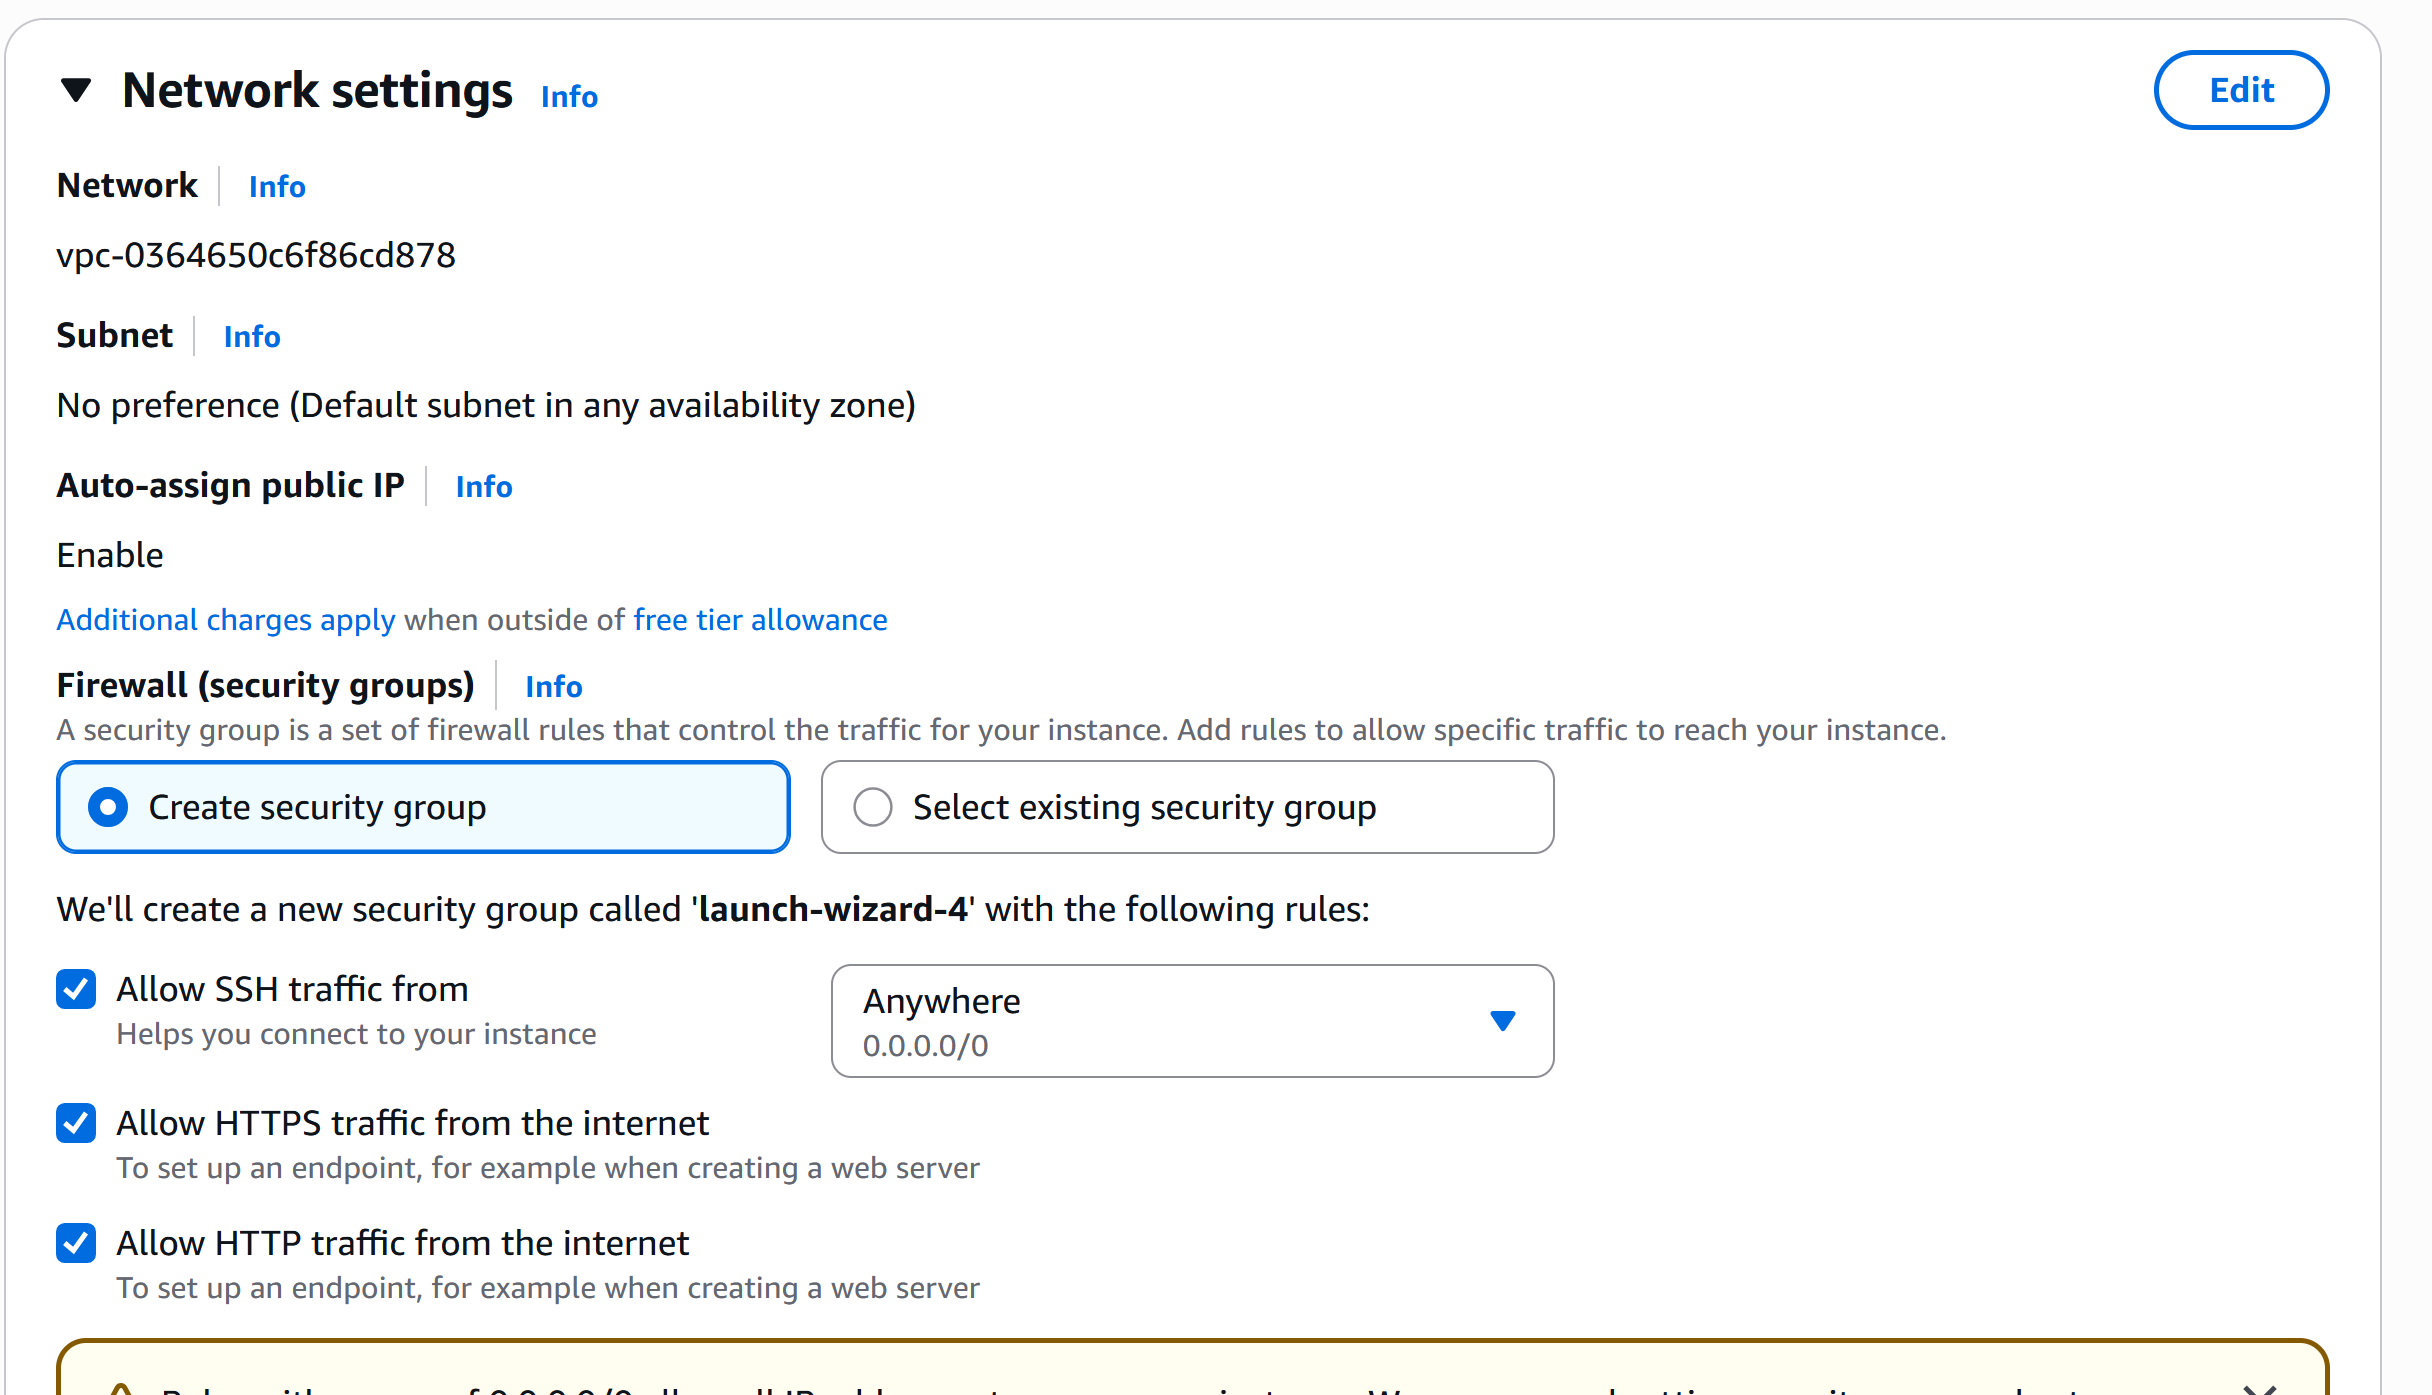
Scroll further down and select as shown:
-
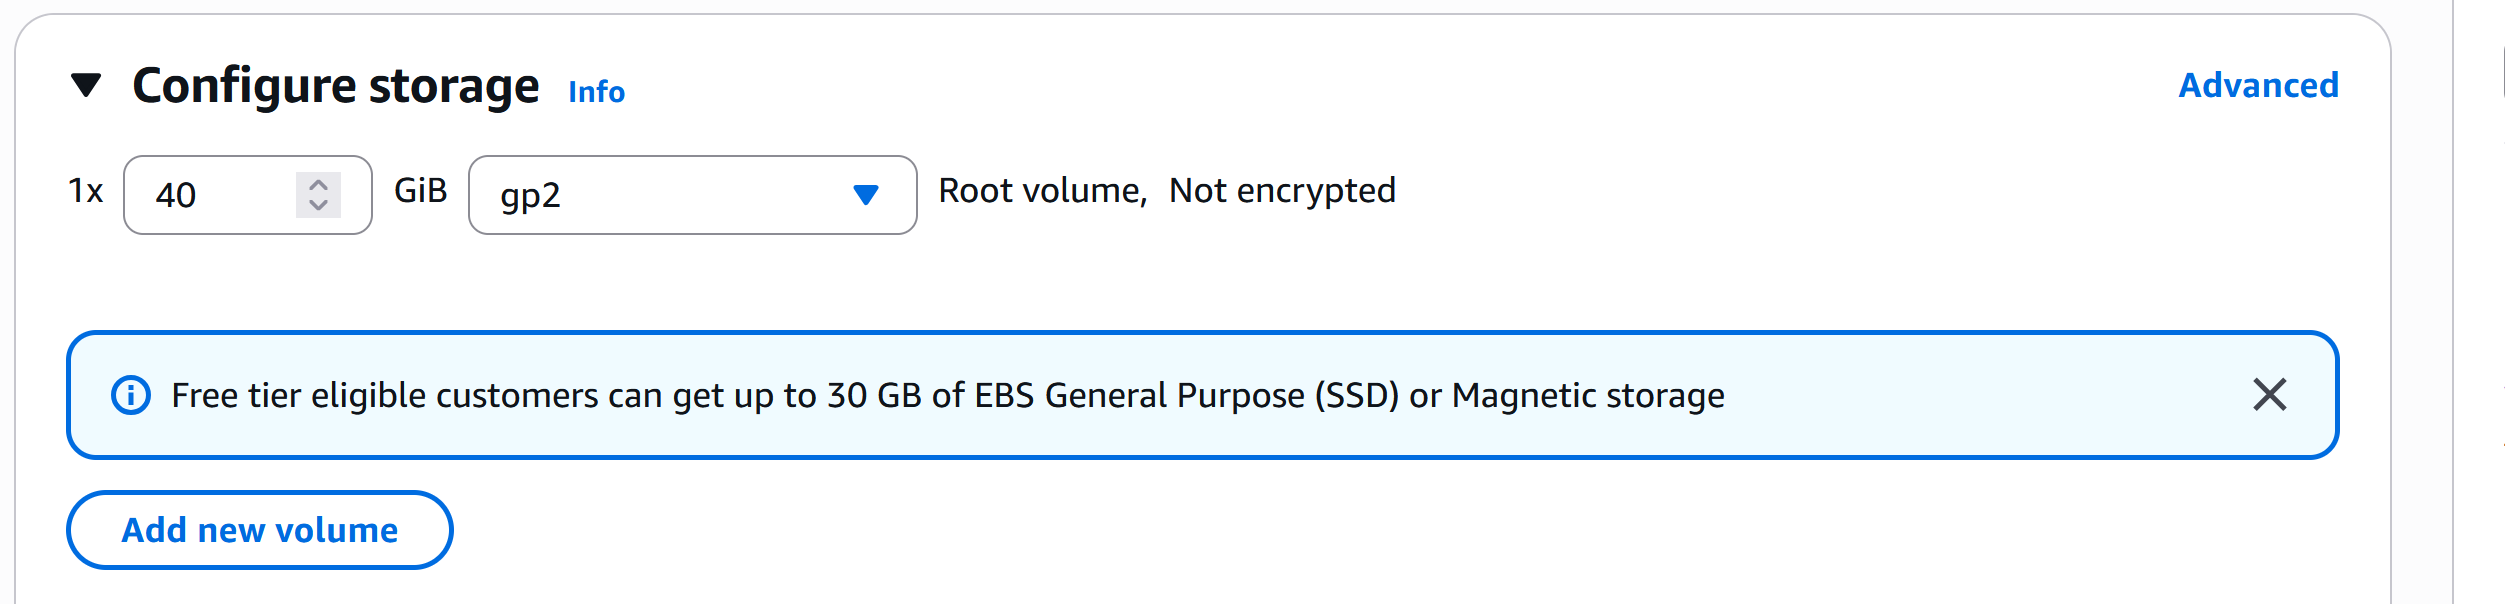
Under storage, select required storage.
-
Leave others as it is.
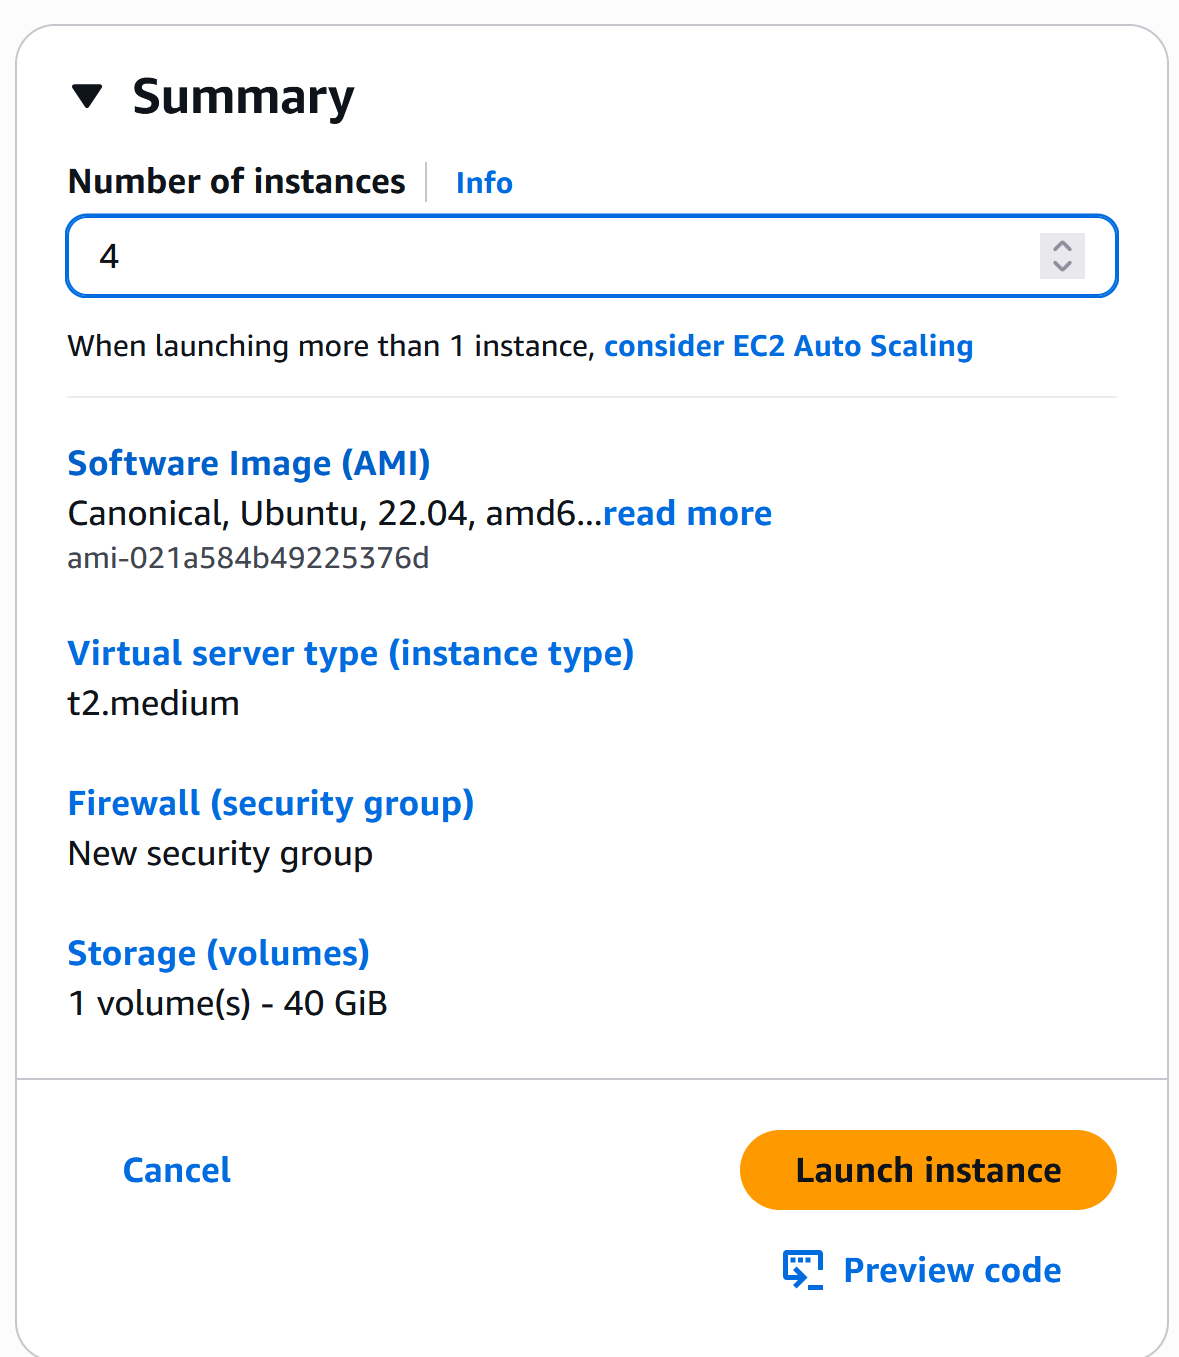
-
On the right side, in Summary section, select
4innumber of instances. -
And then finally click on
Launch Instance.


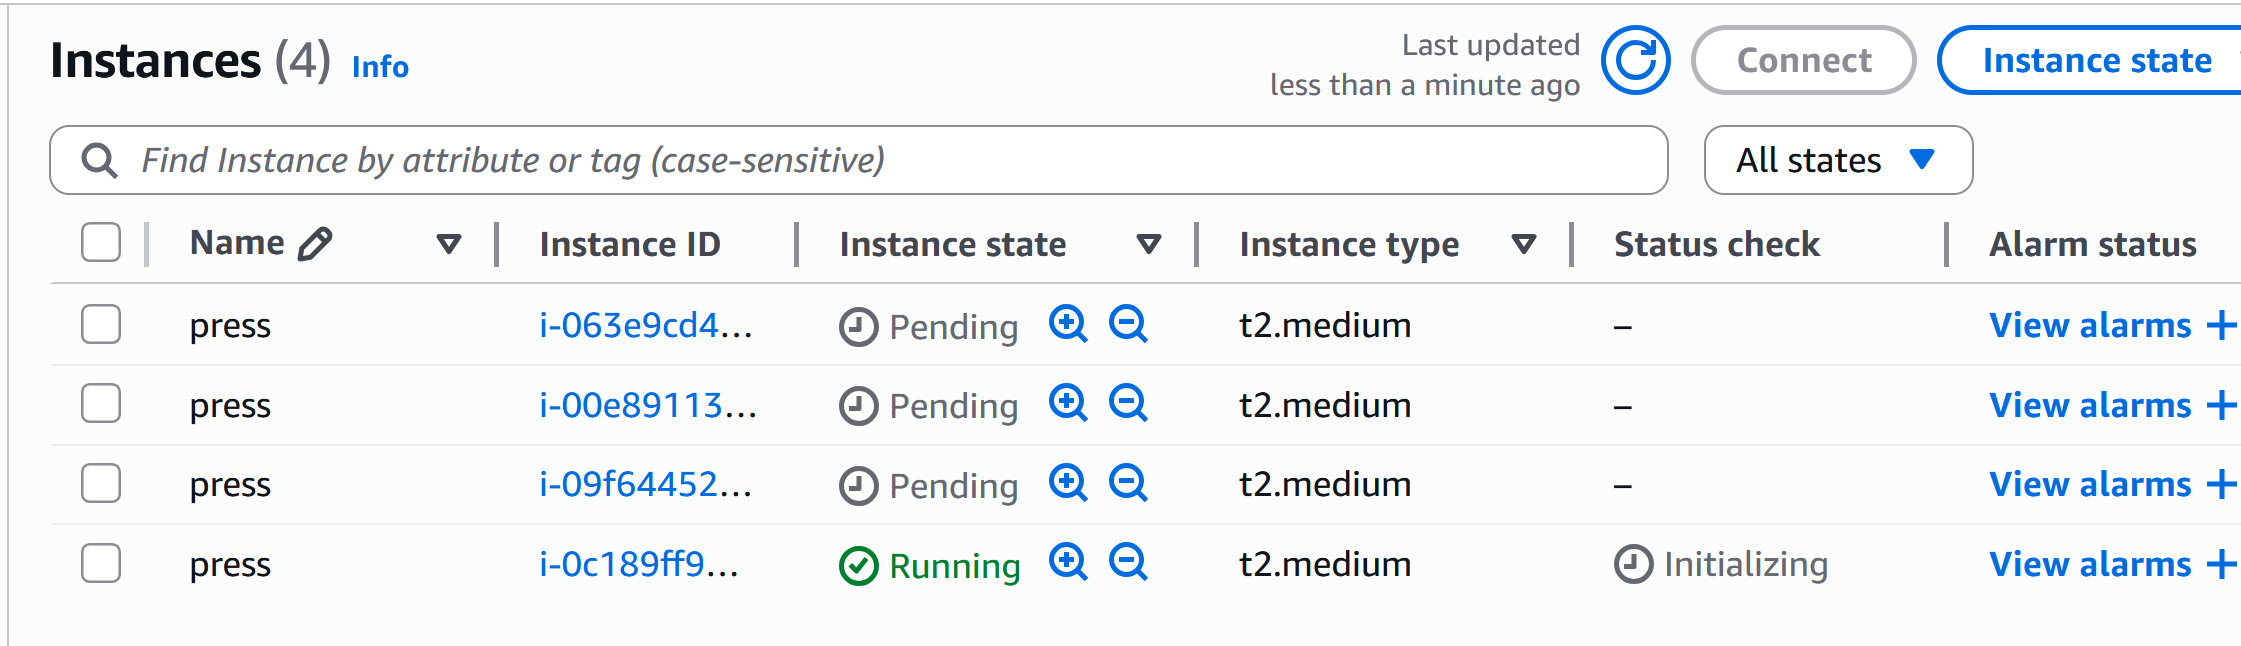
Now wait until instances are created.
After instances are launched you will see something like this:
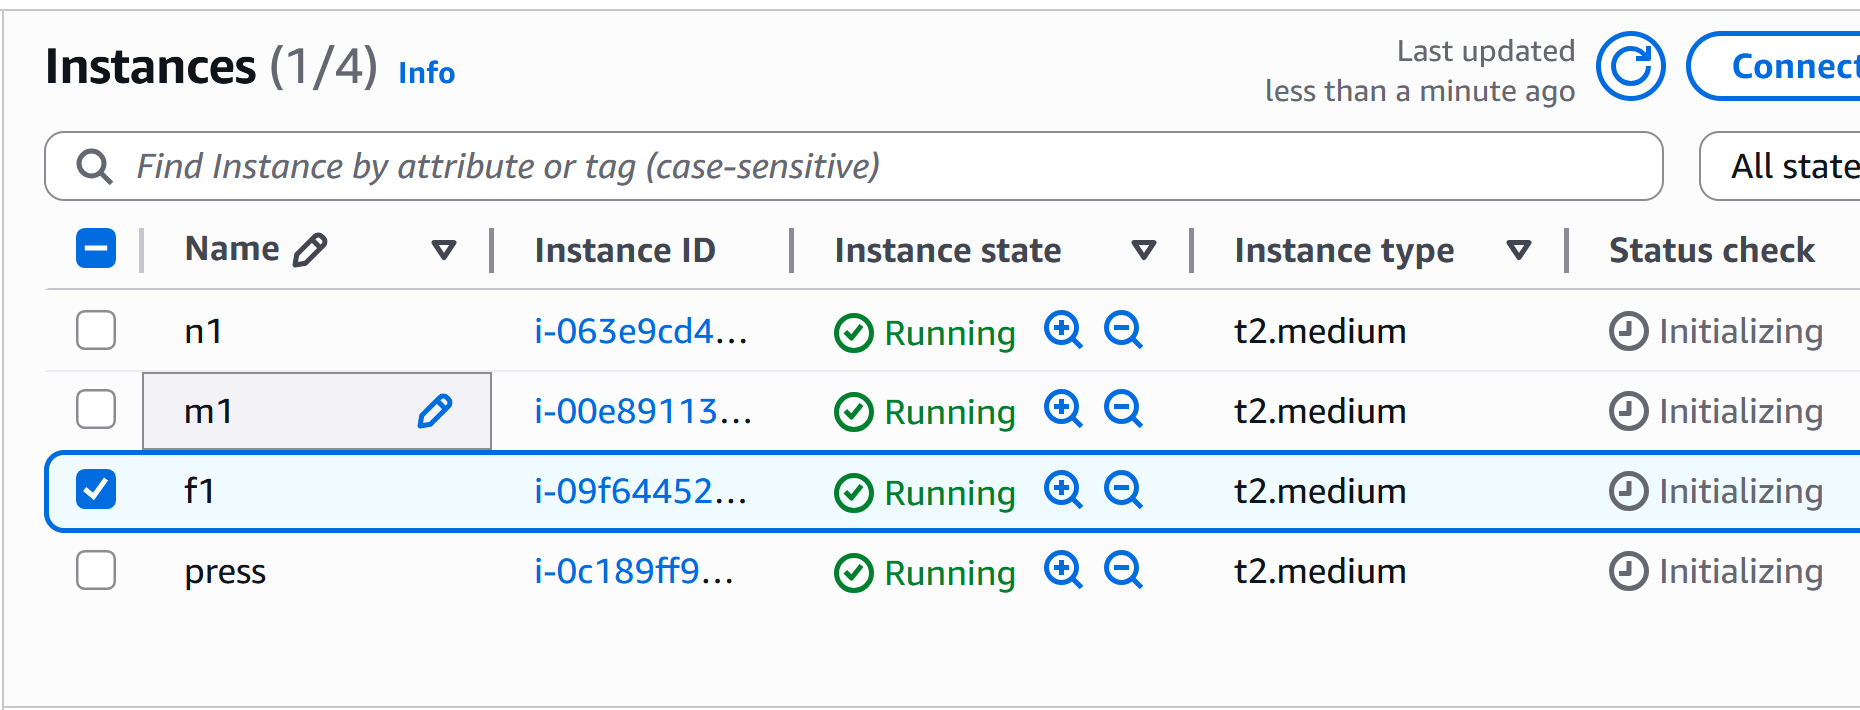
Go ahead and rename 3 of them to n1, m1 and f1. Leave the last one as it is.
Then, go and connect to each instances and set their timezone to your preferred timezone.
timedatectl set-timezone "Asia/Kathmandu"
If you forget it later, there might be issues with date and time mismatch. I assume you already know how to connect to instances and you know basic terminal commands.
Also, if you are using AWS, then all servers must already have a default user ubuntu already created.
For uniformity, lets create user: press in press server, by running these commands:
This user will act as frappe user for us. Before that set password for user ubuntu.
sudo passwd ubuntu #not set password for user ubuntu
sudo adduser press
sudo usermod -aG sudo press
su press
cd /home/press/
[ That step is optional. You can use user ubuntu instead of press. I prefer press, to know what I am working on.]
For other servers - n,m and f, lets use the default user ubuntu. We will need this later while setting up ssh access.
D. Setting up AWS Route 53
I hope you already know the concepts of Nameserver and A records.
-
Goto AWS Route 53.
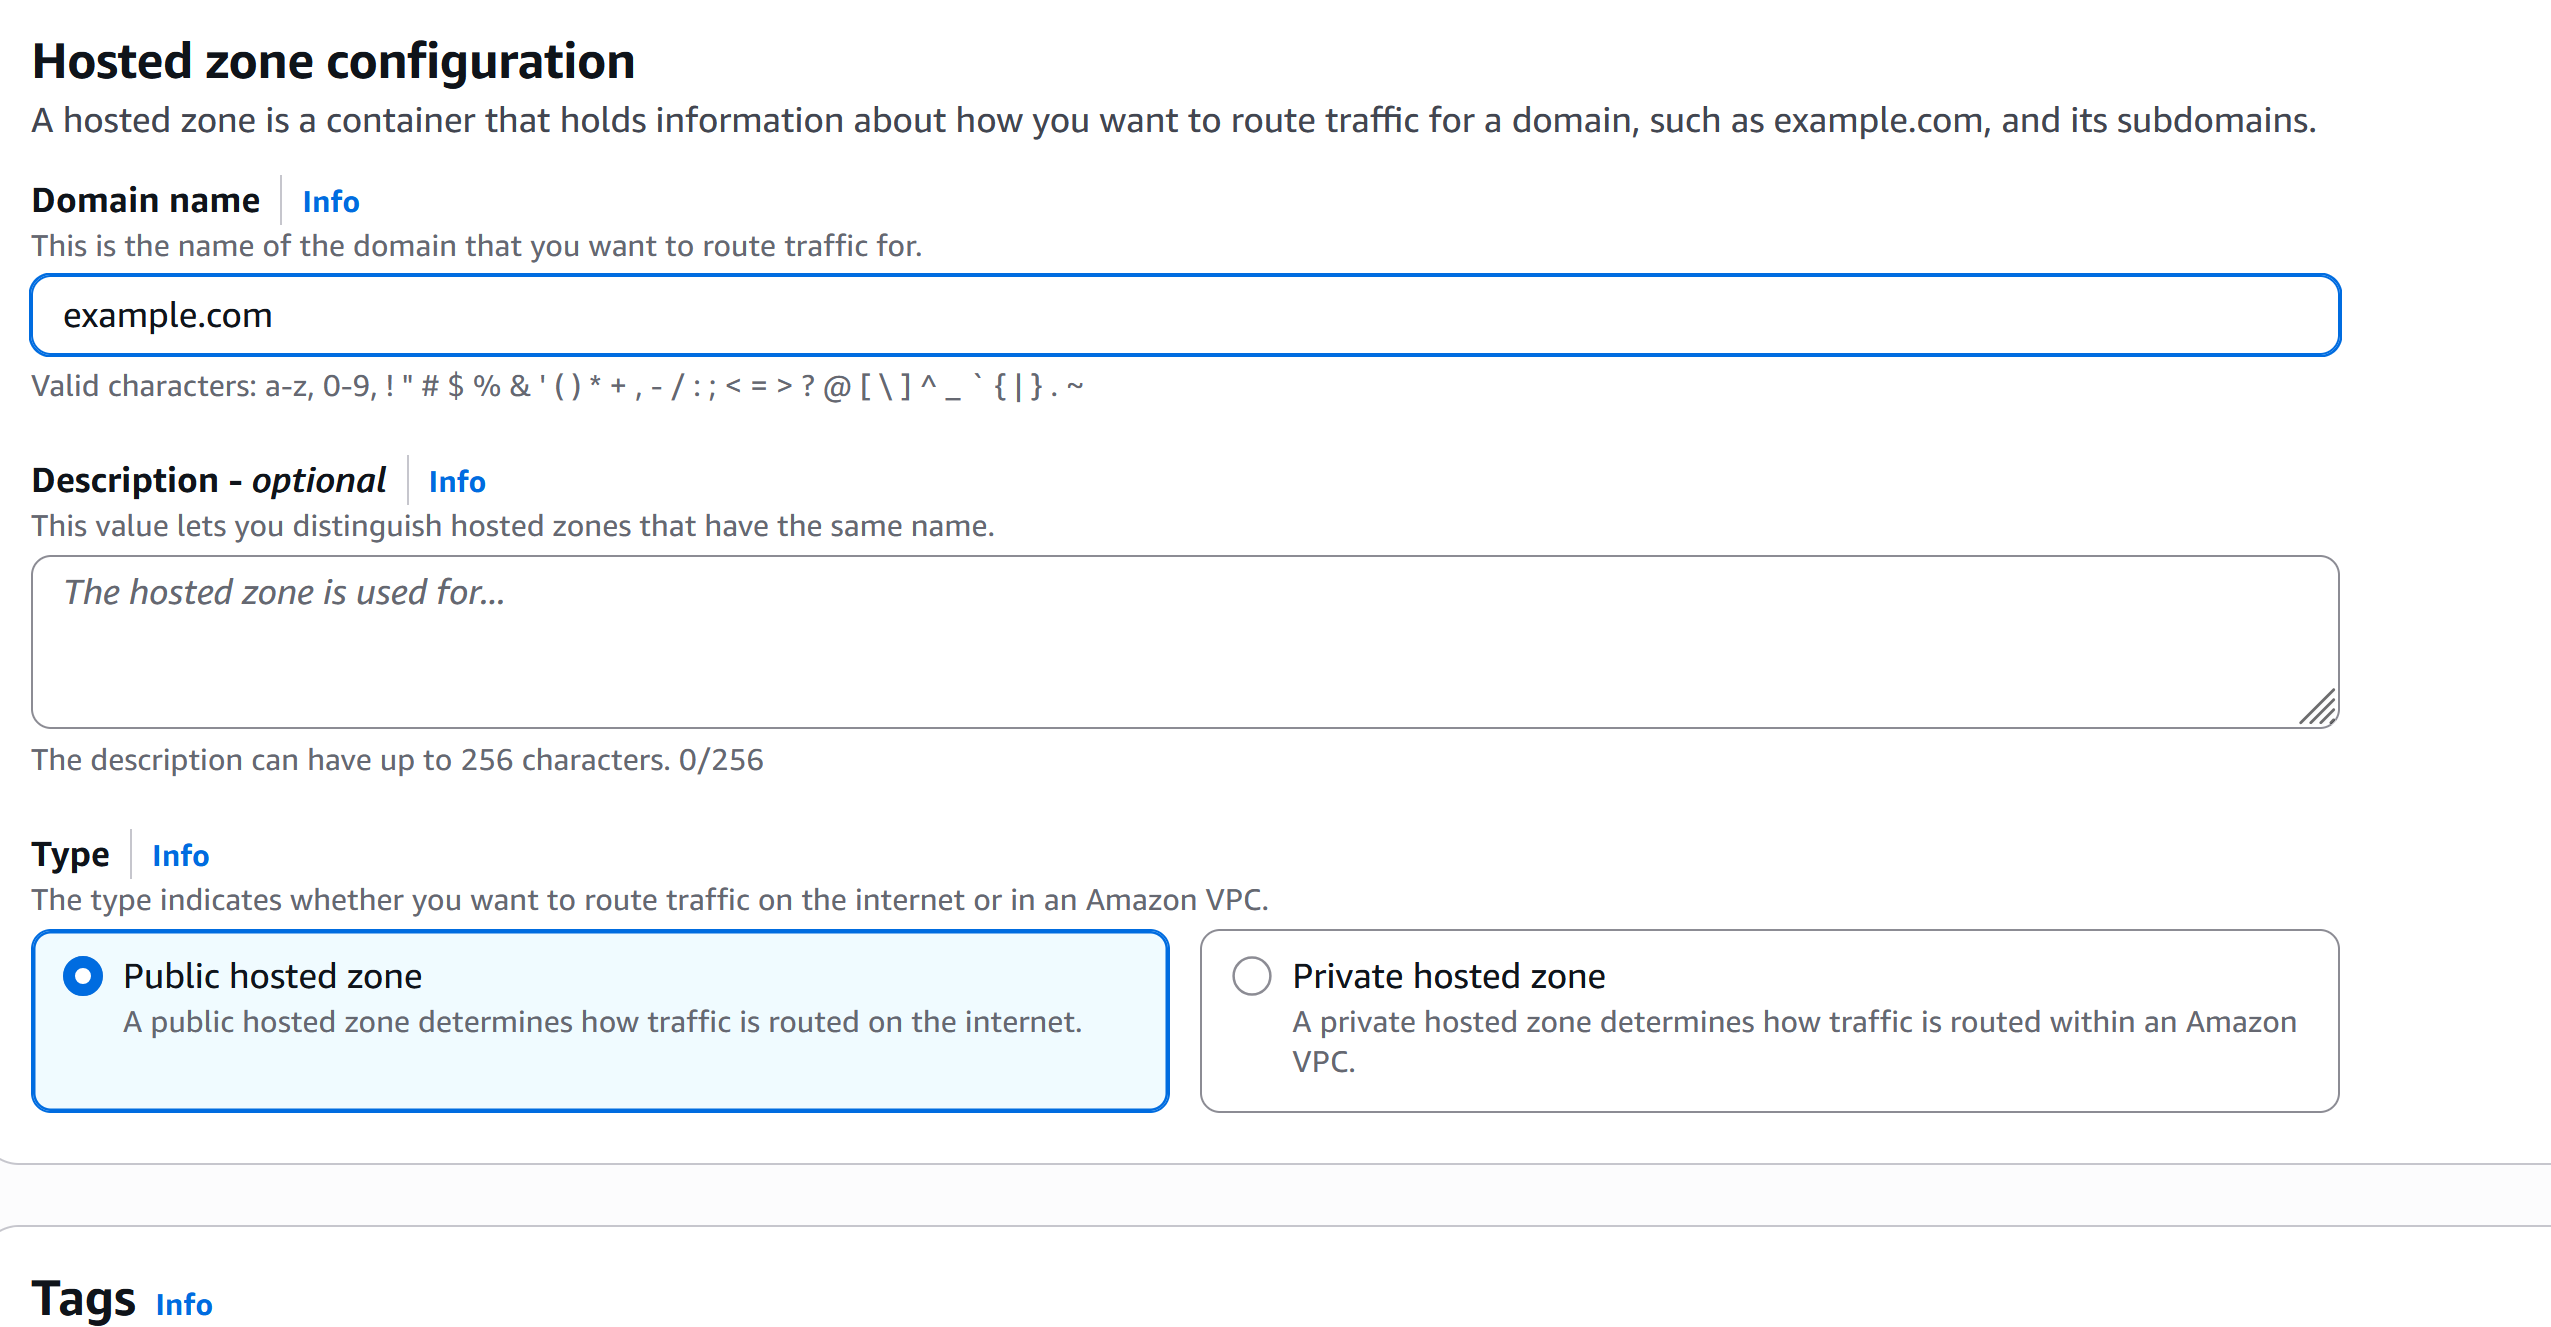
-
Create a hosted zone with your domain.
-
Create the following records: But before that, make sure to get elastic IP from AWS and assign to respective servers. The Elastic IPs make sure your IP addresses don’t change on reboot/stop-start events.
example.com : IP of press server (from EC2 instance)
n1.example.com : IP of n1 server
*.example.com: IP of n1 server (be careful to use n1 server’s ip, not press server)
m1.example.com : IP of m1 server
f1.example.com : IP of f1 server
See this image from EC2 for reference. Use public IPs not Private IPs.

Setting up ssh access to all servers (most crucial)
You need to be able to ssh into press server from your local pc to run operations in press server. You can use AWS’s connect feature (as shown in image),
![]()
but I prefer WSL in windows.
Lets first setup ssh access to press server from WSL. If you remember from previous step, a file key_pair_for_press.pem has been downloaded into your PC (assuming it is windows PC, the file is saved to
C:\Users\your_user\Downloads\key_pair_for_press.pem
Step1: Open Ubuntu terminal.
Step2:
Now you need to copy that downloaded file (which contains your press servers’ private keys) to your ubuntu wsl (local file system).
For that,
# Create a directory for your keys if you don't have one
mkdir -p ~/.ssh

# Copy the .pem file from your Windows drive to your WSL home .ssh directory
cp /mnt/c/Users/your_user/Downloads/key_pair_for_press.pem ~/.ssh/

# Now, change permissions on the copy in your WSL home directory
chmod 400 ~/.ssh/key_pair_for_press.pem

# Verify the permissions (should now show -r--------)
ls -l ~/.ssh/key_pair_for_press.pem
You should now be able to ssh into your press server with this command:
ssh -i ~/.ssh/key_pair_for_press.pem ubuntu@your_press_public_ip_from_aws
But we need to access press user also, so lets copy the keys. Run these from your wsl:
ssh -i ~/.ssh/key_pair_for_press.pem [email protected]
su press #enter your password when prompted
cd
mkdir .ssh
chmod 700 ~/.ssh
sudo cp /home/ubuntu/.ssh/authorized_keys /home/press/.ssh/authorized_keys
sudo chmod 600 ~/.ssh/authorized_keys
sudo chown press:press ~/.ssh/authorized_keys
Now you must be able to ssh into press user of press server by:
ssh -i ~/.ssh/key_pair_for_press.pem [email protected]
Lets setup so that you don’t have to specify private key path and your ip all the time.
In your wsl, run
sudo nano ~/.ssh/config
Add these lines (change as per your server’s ip):
Host press
    HostName example.com
    User press
    IdentityFile ~/.ssh/key_pair_for_press.pem
Now you should be able to ssh into your press server just by:
ssh press
Following up until now?
Great
Now that you can ssh into your press server from your local pc, we will install Frappe and Press app in that server.
Connect to the press instance (by ssh press) and Install Frappe and then install Press app in the press server.
If you don’t know how to install Press, follow this guide. Just make sure NOT to install ERPNext/HRMS and other apps.
Replace the commands from that guide by these in:
Step 5.5:
bench new-site example.com # use your domain here
Step 6:
bench get-app press
bench --site example.com install-app press
All other steps are as they are explained in that guide.
I hope by now, you have installed press and can see press console in example.com.
If you can’t access your press site, thats because you have not set the A records for example.com in AWS Route 53. I hope you can do that on your own.
Lets move on now.
Now that you can access press at example.com, lets setup other servers - n,m,f first.
Its complicated , so bear with me here.
For press to run properly, the press server must be able to ssh into all three n, m, f server. Confused ? Well in previous steps, we made sure you can ssh into press server from your local pc. That’s so that we can install press in press server (in AWS). Since you have now installed press, the press application must be able to interact will n, m, f servers. It does so via ssh access. Lets setup root ssh access to n, m, f servers.
Lets recall what we did in previous step to ssh into press server from local pc.
We copied the private key (of press server/destination server) into our pc (origin) at ~/.ssh/ folder of local pc.
Lets do the same for n,m,f server. We need to copy the private keys of all three servers (which happens to be the same, since we chose same key-pair during instance creation in aws) into the /root/.ssh/ folder of press server (origin).
Lets do that now.
Open Ubuntu terminal in windows and run these commands.
ssh press

# copy private key from your pc to ~/.ssh/ folder
# first make dir ~/.ssh

mkdir -p ~/.ssh # if the folder .ssh doesnot exist
exit # to make sure you are logged in back to local pc, not press server
Use scp command to transfer files from local to press server.
scp -i ~/.ssh/key_pair_for_press.pem ~/.ssh/key_pair_for_press.pem  [email protected]:~/.ssh/
ssh press #ssh into press server
chmod 400 ~/.ssh/key_pair_for_press.pem
# Verify the permissions (should now show -r--------)
ls -l ~/.ssh/key_pair_for_press.pem
You should now be able to ssh into f1 server like this:
ssh -i ~/.ssh/key_pair_for_press.pem [email protected] #your username might be different if you are not using AWS.
SImilarly for n1 and m1 servers
ssh -i ~/.ssh/key_pair_for_press.pem [email protected]
and
ssh -i ~/.ssh/key_pair_for_press.pem [email protected]
must work if you ssh from press server.
By these commands you can ssh into ubuntu user. But press needs root access via ssh.
exit # to come back to press server.
sudo nano ~/.ssh/config
Add these lines (in press server) for making sure you can ssh into root user:
Host f1_public_ip #from aws
    HostName f1_public_ip
    User root
    IdentityFile ~/.ssh/key_pair_for_press.pem

Host n1_public_ip #from aws
    HostName n1_public_ip
    User root
    IdentityFile ~/.ssh/key_pair_for_press.pem

Host m1_public_ip #from aws
    HostName m1_public_ip
    User root
    IdentityFile ~/.ssh/key_pair_for_press.pem

Host f1.example.com
    HostName f1.example.com
    User root
    IdentityFile ~/.ssh/key_pair_for_press.pem

Host m1.example.com
    HostName m1.example.com
    User root
    IdentityFile ~/.ssh/key_pair_for_press.pem

Host n1.example.com
    HostName n1.example.com
    User root
    IdentityFile ~/.ssh/key_pair_for_press.pem
Now run ssh [email protected] or ssh root@f1_public_ip :
I am sure that you failed here. You can’t ssh into root user that easily. SSH by default blocks access to root via ssh/port 22.
Lets change that.
First ssh into f1 server as default user ubuntu in our case.
ssh -i ~/.ssh/key_pair_for_press.pem [email protected]
sudo -i # this take you to root user without asking for password
nano /etc/ssh/sshd_config
Scroll down to make correction or add these lines:
PermitRootLogin yes
PasswordAuthentication no
Save the file.
To ensure root login with same key run these lines:
cp /home/ubuntu/.ssh/authorized_keys /root/.ssh/authorized_keys
chmod 700 /root/.ssh
chmod 600 /root/.ssh/authorized_keys
systemctl restart sshd
exit #goback to ubuntu user if f1 server
exit #goback to press user of press server
Now you should be able to ssh into root user of f1 server directly. Run this line from press server:
ssh root@f1_public_ip
This is needed for press server. You must also be able to ssh like this:
ssh [email protected]
This will be easier for us if we manually need to ssh into f, m ,n server for some task.
Now do this for m1 and n1 servers as well:
Run this in press server:
ssh [email protected]
sudo -i
nano /etc/ssh/sshd_config
Add these lines:
PermitRootLogin yes
PasswordAuthentication no
Run these:
cp /home/ubuntu/.ssh/authorized_keys /root/.ssh/authorized_keys
chmod 700 /root/.ssh
chmod 600 /root/.ssh/authorized_keys
systemctl restart sshd
Again in press server:
Run repeat the same steps with:
ssh [email protected]
sudo -i
nano /etc/ssh/sshd_config
Add these lines:
PermitRootLogin yes
PasswordAuthentication no
Run these:
cp /home/ubuntu/.ssh/authorized_keys /root/.ssh/authorized_keys
chmod 700 /root/.ssh
chmod 600 /root/.ssh/authorized_keys
systemctl restart sshd
Now finally you should be able to ssh into all f1, n1 and m1 server from f1 server like this:
ssh [email protected] # from press server
ssh [email protected] # from press server
ssh [email protected] # from press server
ssh root@f1_ip_address # from press server
ssh root@m1_ip_address # from press server
ssh root@n1_ip_address # from press server
Now lets make some subtle changes.
While in f1, n1 and m1 server, take a moment to change UID of default user from 1000 to 1001 because during Press setup, press will create a new user with UID 1000. But as ubuntu already has 1000 UID, it will through error.
ssh [email protected]
usermod -u 1001 ubuntu
exit
ssh [email protected]
usermod -u 1001 ubuntu
exit
ssh [email protected]
usermod -u 1001 ubuntu
exit
Finally,
Lets setup Press.
ssh into press server with press user, run these:
cd
mkdir .certbot
cd .certbot
mkdir .webroot
cd
cd press-bench # or whatever your bench directory is
mkdir .clones
mkdir .docker-builds
cd
sudo pip3 install certbot-dns-route53 # run this outside bench directory, don't miss the sudo
Login to example.com with Administrator account.
You can access dashboard at example.com/dashboard.
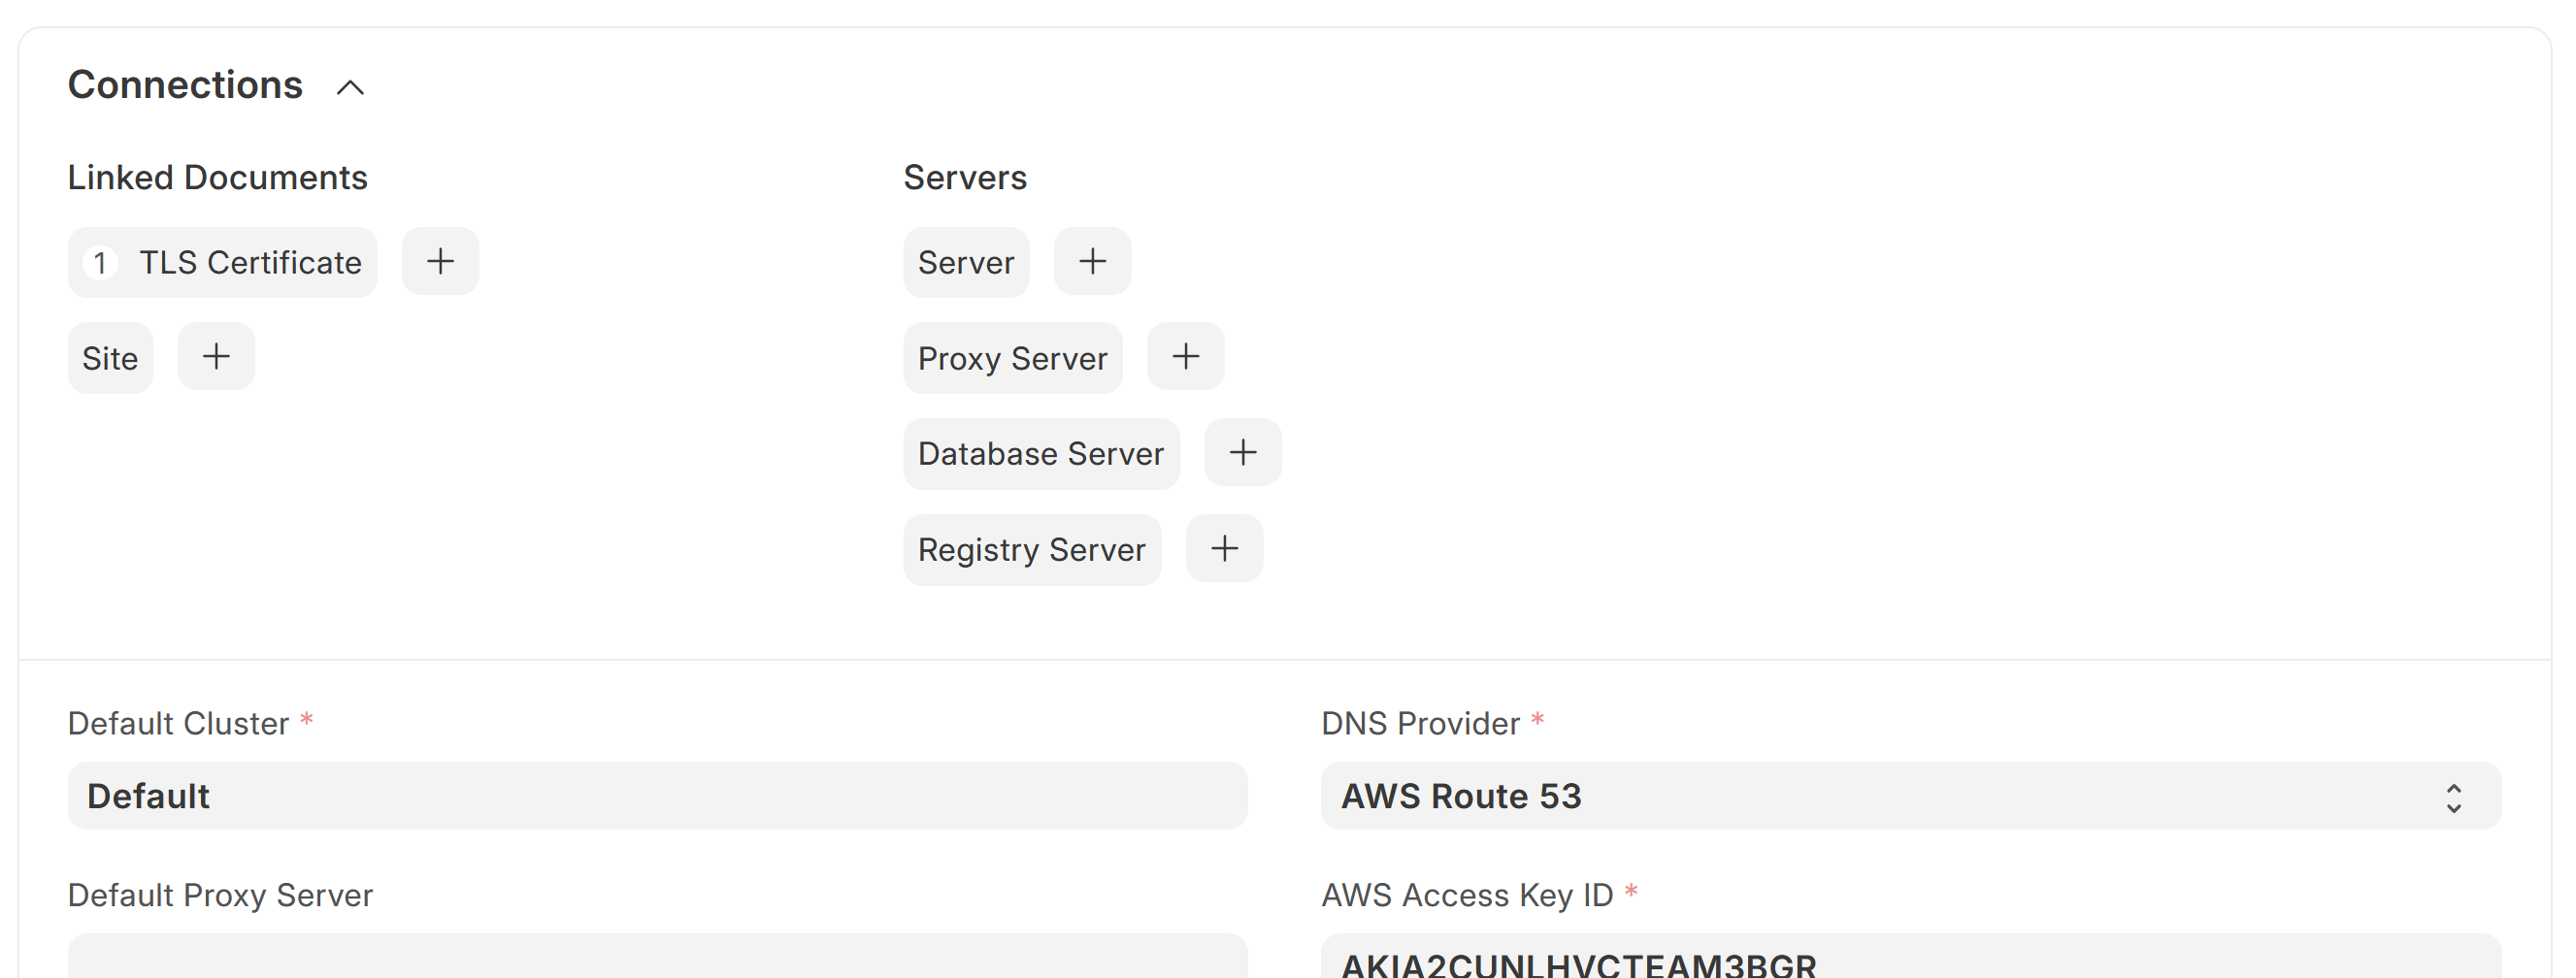
Go to Press UI and search for Root Domain.
Create a new root domain and fill in like this:
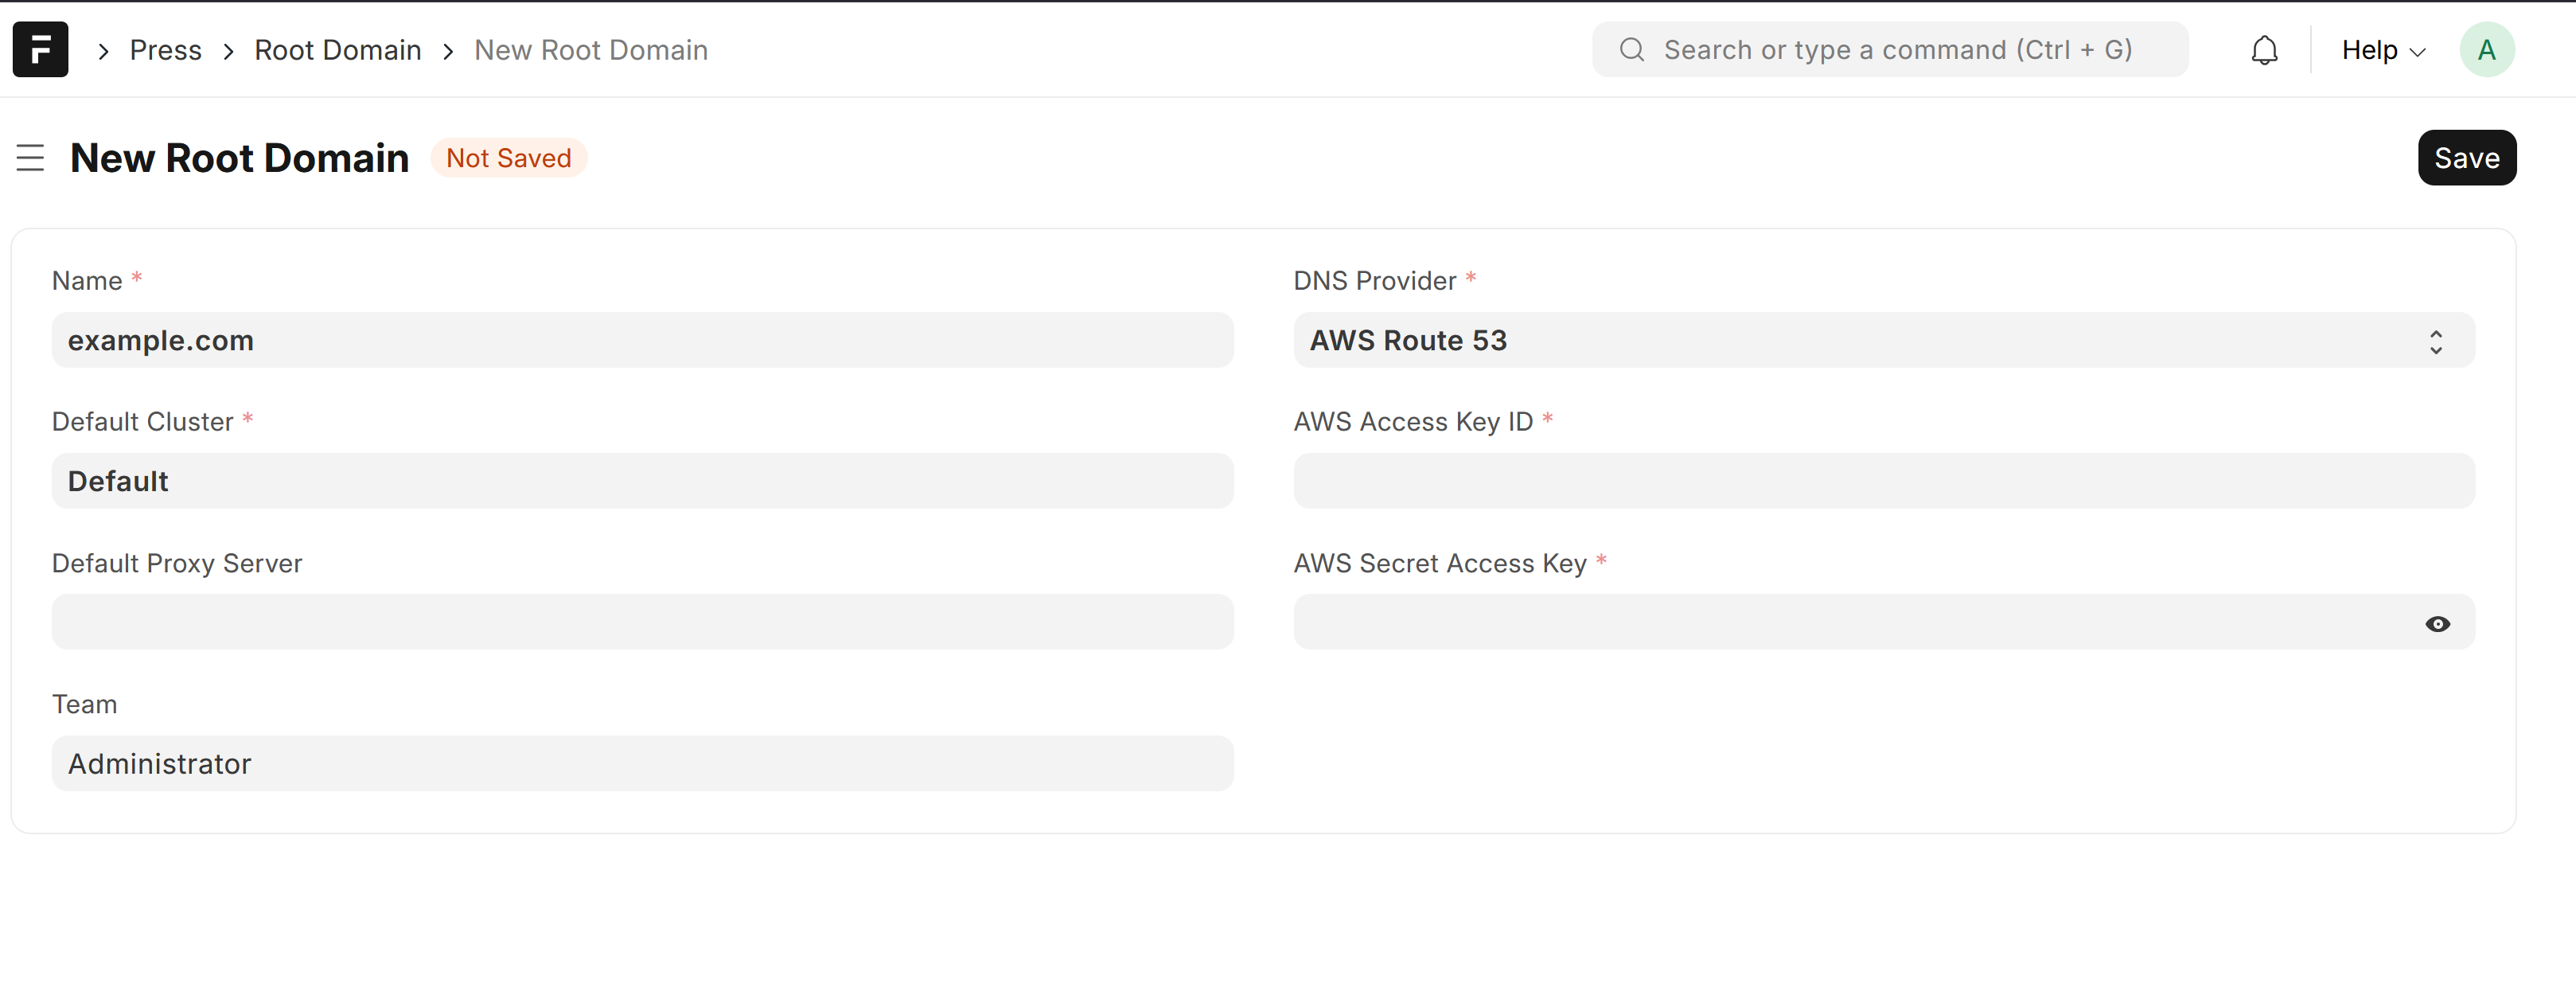
In AWS access key and secret, generate your root user access key and secret and paste there. (not press-user that we created with permission AmazonElasticContainerRegistryPublicFullAccess but root user)
After you save this, a TLS certificate is automatically created.
Go to TLS certificate.
You will probably get this error:
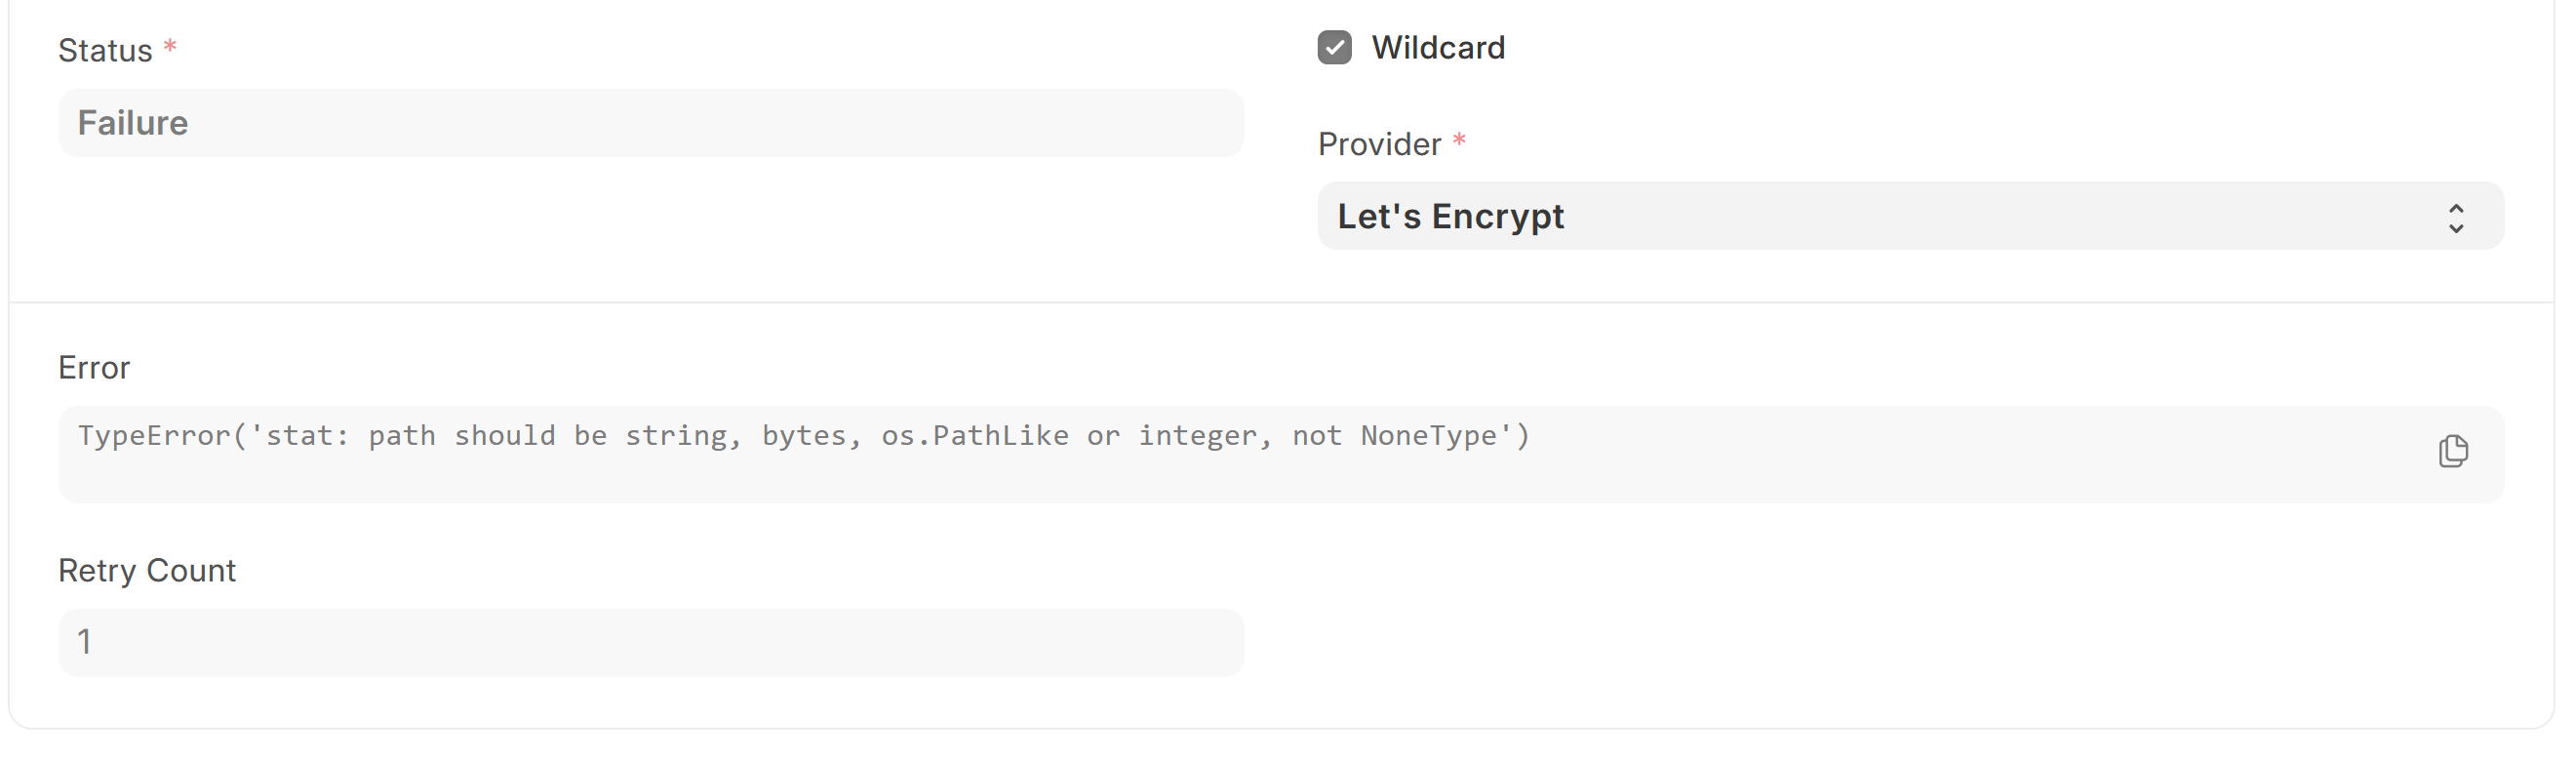
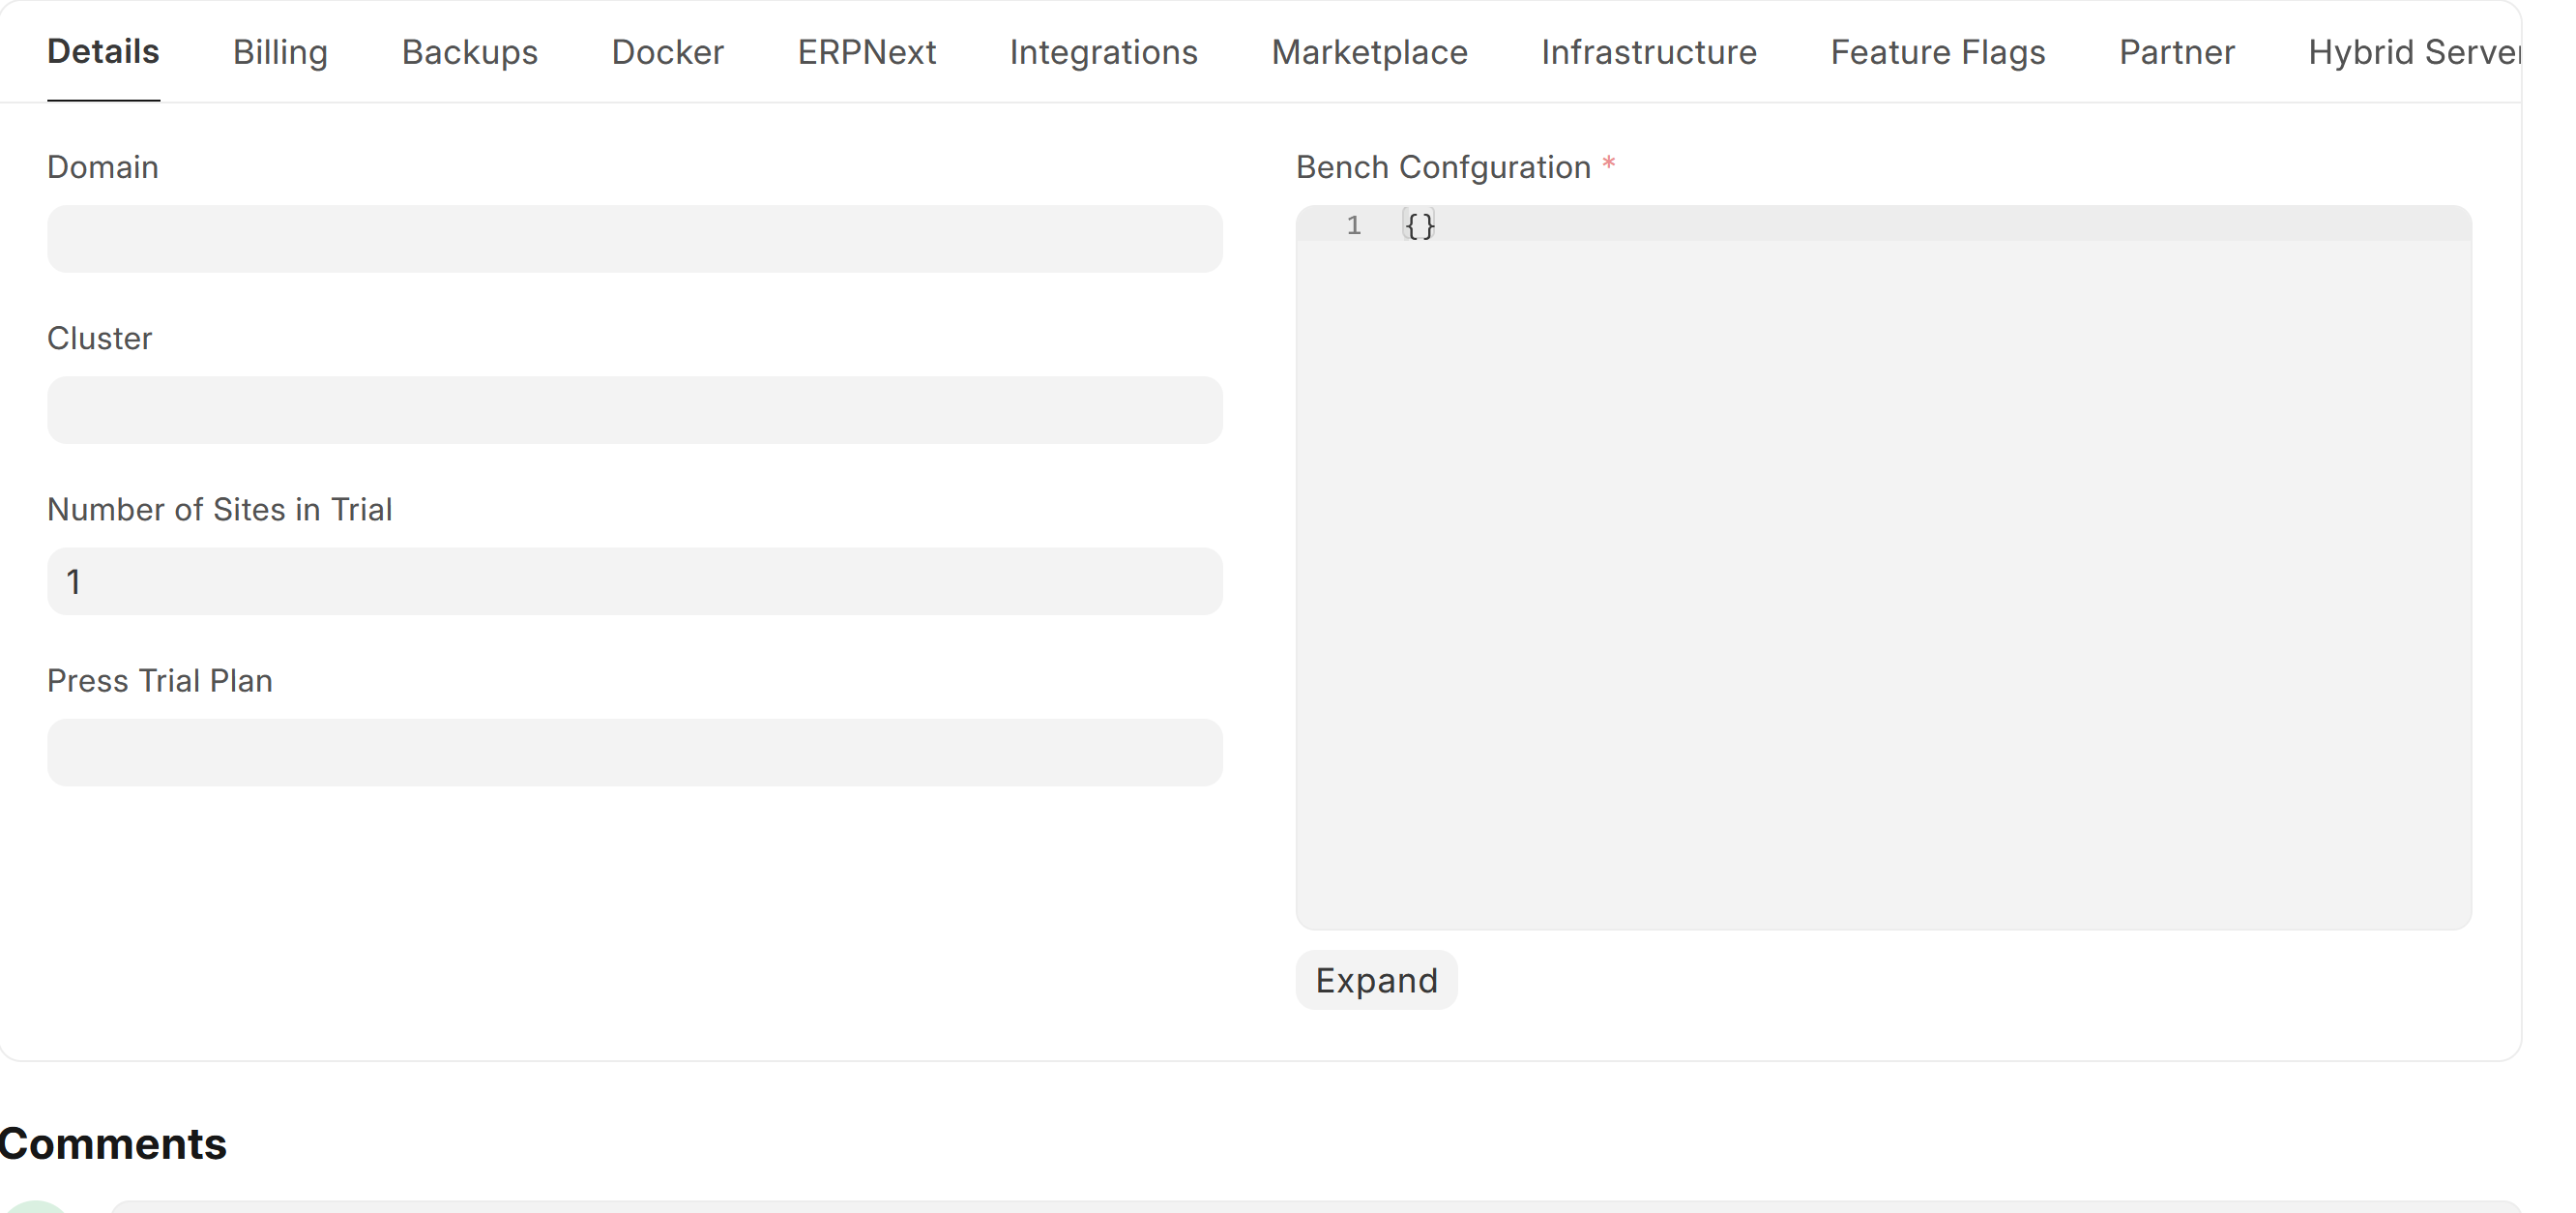
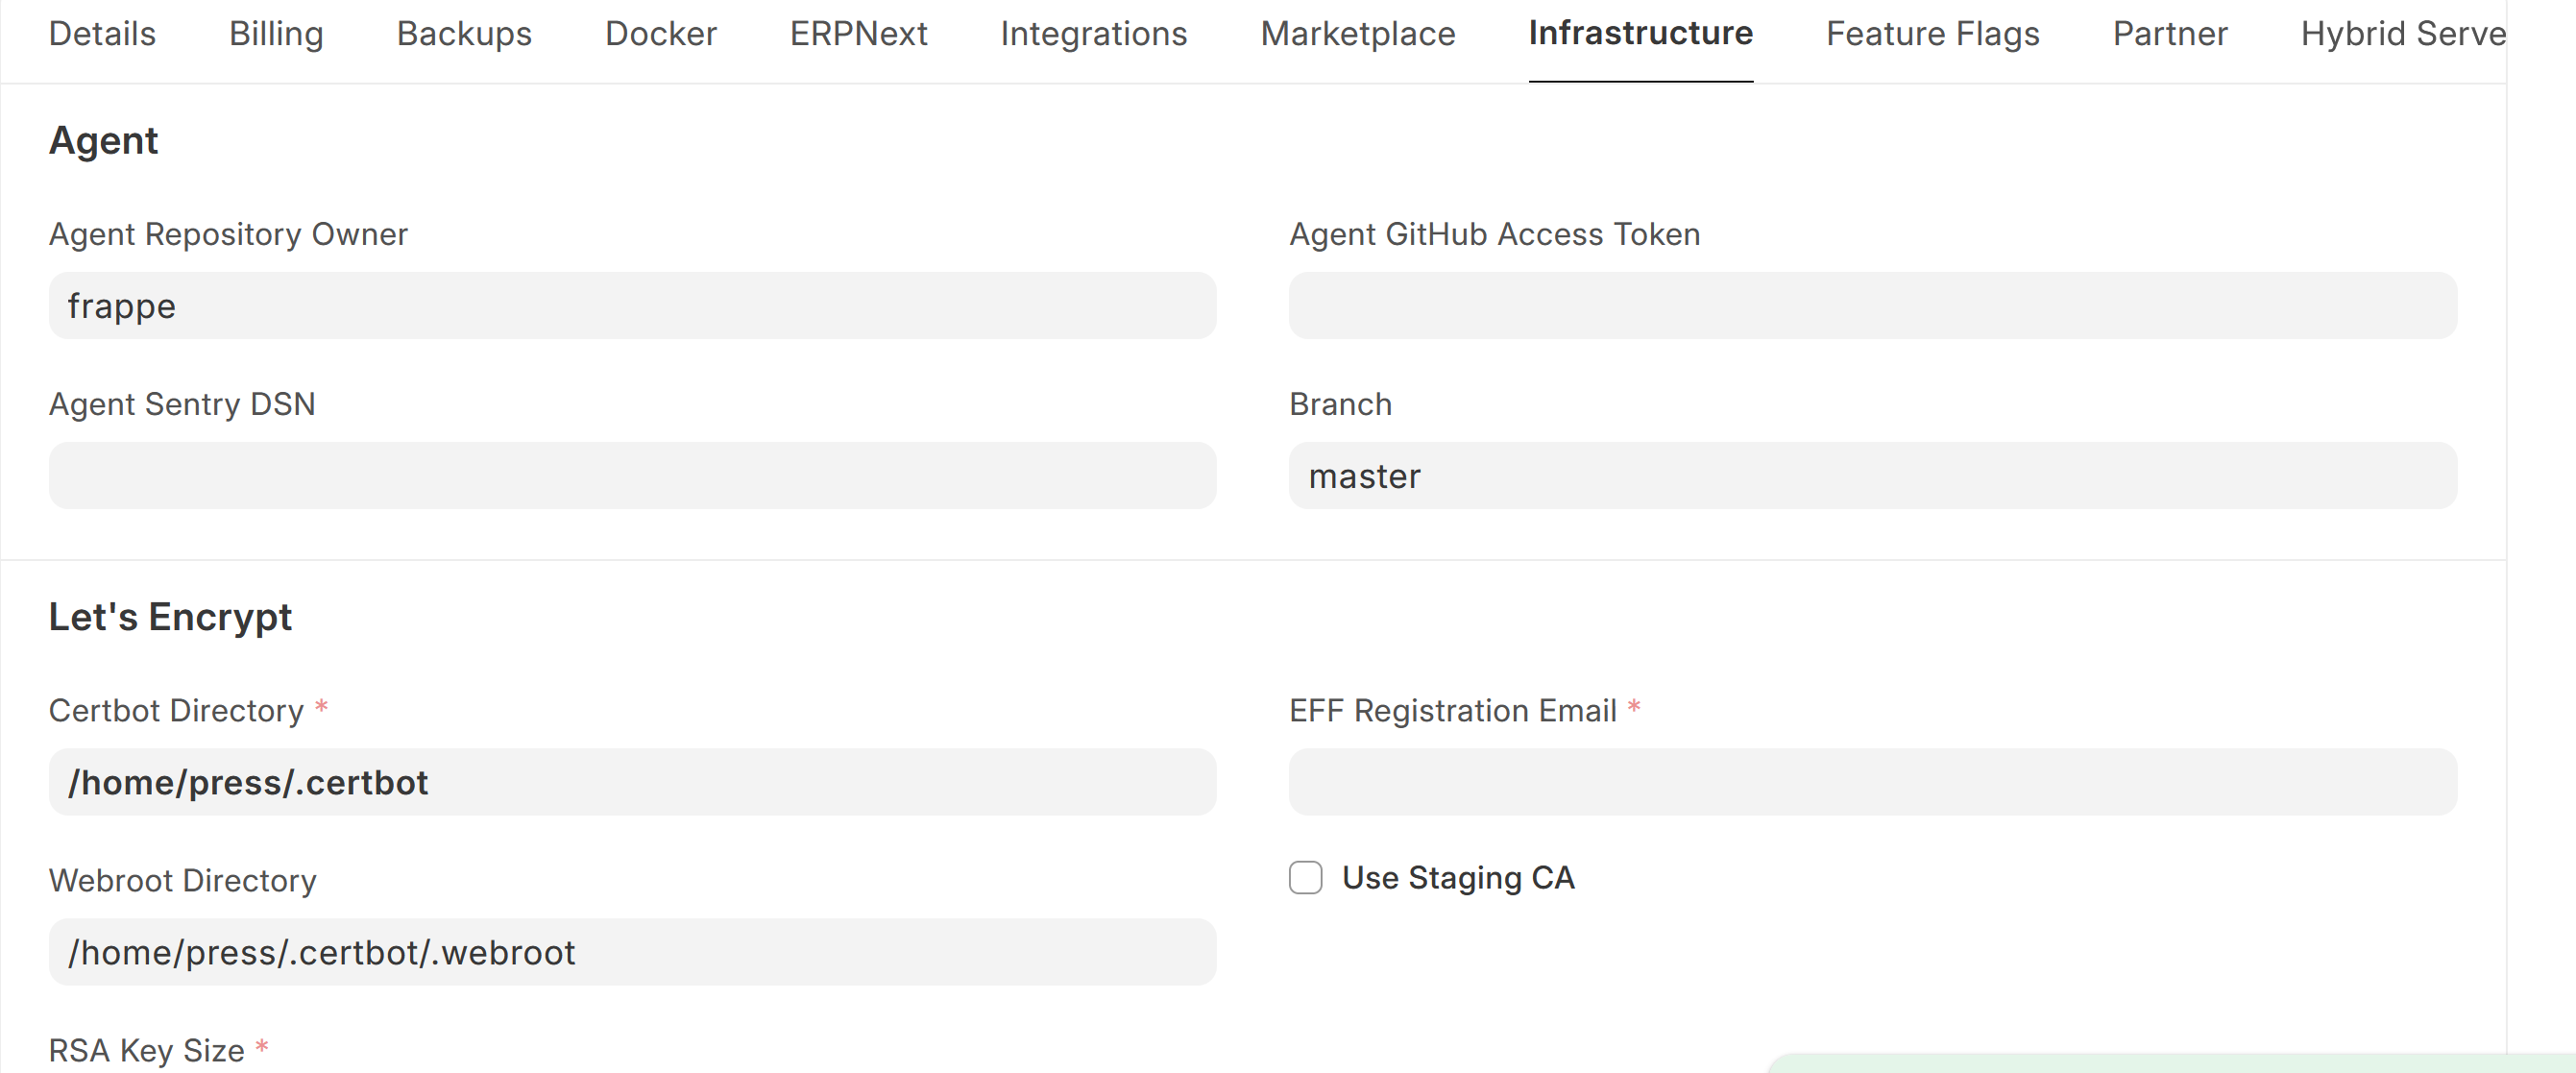
To solve this, go to press setting (awesome bar to the rescue):
In Details section set the following:
Domain: example.com
Cluster: Default
In Infrastructure Section set the following:
Certbot Directory: /home/press/.certbot
Webroot Directory: /home/press/.certbot/.webroot
EFF Registration Email: your_email_address
Go back to TLS certificate list, open the previous TLS certificate and click on Obtain Certificate and wait for a few minutes.
You might get this error:
Saving debug log to /home/press/.certbot/logs/letsencrypt.log
The requested dns-route53 plugin does not appear to be installed
Ask for help or search for solutions at https://community.letsencrypt.org. See the logfile /home/press/.certbot/logs/letsencrypt.log or re-run Certbot with -v for more details.
This means that dns-route53 plugin was not properly installed or there was permission error.
In that case in terminal (press server):
cd ~
sudo pip3 install certbot-dns-route53
Then go back to TLS certificate and Click on Obtain Certificate again and wait for a few minutes.
This should now fetch a certificate for *.example.com.
Great
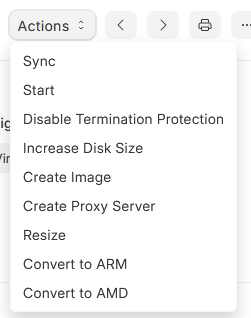
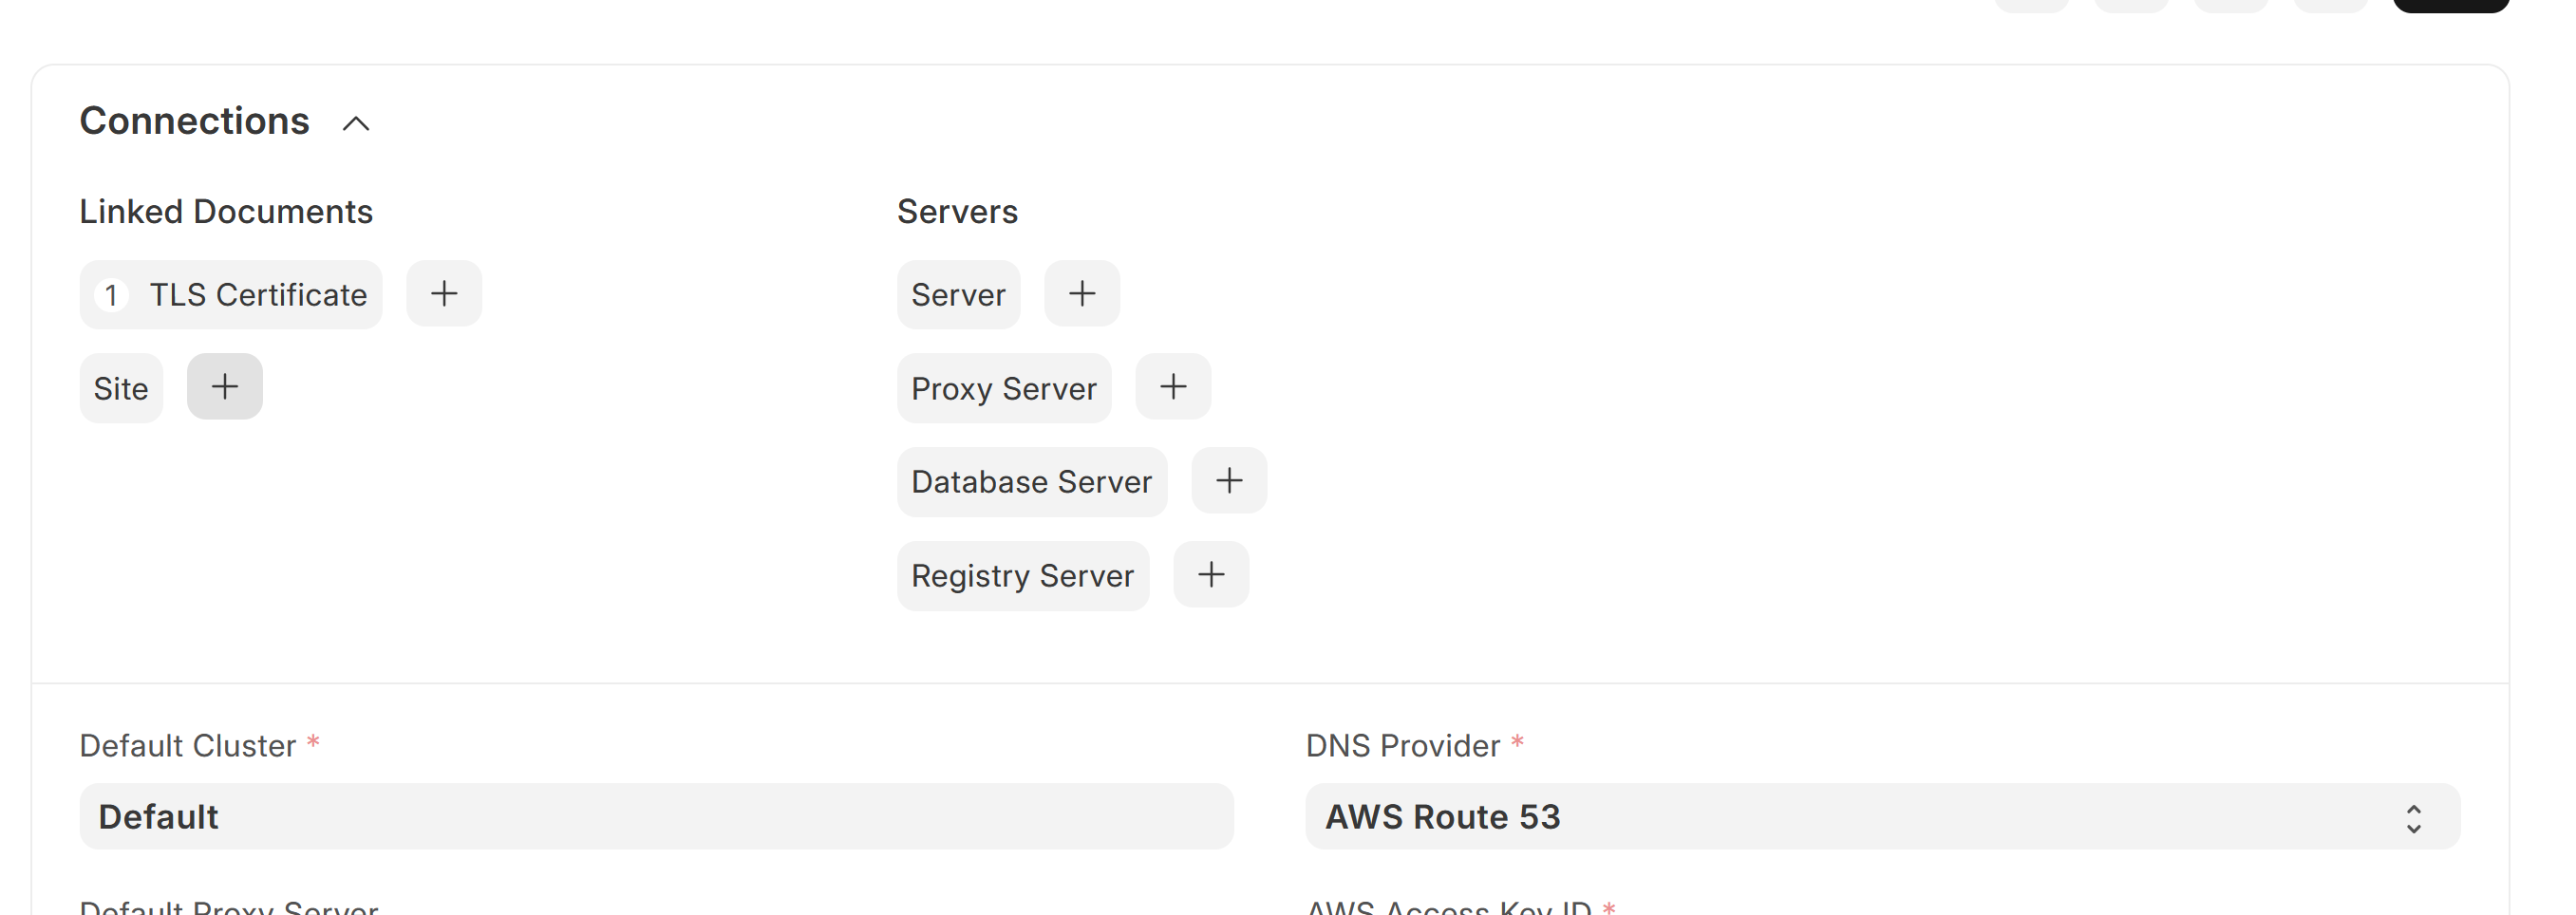
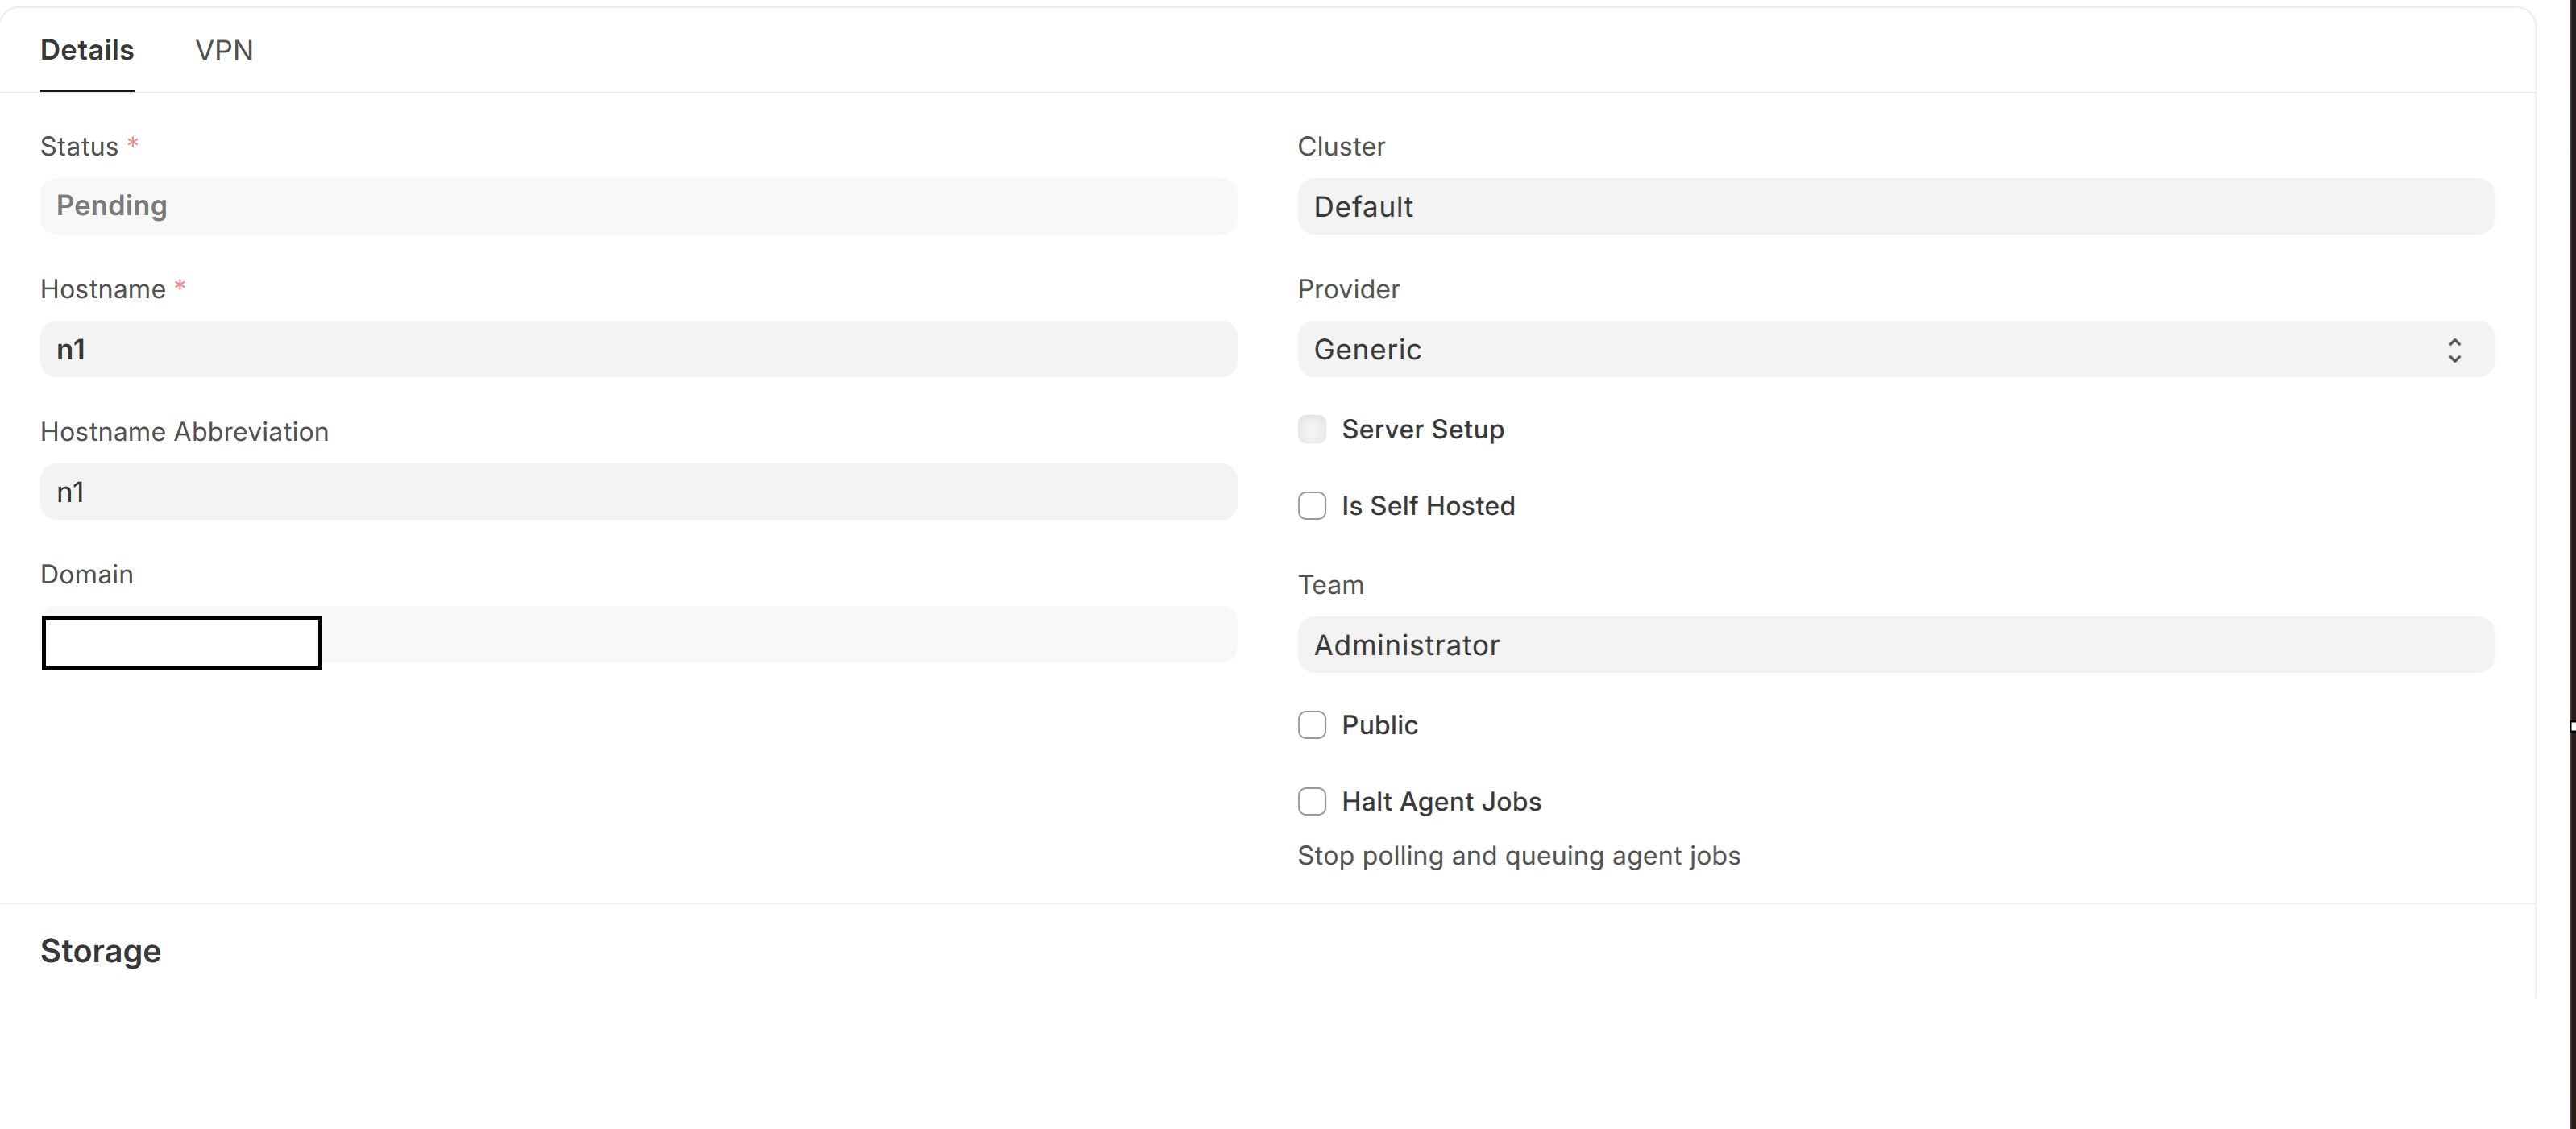
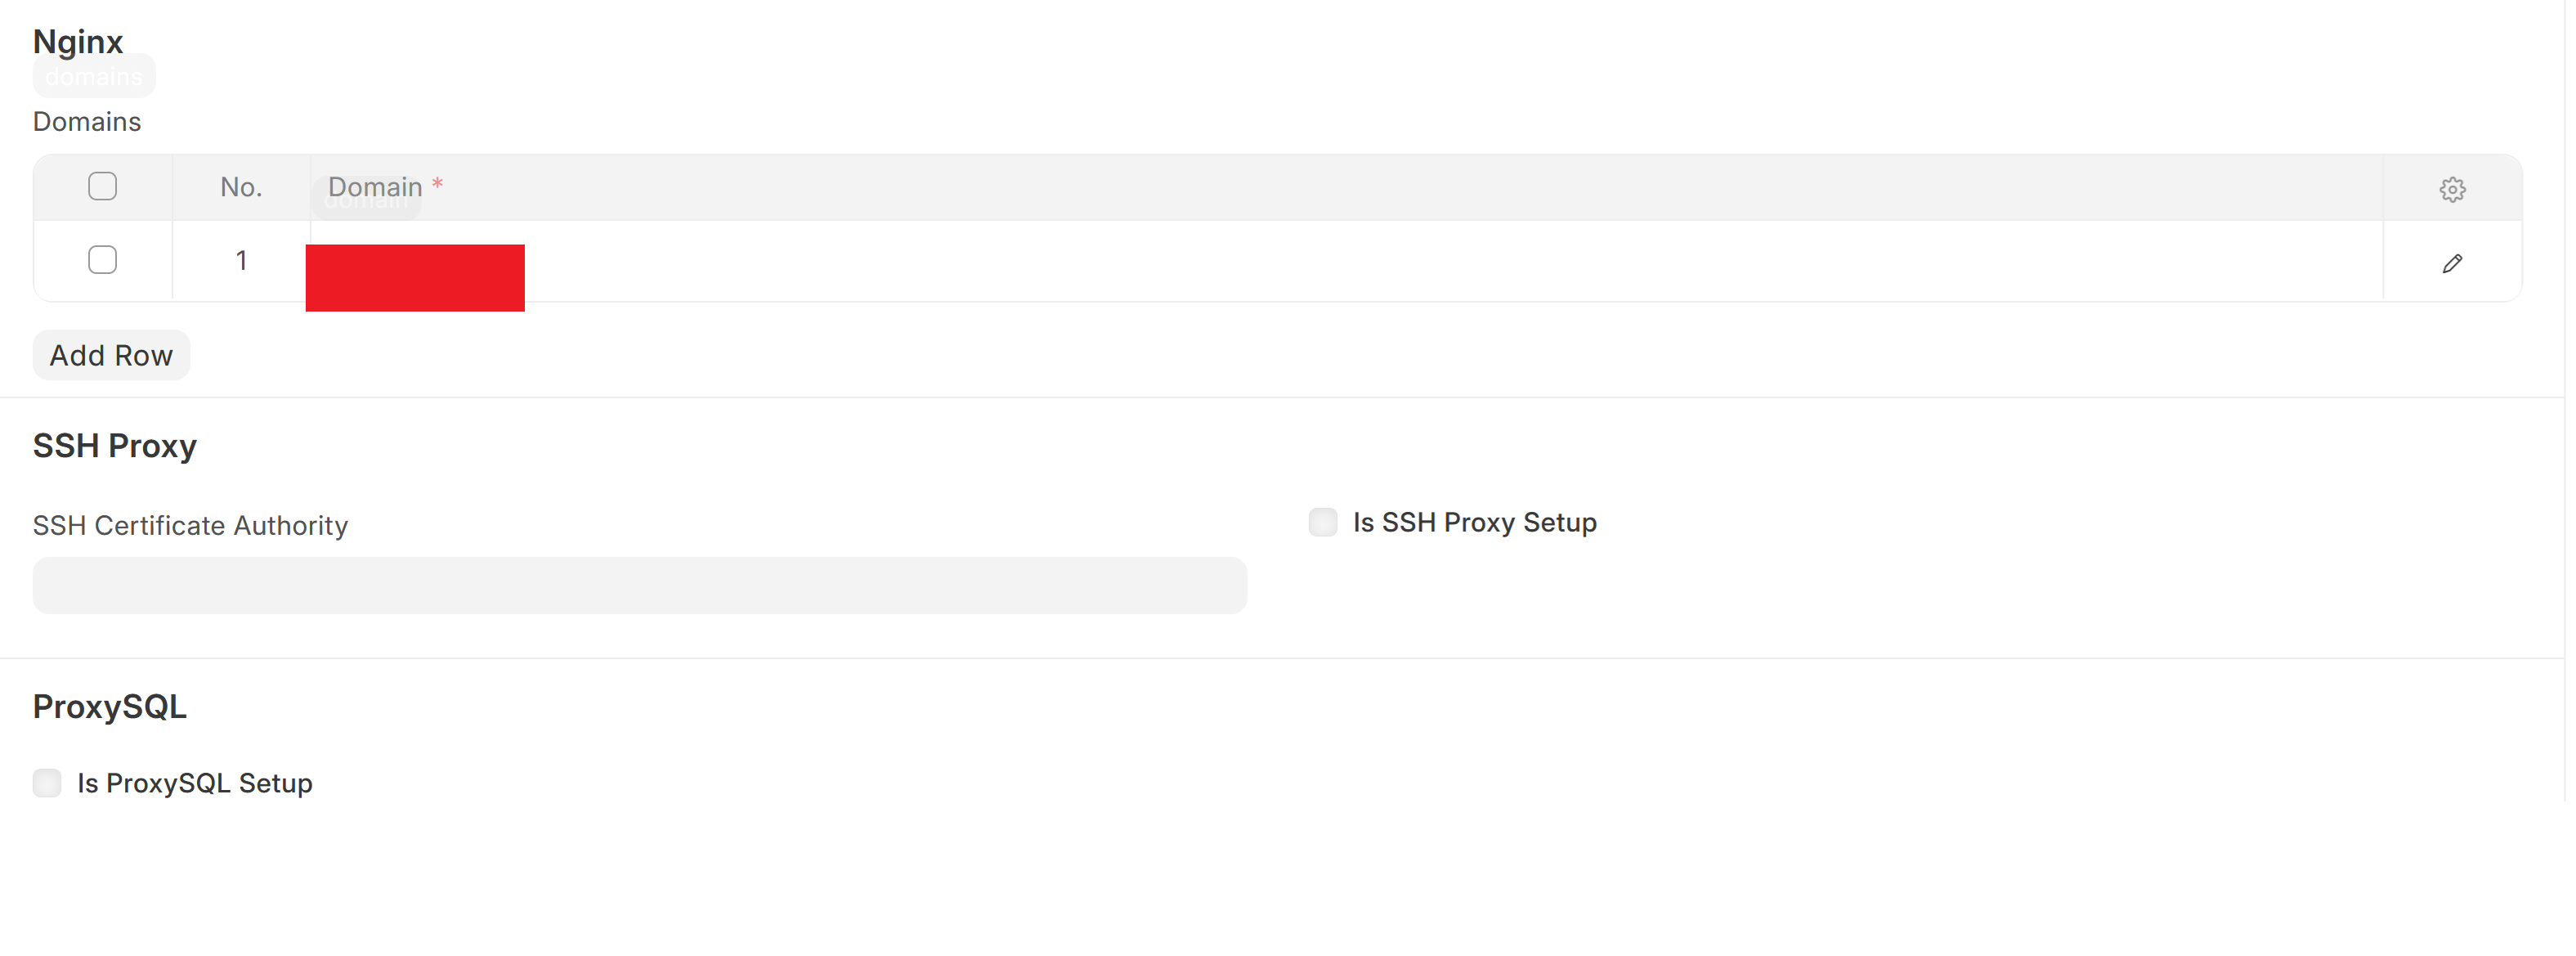
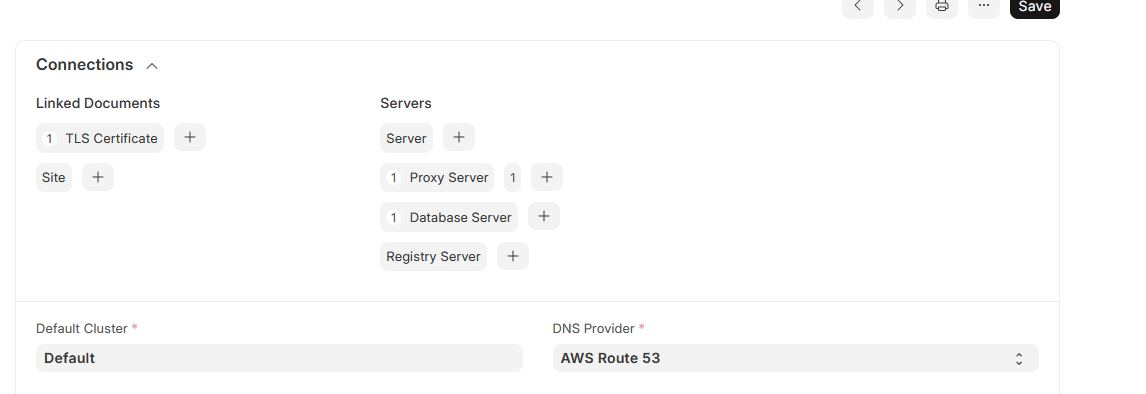
Now go back to Root Domain and click on Plus sign after Proxy Server (under connections)
This should open a add new proxy server window. Fill in as shown:
Then,
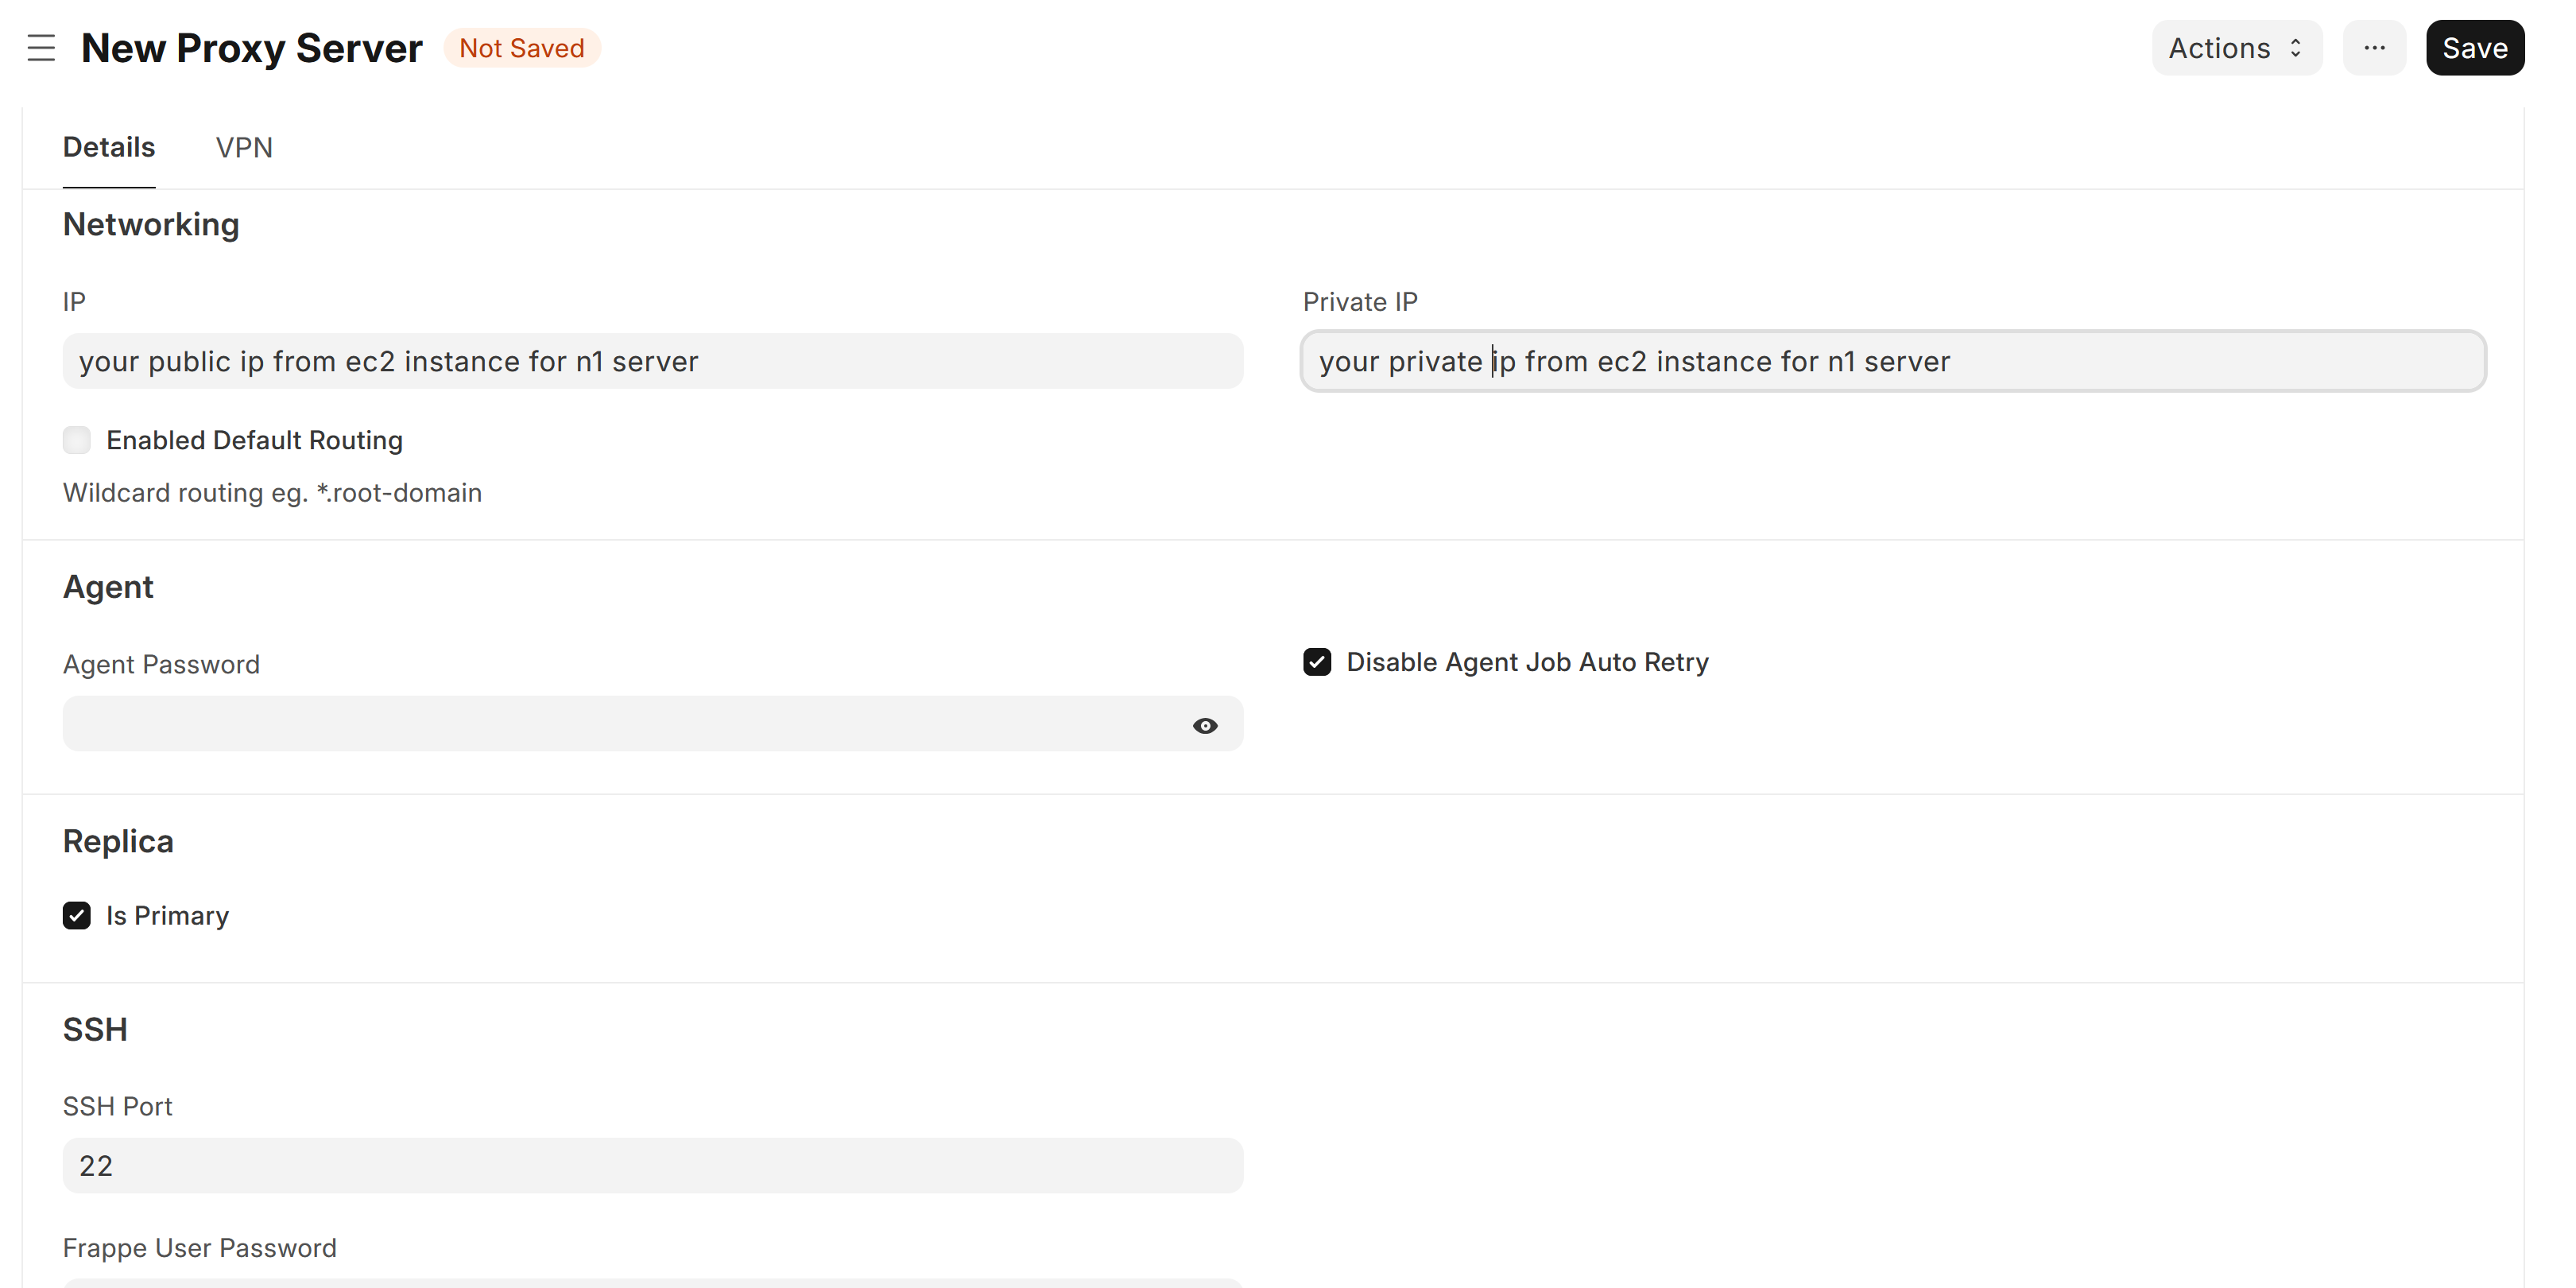
And,
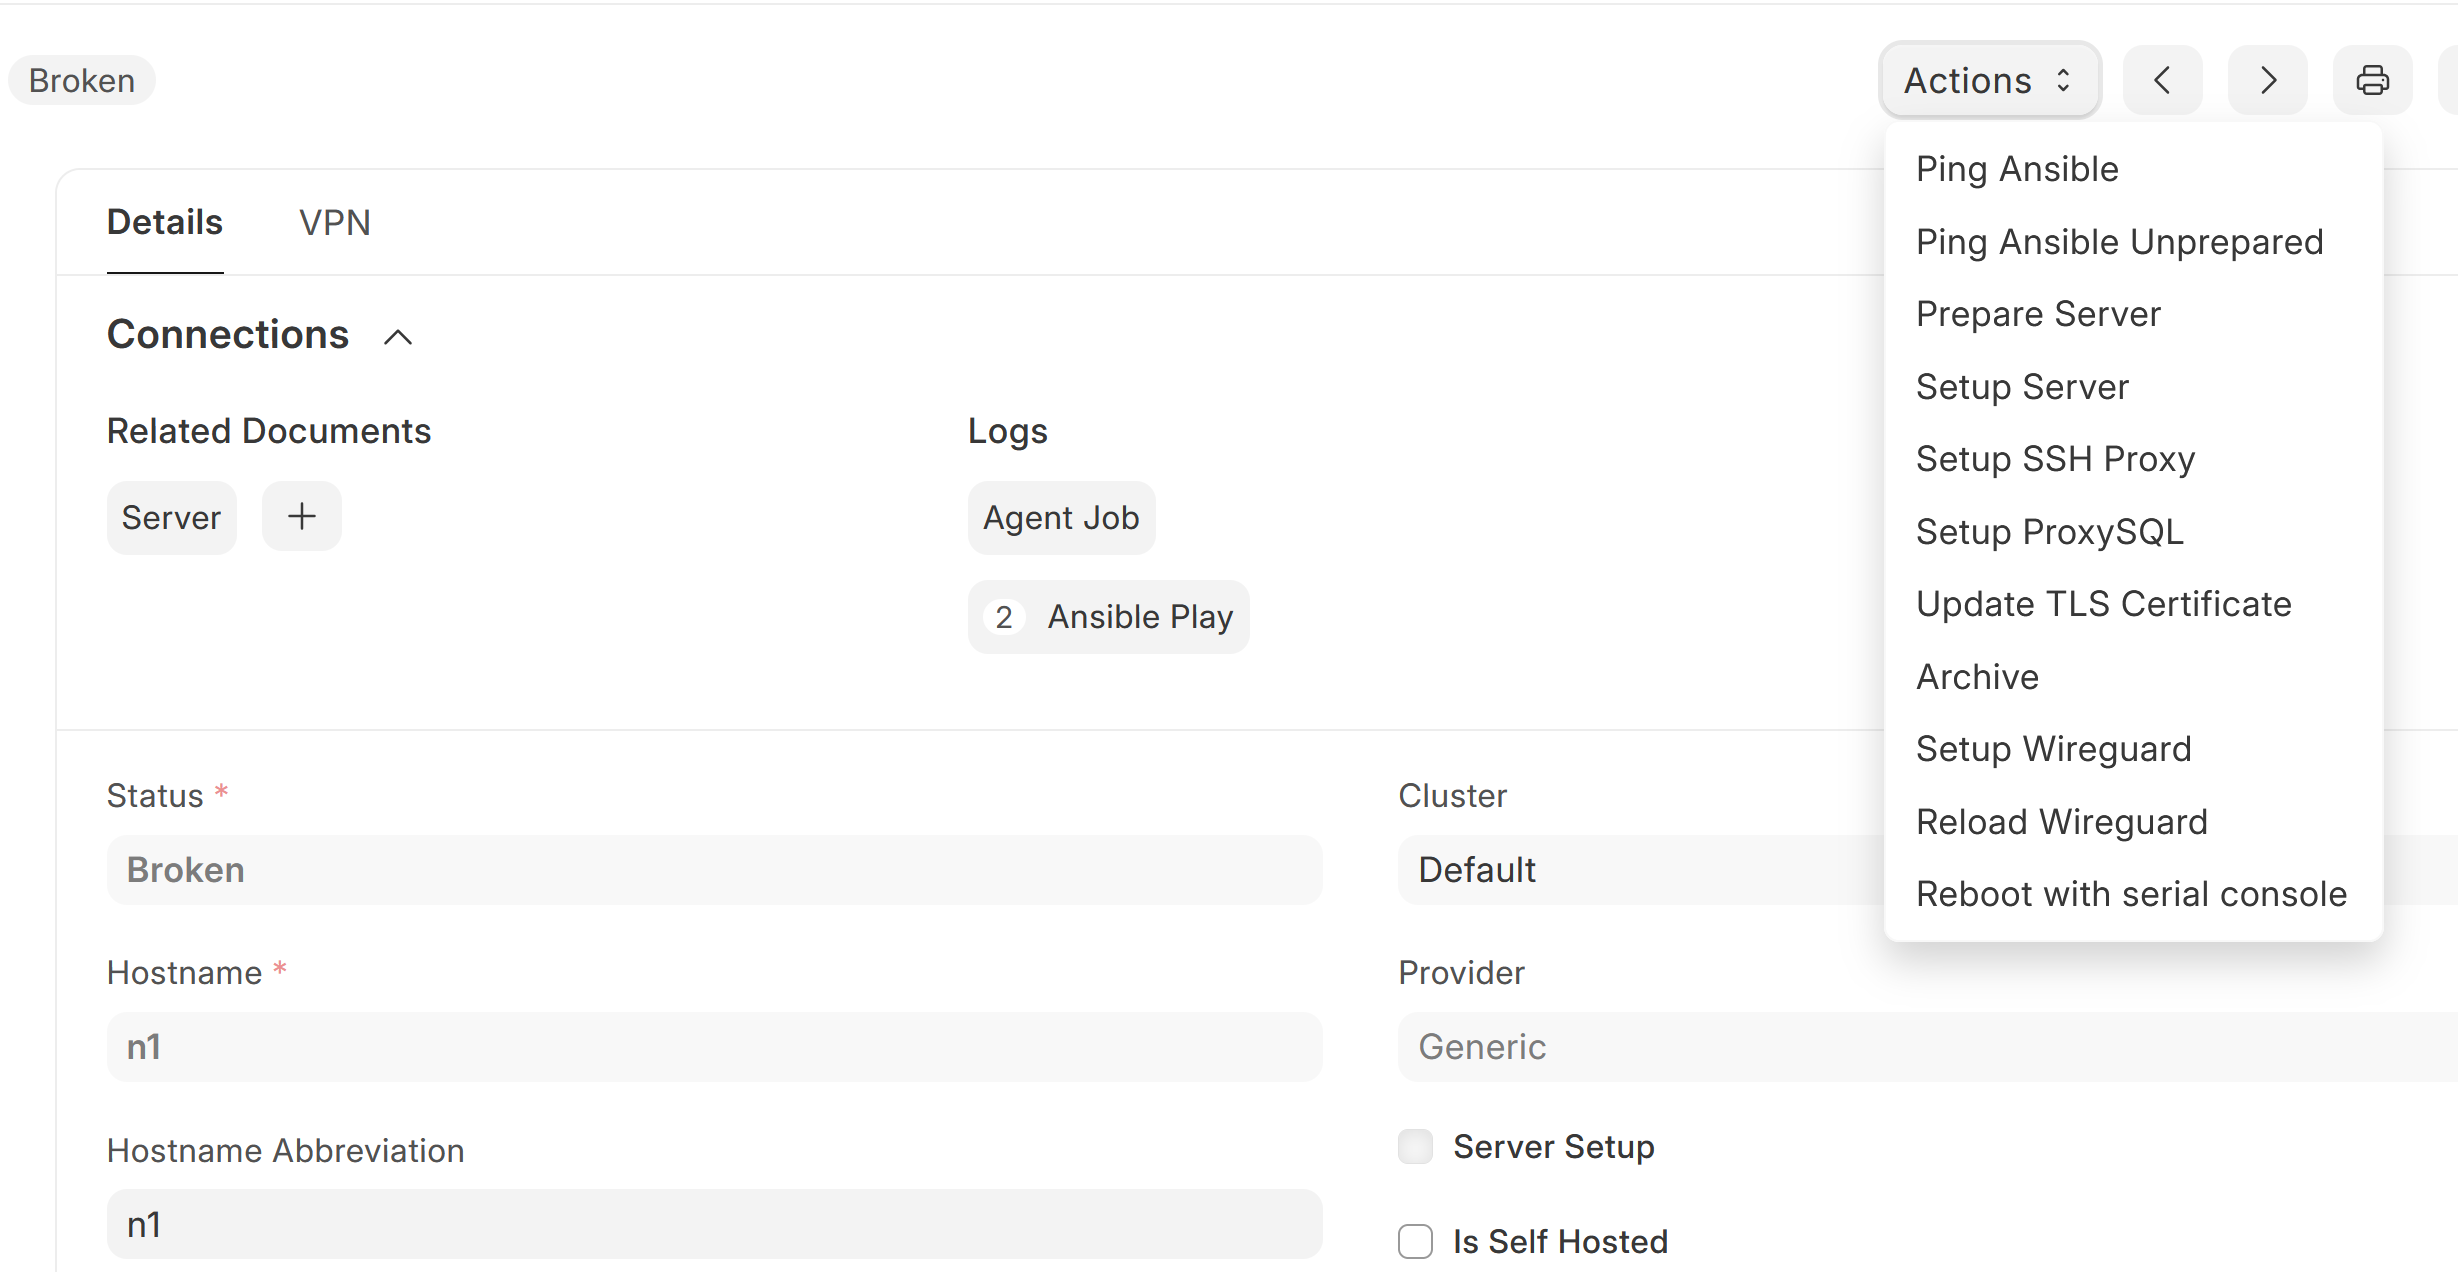
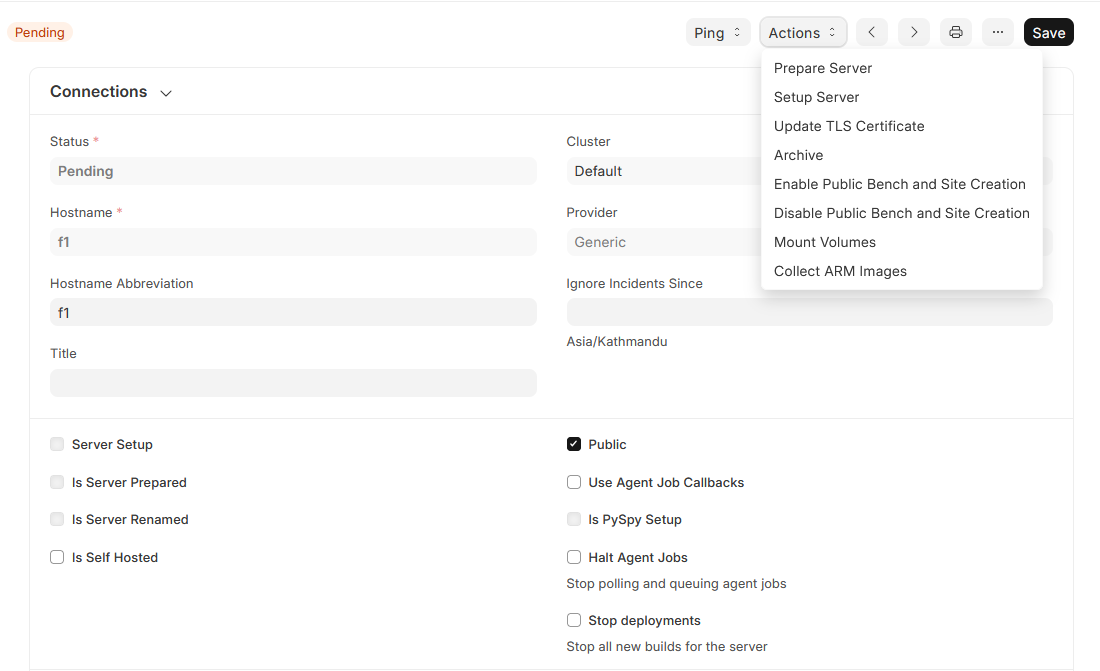
Now create on Actions and Setup Server.
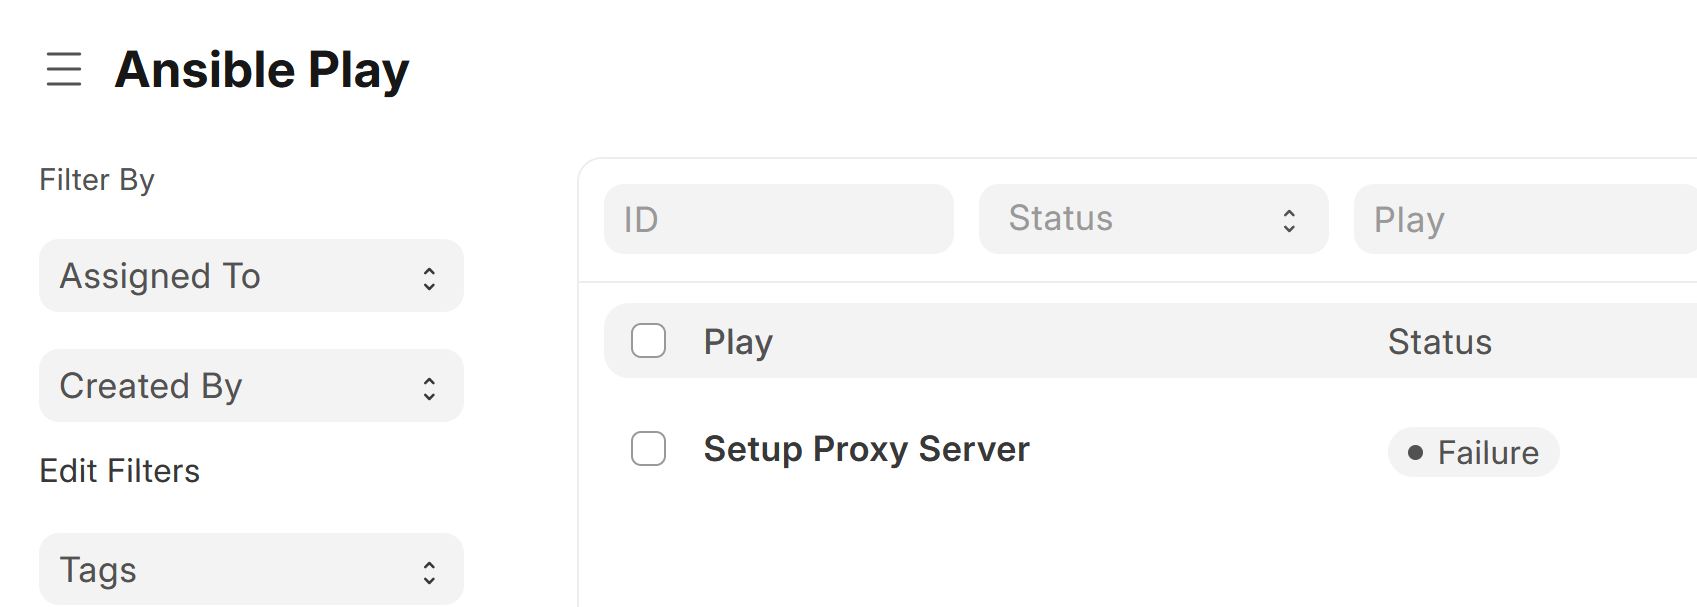
If you get any Broken status, its probably because of ssh into n1 server as root has failed.

to debug, check ssh [email protected] and ssh root@server_ip_address from press server. If you can’t ssh then your setup is wrong. Correct it and run Setup server again .
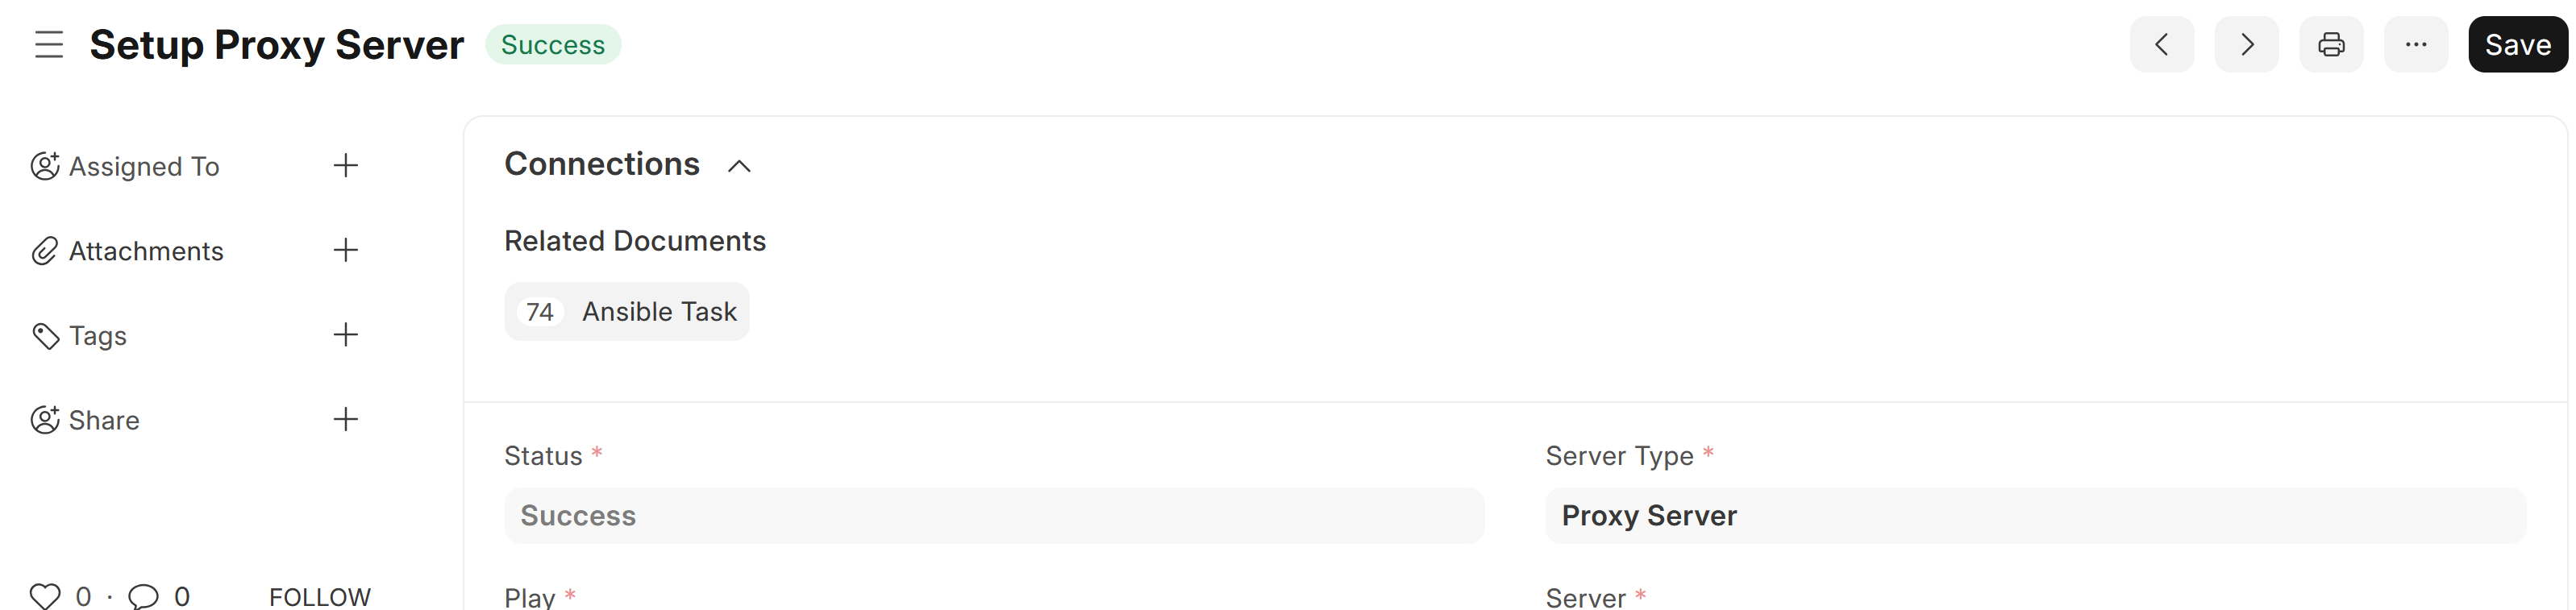
To check what tasks are completed, open Ansible Play list.

and open
Ansible Task.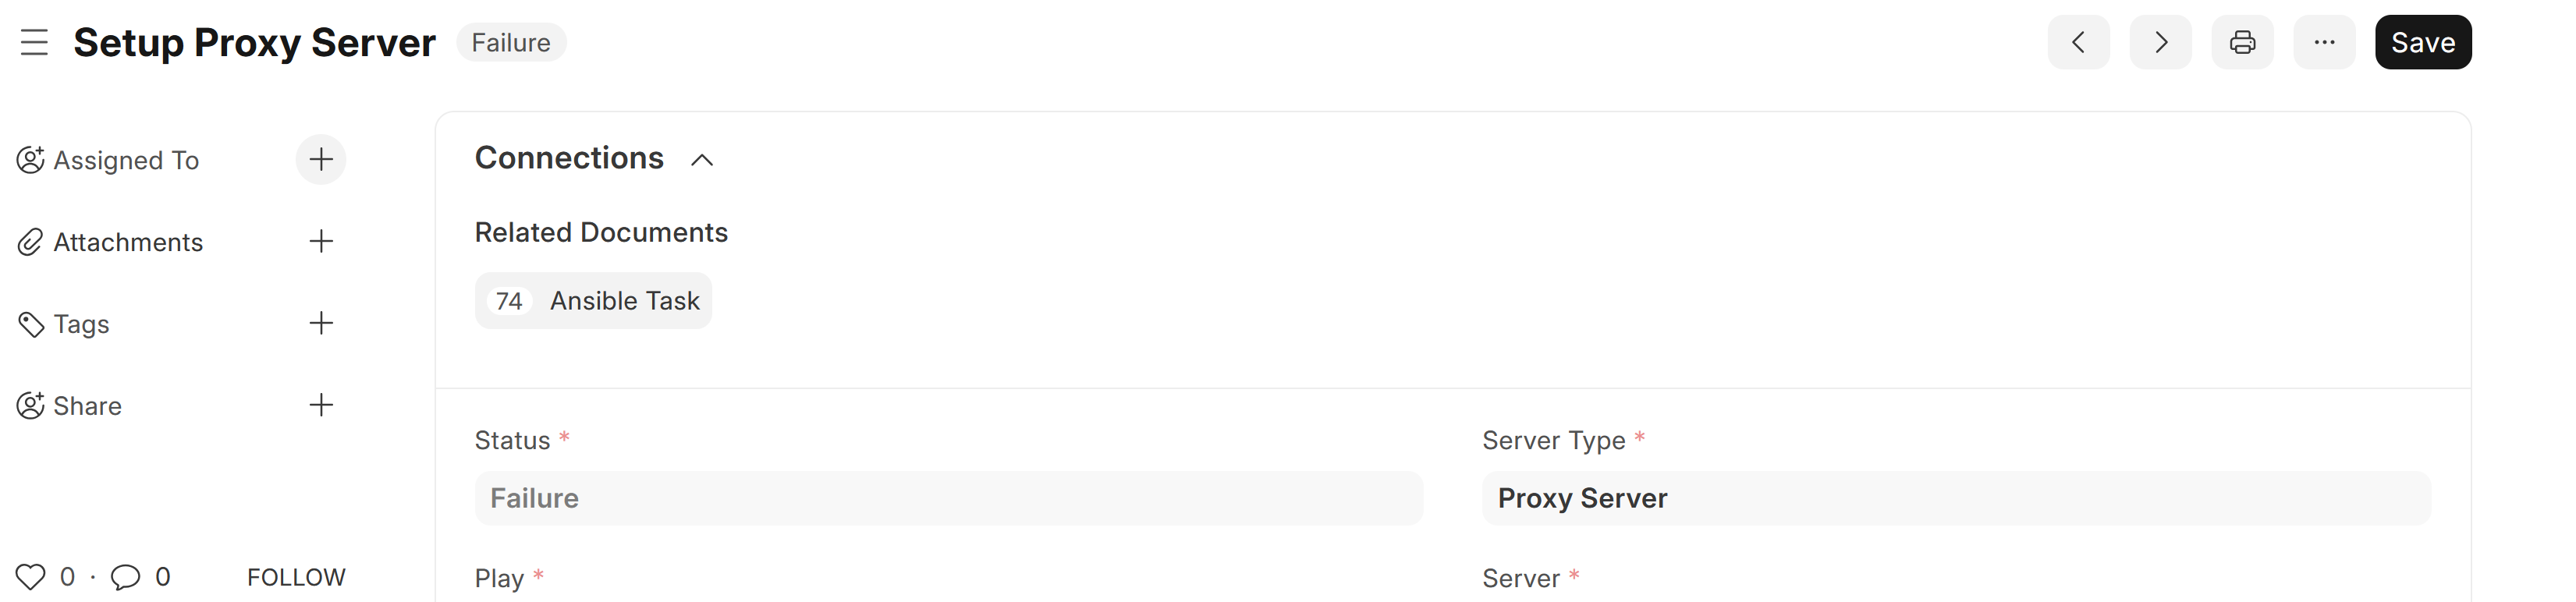
You might run into another problem here. You might see a Broken status in Create Frappe User task if you are using AWS EC2 instances.
Check error:
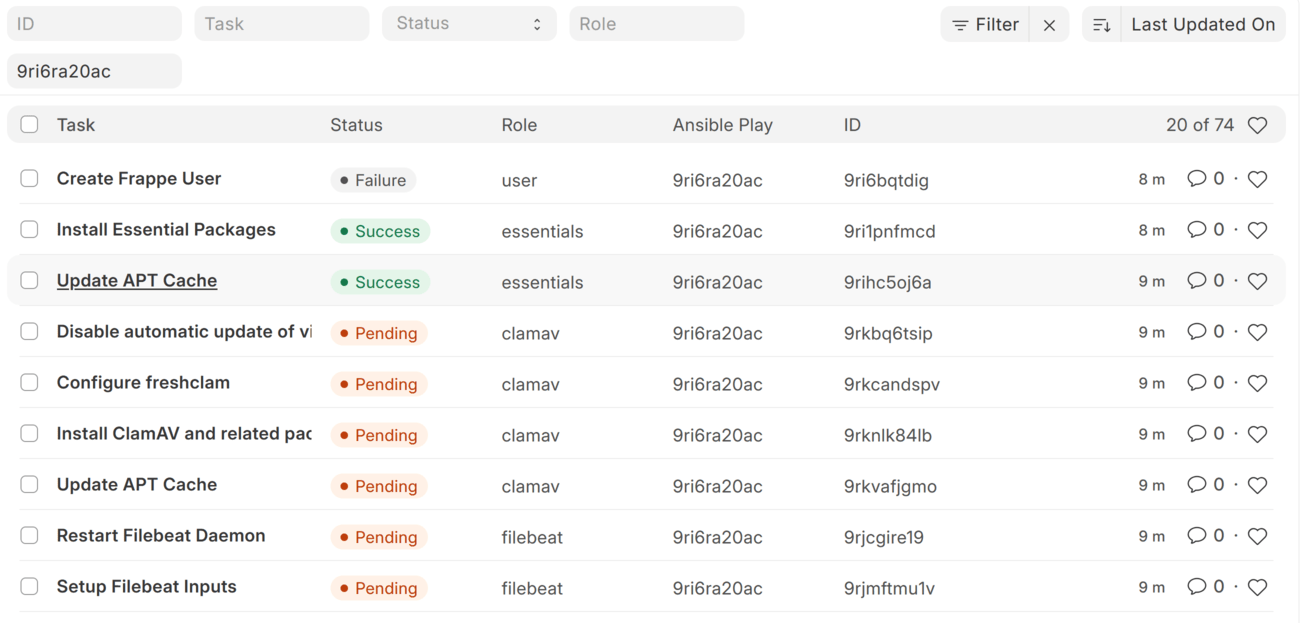
Open the Broken task and check the error. This is the most common error:
useradd: UID 1000 is not unique
This is because agent tries to create a new user in n1 server with UID 1000. But in aws, the default user already has UID 1000. Go to n1 server and change the UID of ubuntu user to 1001. Follow this:
From press server:
ssh [email protected]
usermod -u 1001 ubuntu
sudo find /home/ubuntu -uid 1000 -exec chown ubuntu {} +
exit
Make sure user ubuntu is not logged in in n1 server.
Repeat these steps for f1 and m1 servers as well.
After making corrections, re-run the Setup Server from Proxy Server doctype.
You will not get this error if you followed the setup properly and already changed the UID of default user to 1001.
If you run in to any problem like:
Failed to lock apt for exclusive operation: Failed to lock directory /var/lib/apt/lists/: E:Could not get lock /var/lib/apt/lists/lock. It is held by process 13432 (apt-get)
Or any other process might be causing error.
To solve, ssh into n1 server and kill the process id causing problem.
And sometimes you might need to remove the lock files.
sudo rm /var/lib/apt/lists/lock
sudo rm /var/cache/apt/archives/lock
sudo rm /var/lib/dpkg/lock
sudo rm /var/lib/dpkg/lock-frontend
Re run Setup Server.
Wait for it to Succeed.
Now setup Database Server
Goto Root Domain and add a new Database server.
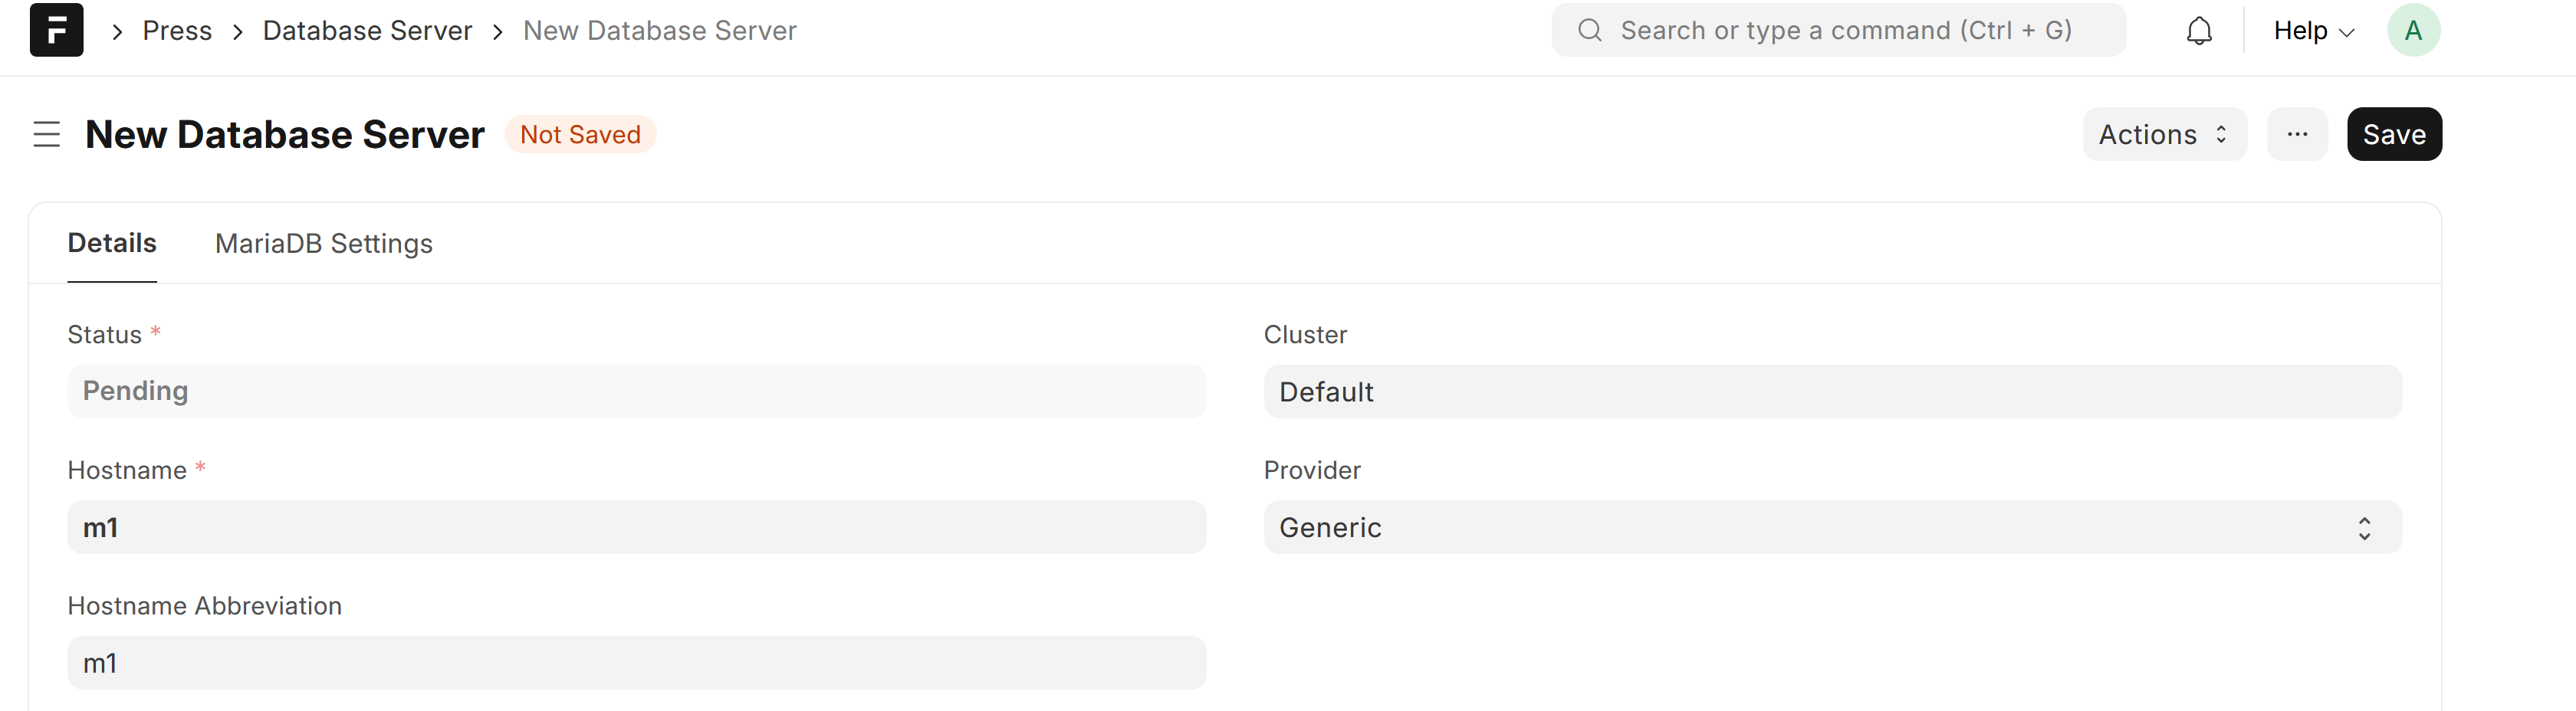
Enter public and private IP of m1 server (from AWS EC2).
Click on Save and then Actions->Setup Server.
I hope Database Server setup is now complete.
Setup App Server
- Goto Root domain
- Click on Plus sign after Server
- Fill in details as shown:
In IP, fill in public and private IP for f1 server from EC2 or your provider.

Set Proxy Server to
n1.example.com
Set Database Server tom1.example.com
Leave others as it is.

Now save and Actions → Setup Server
I hope everything goes smooth and you have an active f1 server.
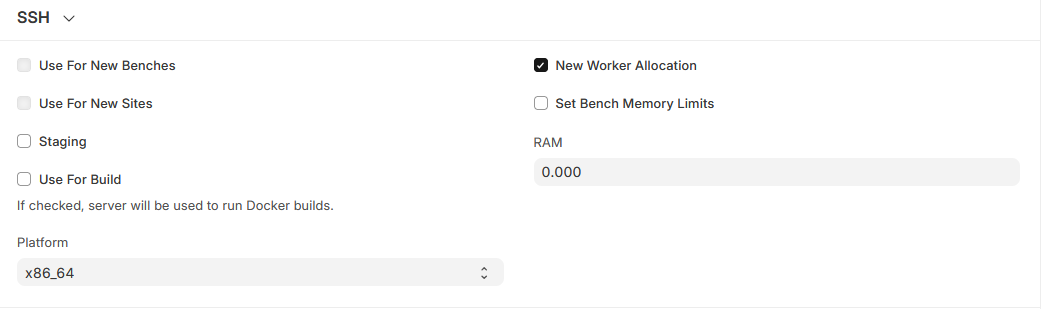
Open this f1.example.com server and tick Use for Build in SSH section.
Great ! Congratulations, you are half way through !!
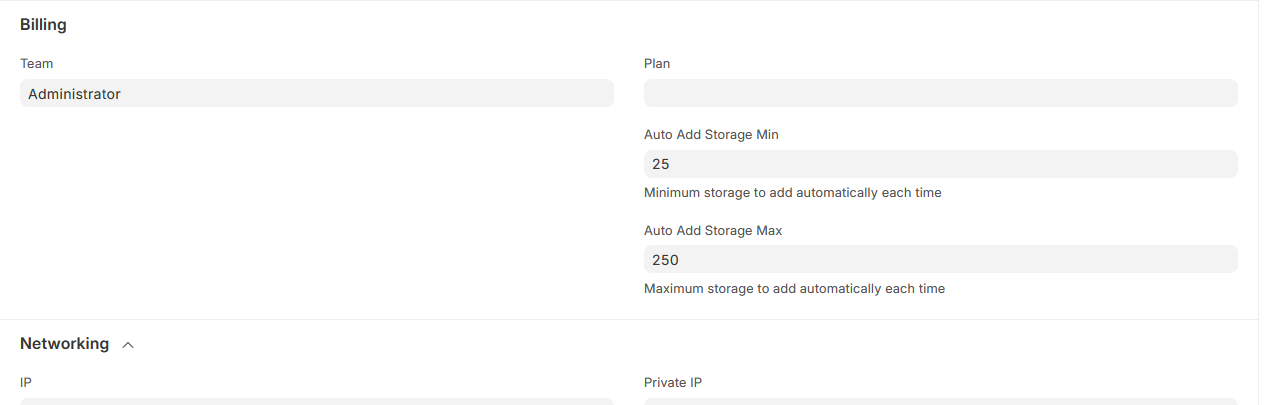
Lets go to Press settings now and under Docker tab, fill these in.
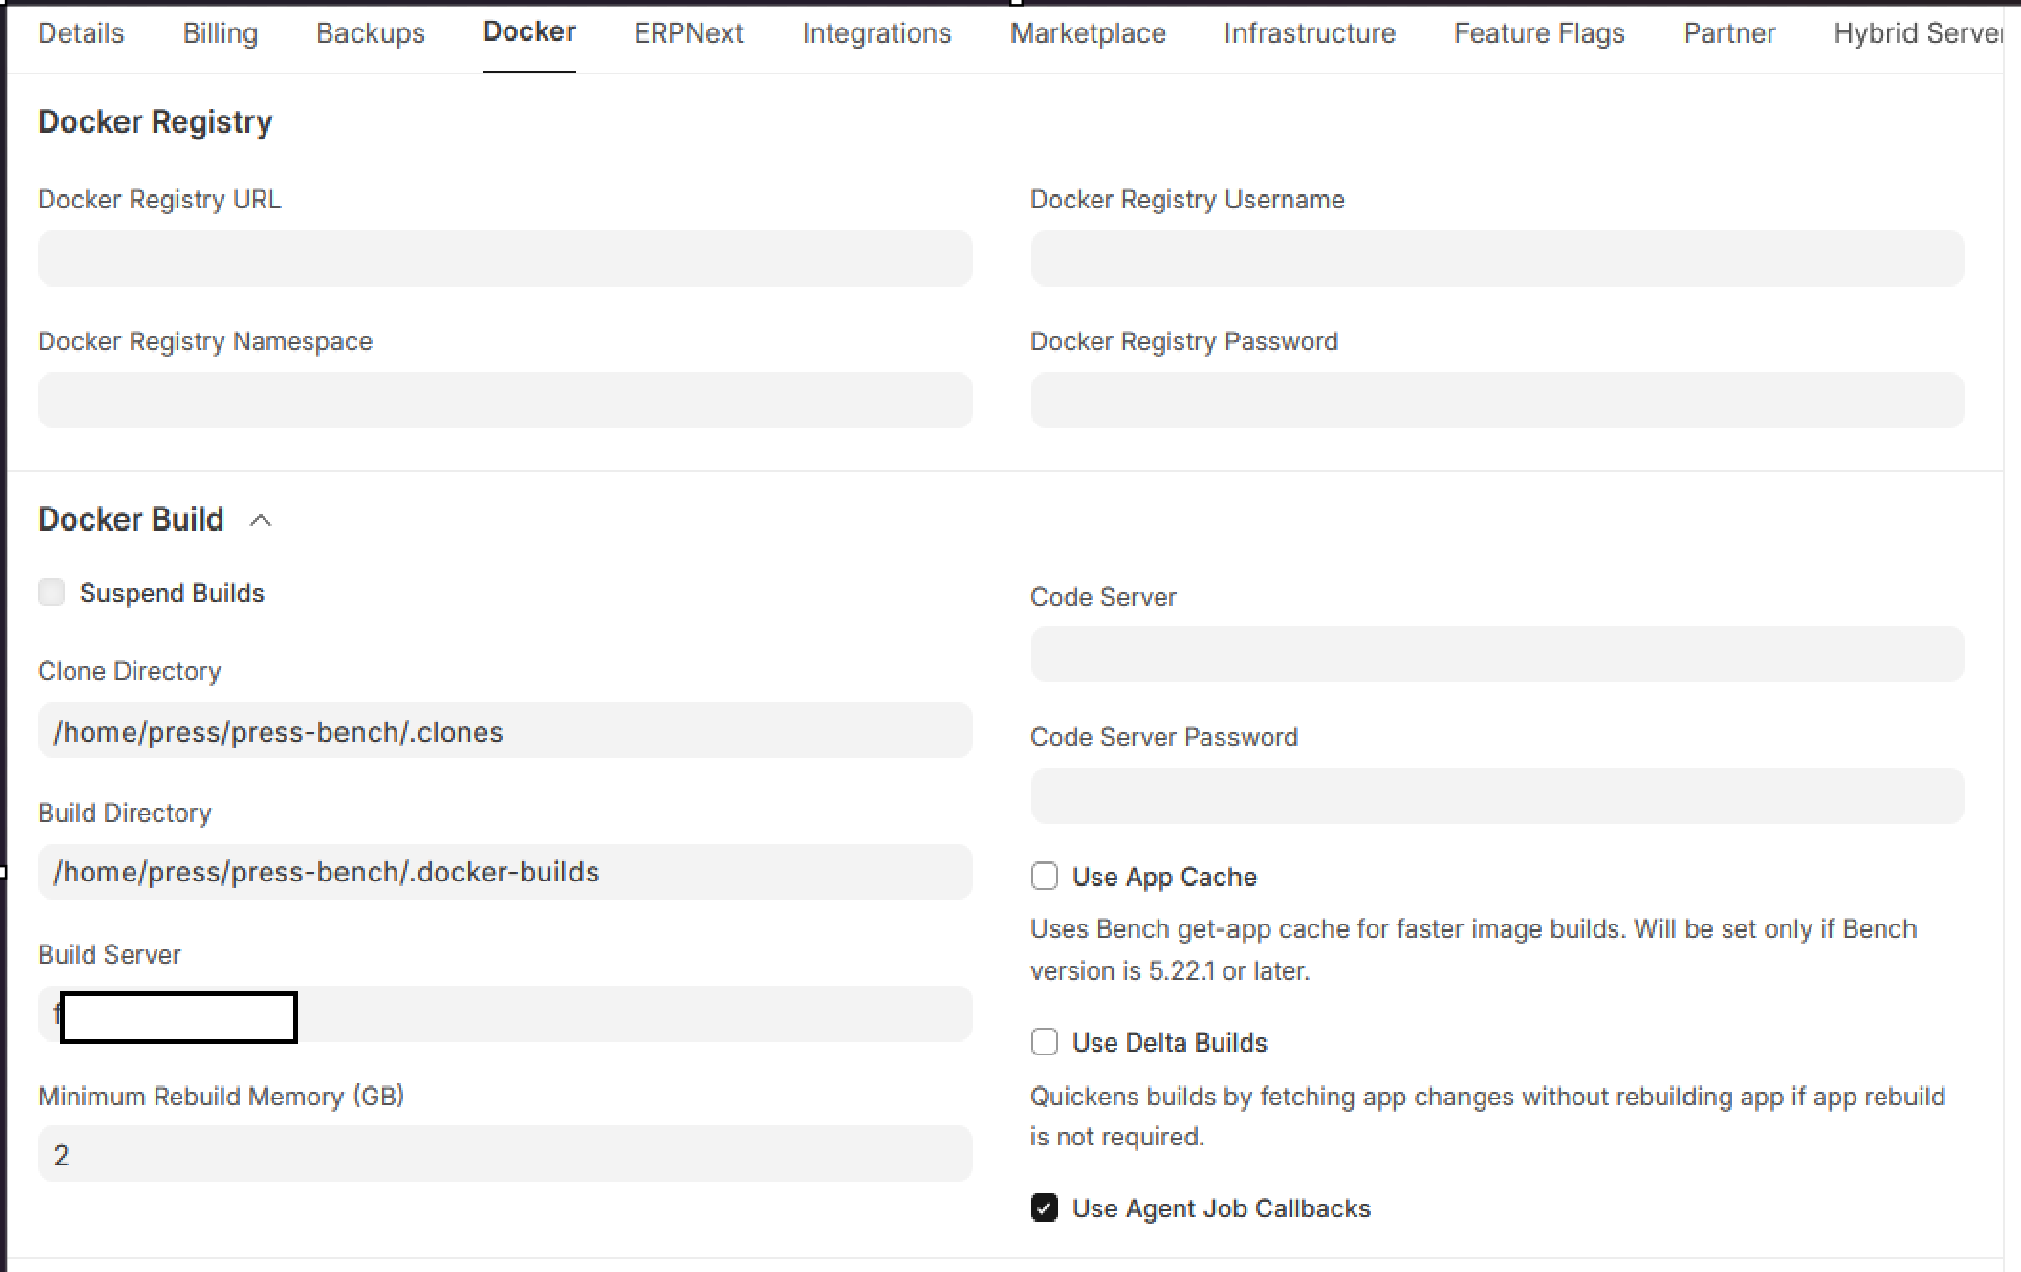
If you had not created those folders as you see in Clone Directory and Build Directory, create them now.
Select your build server : f1.example.com
Lets move to the upper part where you fill in Docker Registry URL, namespace, username and password.
I will do it for AWS, if you use other docker registry provider, you can fill in accordingly.
- Go to AWS Elastic Container Registry.
- Create a new registry (public or private as per your choice, public gives more free storage.
- I will do Public.
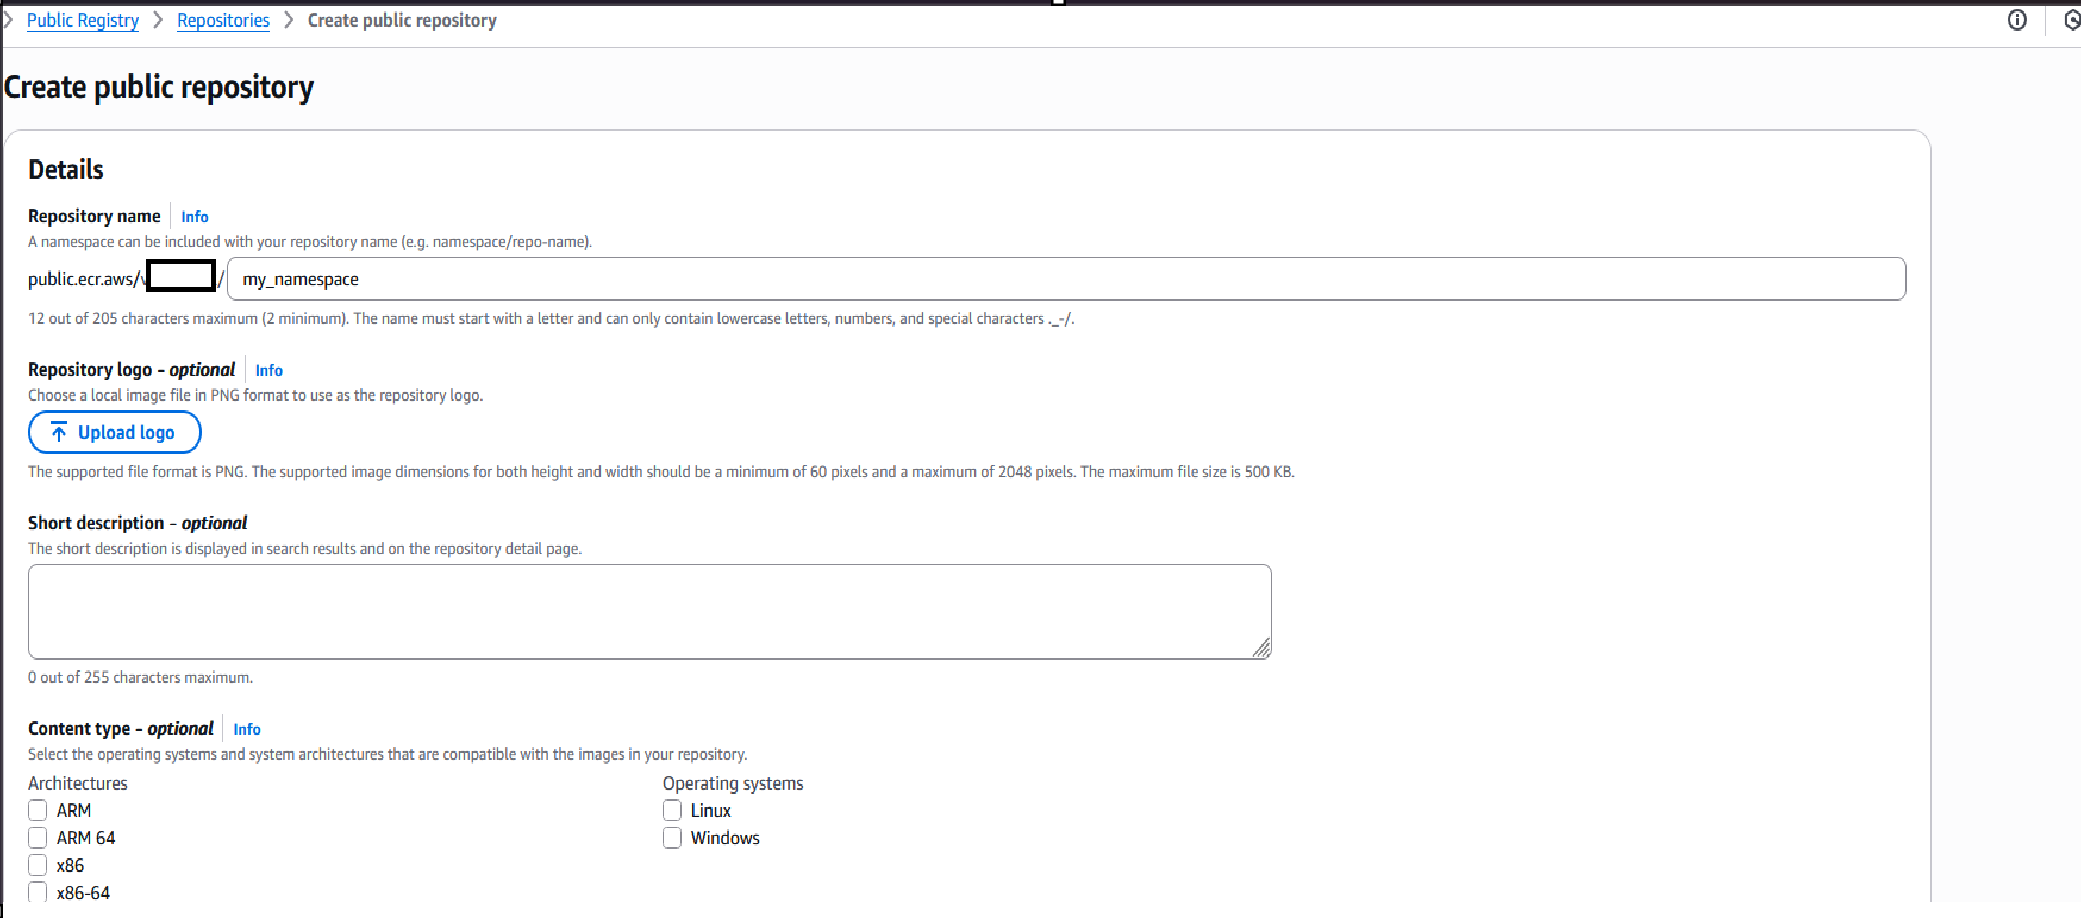
Take note/copy your URL- something like this:
public.ecr.aws/v1b2n3m4/and paste it in Registry URL andmy_namespacein Docker Registry Namespace.
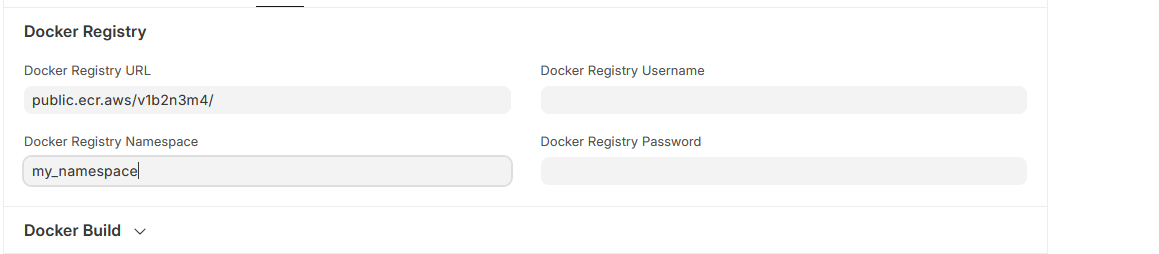
For Username and Password, remember the press-user IAM account that you created in AWS at the beginning ?
You had downloaded a file that contains AWS access key and secret for press-user.
Yes, open that file and copy-paste values in respective fields.
Fill in those info and save.
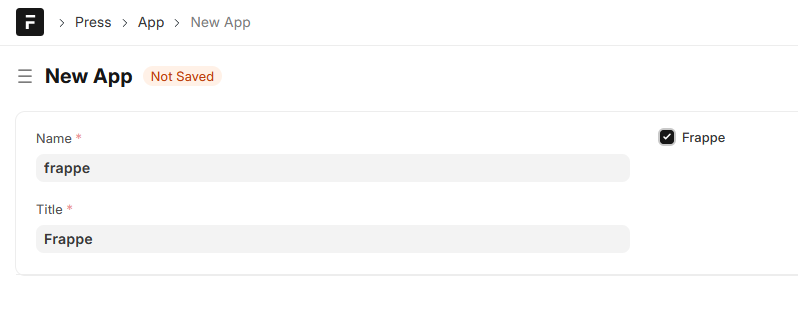
Next Create an APP
- Go to App list. And create a new App.
First app in any Release group must be Frappe.
- Save
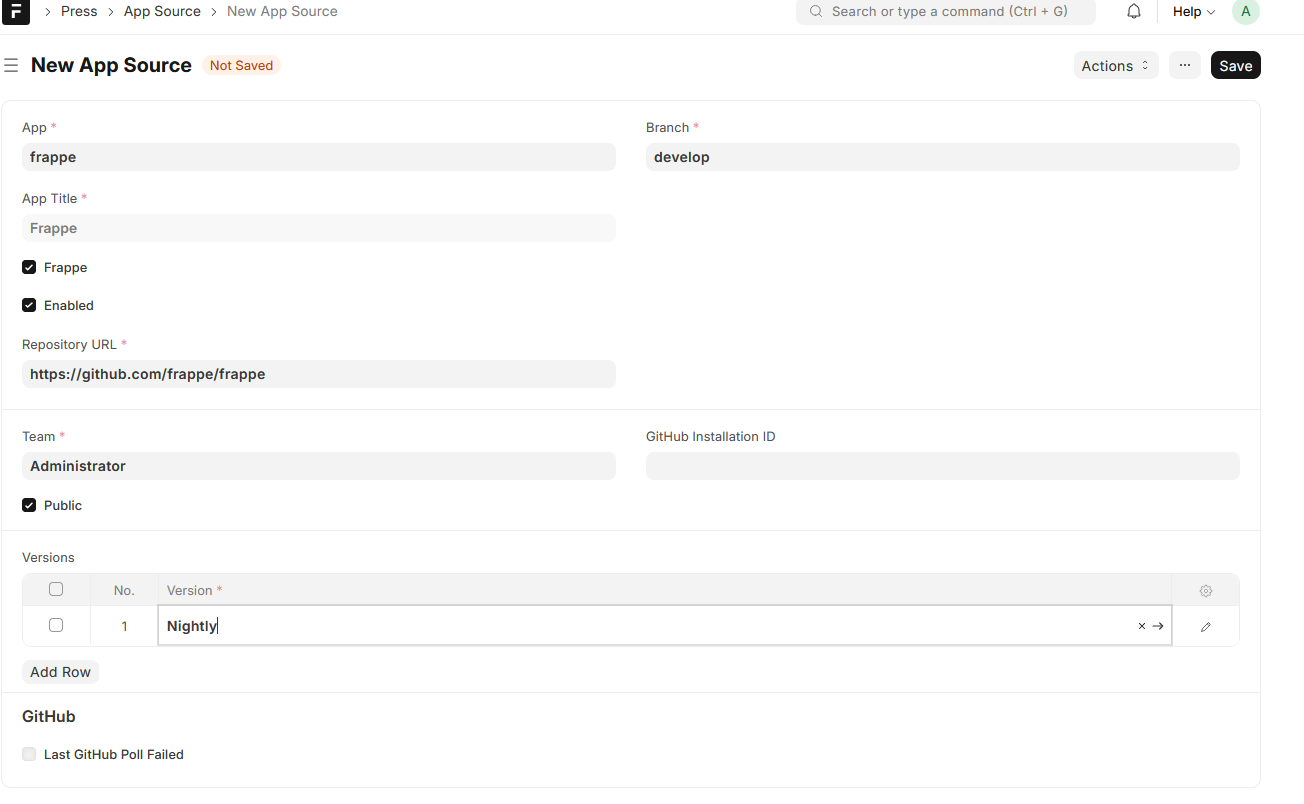
- Create an App Source for the app.
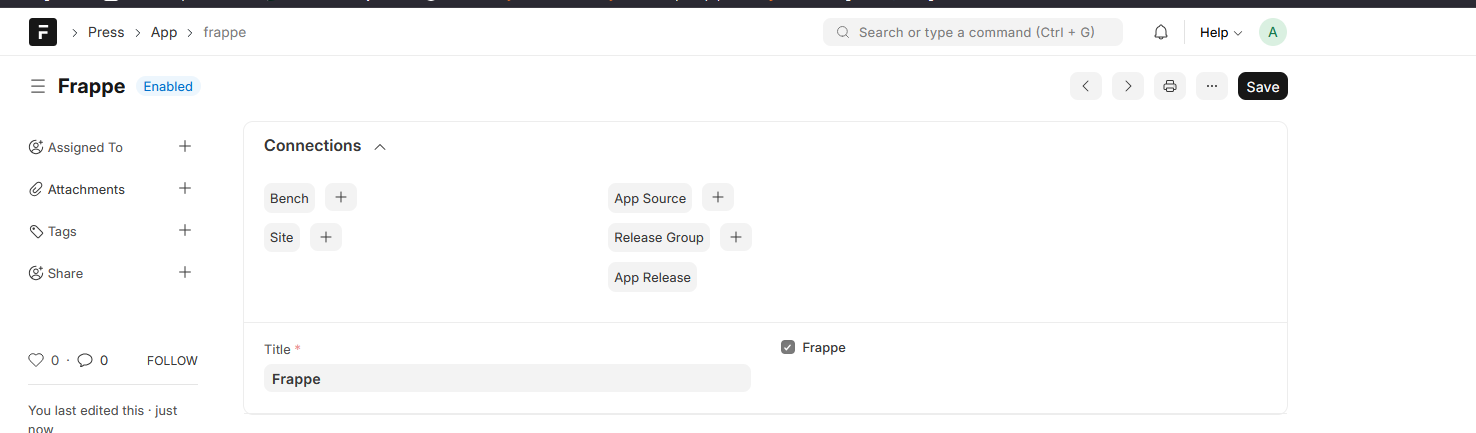
or, you can use your own forked repo of frappe. You can also choose develop branch.
-
An app release is automatically created.
-
Open that app release and approve it, then save it.

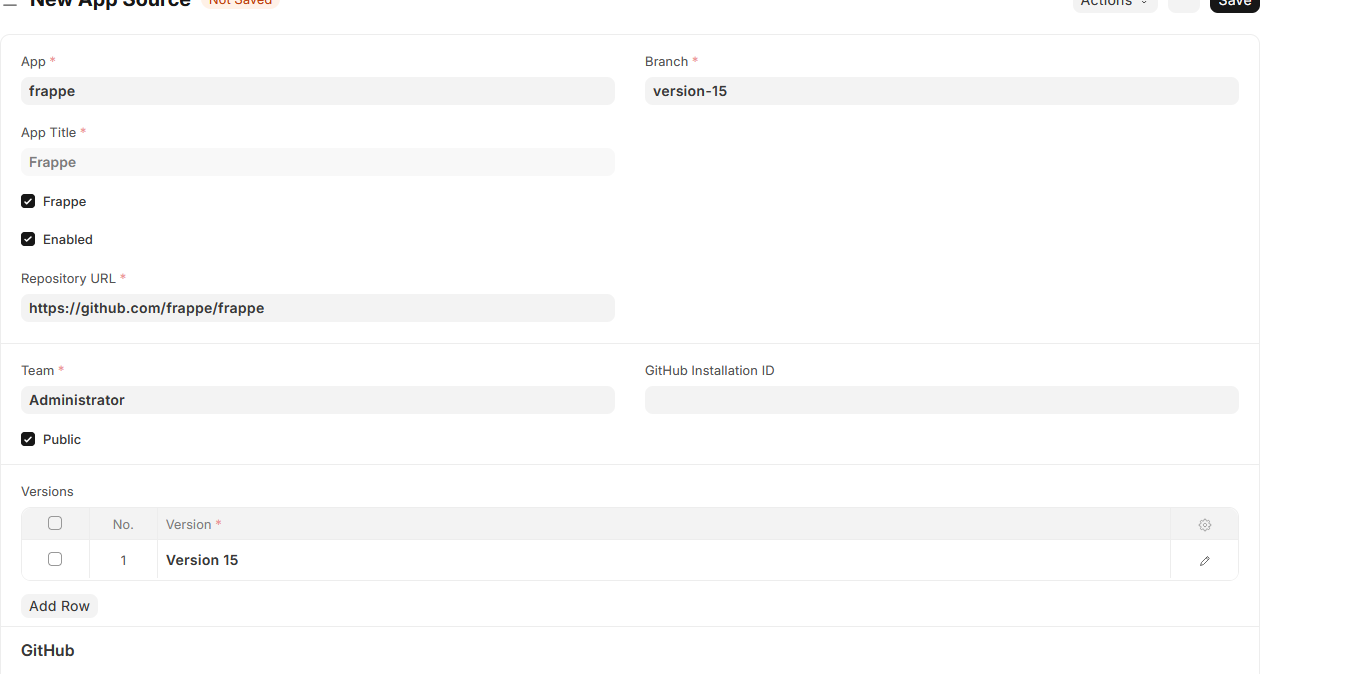
Lets also create an app source for develop version of frappe.
- Go to App list.
- Click on Frappe and Click on
+ App Source. - Fill in like this:
Our you can use your own repo.
Then open its release and approve it.
Task for you: Similarly, create another app - ERPNext and HRMS (name must be erpnext, hrms) and create two releases for it: develop and version-15.
Now we will create two release groups: one for develop version and another for version 15. Release groups are also known as Bench Groups.
- Go to Release group and create new.
- Name it V-15.
- Version: Select Version 15
- Team: Administrator
- Tick: Emabled, Default (Lets make v15 default). You may leave Public off.
- Under servers, add a row and select your app server: f1.example.com
- Under Build server: select f1.example.com
- Go to Apps tab.
- Under Apps table, add new rows as required and select all the apps (in App column) that you want to make available in this release group.
- In Source column, carefully select the app sources for version -15. Go to app source doctype to confirm the names if necessary.
Then save.
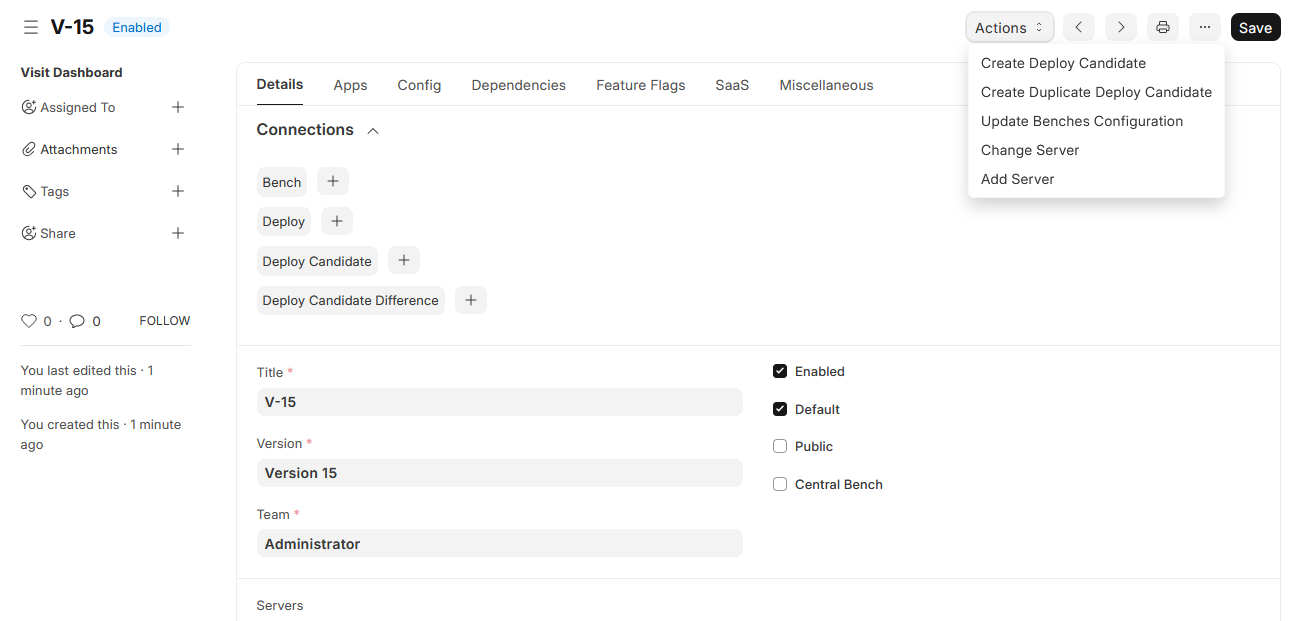
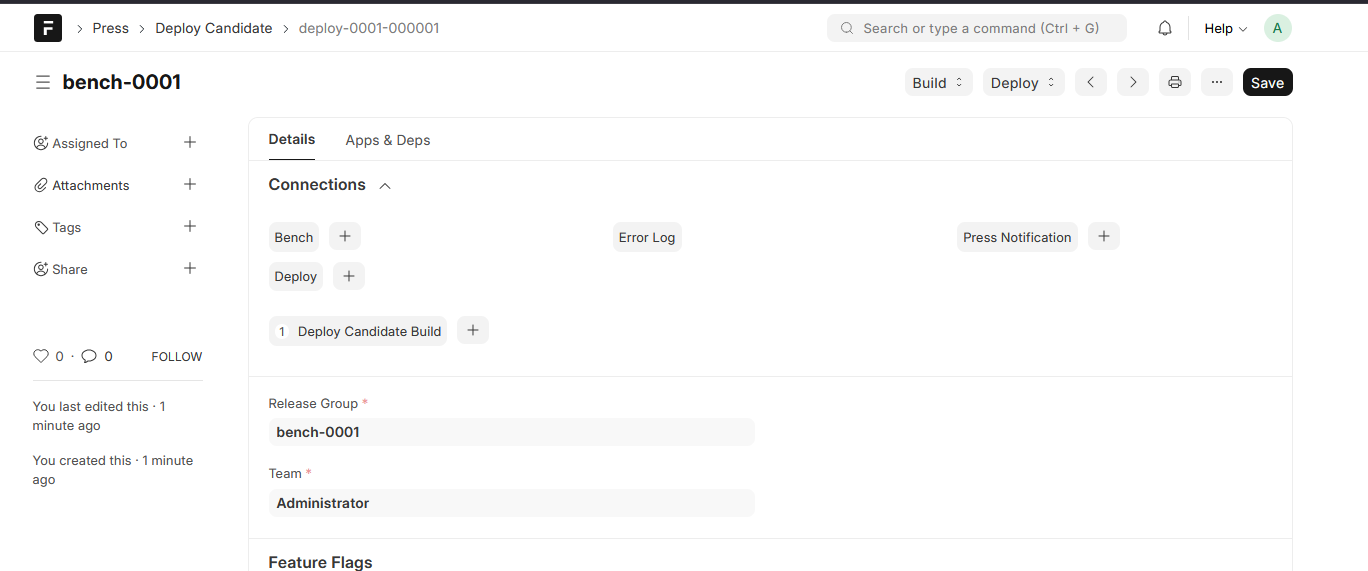
Then click on Actions → Create Deploy Candidate.
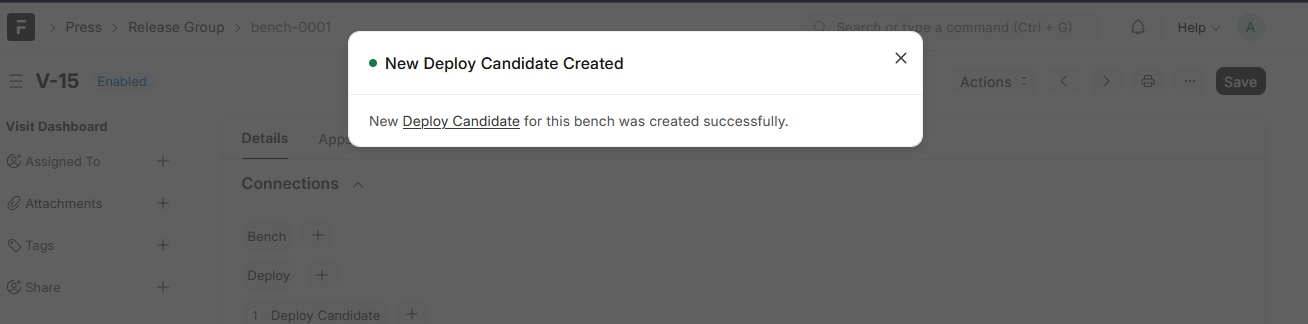
Then you will see this info:
Open the deploy candidate and Click on Deploy → Schedule Build and Deploy.

Open the Deploy Candidate Build
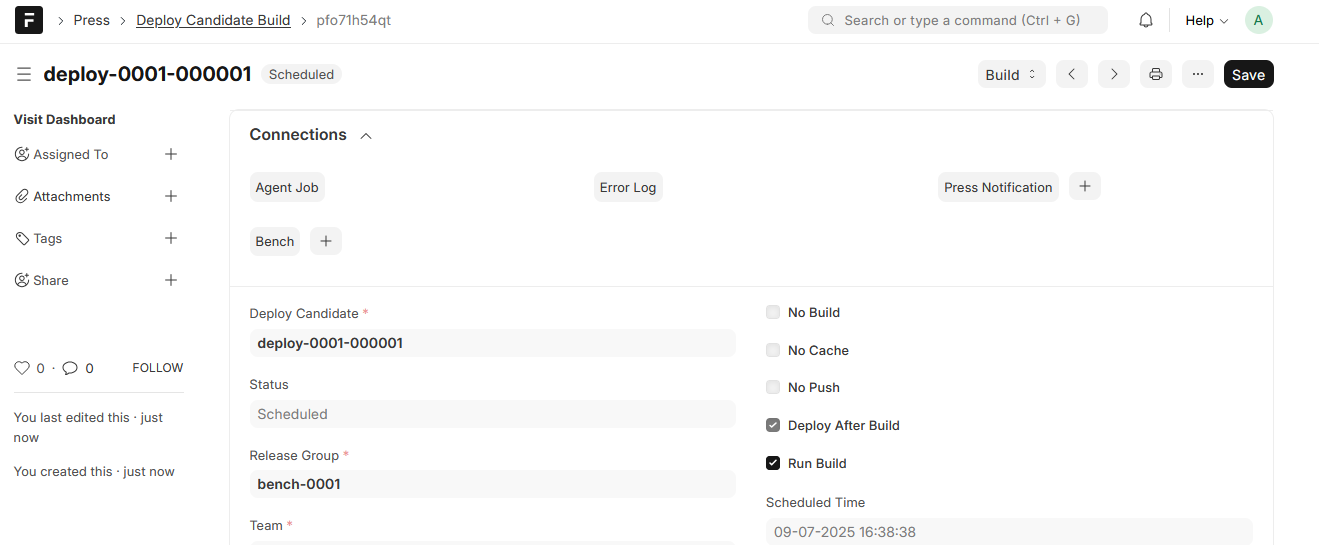
And Click on Visit Dashboard to see the build progress.
The status will remain Scheduled for a while and then it must switch to pending.
If instead you see error, as seen here:

Check the error:

The queue is
build type.
This is because queue type build is not defined in common_site_config.json.
Lets change that. SSH into Press server
ssh press # or whatever your setup was.
cd press-bench/sites/
sudo nano common_site_config.json
Add these line at the end.
  "workers": {
    "sync": {
      "timeout": 300
    },
    "build": {
      "timeout": 2400
    }
  }
Your common_site_config.json file must look something like this:
{
 "background_workers": 1,
 "dns_multitenant": true,
 "file_watcher_port": 6787,
 "frappe_user": "press",
 "gunicorn_workers": 5,
 "live_reload": true,
 "rebase_on_pull": false,
 "redis_cache": "redis://127.0.0.1:13000",
 "redis_queue": "redis://127.0.0.1:11000",
 "redis_socketio": "redis://127.0.0.1:13000",
 "restart_supervisor_on_update": true,
 "restart_systemd_on_update": false,
 "serve_default_site": true,
 "shallow_clone": true,
 "socketio_port": 9000,
 "use_redis_auth": false,
 "webserver_port": 8000,

  "workers": {
    "sync": {
      "timeout": 300
    },
    "build": {
      "timeout": 2400
    }
  }

}
Save the file.
Now ssh into f1 server:
ssh [email protected]
chmod 666 /var/run/docker.sock
exit
Now go to Deploy candidate, (not deploy candidate build) and click on Deploy → Schedule Build and Deploy again.