Step by Step Guideline Please.
Step By Step Guideline Please
can you pls share with me the custom_barcoade_ svg field code?
Here is what I have done. Inspired from danishaak.
you will get an out put like this.
- Add barcode in the barcodes table for items (I have used ean13 format to make the barcode clean and simple. So please add an ean13 value )
- Create a new print format - Settings->Print Format->new
- Put the below code in the HTML section of the new print format
<div class="dashboard-section">
  <div class="barcode-label-container">
    <div id="barcode-label" class="barcode-label">
      <div class="barcode-header">LMNAs</div>
      <div class="barcode-text">
        <span class="barcode-strong">{{ doc.item_name }}</span>
      </div>
      <div class="text-center">
          <svg class="barcode"
              jsbarcode-format="ean13"
              jsbarcode-value= {{ doc.barcodes[0].barcode }}
              jsbarcode-height = 30
              jsbarcode-width = "1.5"
              js-barcode-fontSize = 10
              jsbarcode-textmargin="0"

              jsbarcode-fontoptions="bold">
          </svg>
      </div>
      <div class="barcode-foot barcode-strong barcode-rotated">
       {{ doc.get_formatted("standard_rate", doc)  }}
      </div>
    </div>
  </div>
</div>


<script src="https://cdn.jsdelivr.net/npm/jsbarcode@3.11.0/dist/JsBarcode.all.min.js"></script>
<script>

JsBarcode(".barcode").init();
</script>
- Put this code in the CSS section of the print format
.dashboard-section {
display: flex;
flex-flow: row nowrap;
align-items: flex-end;
}
.dashboard-section > button {
margin-left: 10px;
}
.barcode-label-container {
border: 1px solid #d1d8dd;
width: fit-content;
overflow: hidden;
}
.barcode-label {
background-color: #ffffff;
color: #000000;
box-sizing: border-box;
height: 25mm;
width: 50mm;
padding: 1.5mm;
display: grid;
grid-template-columns: 1fr 6mm;
grid-template-rows: 4mm 1fr 17.5mm;
grid-template-areas: ‘header footer’ ‘text footer’ ‘barcode footer’;
font-family: monospace;
font-size: 8pt;
line-height: 1.2;
text-align: center;
}
.barcode-rotated {
line-height: 6mm;
transform: translate(calc(-10.5mm), 0) rotate(-90deg);
transform-origin: center center;
height: 6mm;
width: calc(31mm);
}
.barcode-header {
grid-area: header;
text-transform: uppercase;
}
.barcode-text {
grid-area: text;
height: calc(16pt);
overflow-y: hidden;
align-self: center;
}
.barcode-area {
grid-area: barcode;
align-self: center;
width: 14mm;
}
.barcode-foot {
grid-area: footer;
font-size: 1.4em;
align-self: center;
}
.barcode-strong {
font-weight: bold;
}
- Finally open the item and choose the pint preview. Please do not forget to choose the print format you have recently created. The default would be Standard.
Thank you soo much
hello, I’m also using jsbarcode but the barcode in my printformat didn’t show in pdf file. Do you know what could possibly went wrong?
Hello Valen,
Hope you are able to view the barcode in the print preview. Try to use normal print function and choose Save as Pdf in the print dialog.
.oke thankyou so much, I used the PDF button that’s why it didnt show.
Ispired by @gsarunk I have made custom format for barcode price labels that looks like this.
I have made it to perfectly fit 4x10 (40) labels per A4 paper size, including for safety margins of 5 mm.
But I can’t figure out how to print more than one item. And how to include price from a price list.
So what I want to achieve is:
- On item list page, select all items you wish to print. Go to action>print and select print format. Print.
I am guessing that it will be something like {{% for item in items %}}, but I don’t know where to look for field names I need to use. - On item label I want to define from which price list is price taken. And to put that price on label.
Thanks in advance.
Here is my html and css code. I improved on @gsarunk code by first checking if barcode is available.
HTML:
<div class="dashboard-section">
  <div class="barcode-label-container">
    <div id="barcode-label" class="barcode-label">
      <div class="label-item-name label-field">
          {{ doc.item_name }}
      </div>
      <div class="label-item-price label-field">
          34.000,00
          <!--{{ doc.standard_rate }}          -->
      </div>
      {% if doc.barcodes %}
      <div class="label-item-code label-field">
       {{ doc.item_code  }}
      </div>
      <div class="label-item-barcode label-field">
        <div class="barcode-container">
            <svg class="barcode" jsbarcode-format="ean13" jsbarcode-value={{ doc.barcodes[0].barcode }} jsbarcode-height=23
            jsbarcode-width="1" js-barcode-fontsize=1 jsbarcode-textmargin="2" jsbarcode-margin="0" jsbarcode-fontoptions="bold">
        </svg>
        </div>
      </div>
      {% else %}
      <div class="label-item-code-alone label-field">
       {{ doc.item_code  }}
      </div>
      {% endif %}
    </div>
  </div>
</div>


<script src="https://cdn.jsdelivr.net/npm/jsbarcode@3.11.0/dist/JsBarcode.all.min.js"></script>
<script>

JsBarcode(".barcode").init();
</script>
CSS:
.barcode-label{
    height: 29mm;
    width: 50mm;
}
.barcode-label {
  display: grid;
  grid-template-columns: 1fr 1fr 1fr 1fr;
  grid-template-rows: 1fr 1fr 1fr;
  gap: 0px 0px;
  justify-items: center;
    align-items: center;
  grid-template-areas:
    "label-item-name label-item-name label-item-name label-item-name"
    "label-item-price label-item-price label-item-price label-item-price"
    "label-item-code label-item-barcode label-item-barcode label-item-barcode";

}

.label-item-name {
    grid-area: label-item-name;
    font-size: 3mm;
    width: 50mm;
    height: 10mm;
    line-height: 3.5mm;
    z-index: 1;
    overflow: hidden;
}

.label-item-price {
    grid-area: label-item-price;
    font-size: 2em;
    font-weight: 600;
    width: 50mm;
    height: 8mm;
}

.label-item-code {
    grid-area: label-item-code;
    width: 15mm;
    height: 11mm;
    font-size: 2.5mm;
    overflow-wrap: break-word;


}

.label-item-code-alone {
    grid-area: label-item-code;
    width: 25mm;
    height: 11mm;
    font-size: 2.5mm;
    overflow-wrap: break-word;
}

.label-item-barcode {
    grid-area: label-item-barcode;
    width: 35mm !important;
    height: 12mm;
    font-size: 0.5em;

}
.barcode-container{
    max-width: 100%;
    max-height: 100%;

}
.barcode-label-container {
border: 1px solid #d1d8dd;
width: fit-content;
overflow: hidden;
}
.print-format, .barcode-label-container, .dashboard-section{
margin: 0;
padding: 0;
}
.label-field{

    padding: 1mm;
    //border: 1px solid black;
    text-align: center;

}
You need to loop through the barcode not the CSS.
{%- for item in doc.items -%}
{% set item_barcode = frappe.get_doc("Item Barcode", {"parent": item.item_code, "idx": 1,}) %}
{% set item_details = frappe.get_doc("Item", item.item_code) %}
{% for i in range((item.qty) |round|int ) %}


    <div class="dashboard-section pagebreak">
      <div class="barcode-label-container">
        <div id="barcode-label" class="barcode-label">
          <div class="barcode-header">Style Advisor</div>


          <div class="text-center barcode-area">
              <svg class="barcode"
                  jsbarcode-format="ean13"
                  jsbarcode-value= {{ item_barcode.barcode }}
                  jsbarcode-height = 25
                  jsbarcode-width = 1
                  js-barcode-fontSize = 10
                  jsbarcode-textmargin="0"

                  jsbarcode-fontoptions="bold">
              </svg>
          </div>
          <div class="barcode-text">
            <span class="barcode-strong">{{ item.item_name }}</span>
          </div>
          {% if item_details.standard_rate %}
              <div class="barcode-foot barcode-strong barcode-rotated">
                {{ item_details.get_formatted("standard_rate", doc)  }}

              </div>
          {% endif %}
        </div>
      </div>
    </div>
{% endfor %}
{%- endfor-%}
The above is the one i have created for printing multiple barcodes for all items and quantity during a material receipt. Similarly you can adapt it for your use case.
Thanks for sharing step by step points
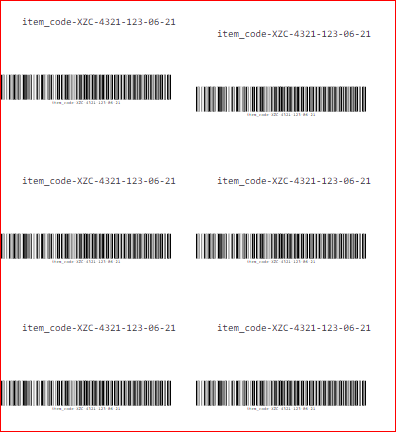
But I need to know one more thing how I can split that into 2 r 5 columns,
For more clarification, I’ve attached a screenshot below

This should be a pure CSS work. If you are good at CSS you can achieve this. I am not an CSS expert though ![]()
Fine, Thanks for reply
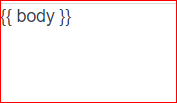
I did that but on click of print, browser simply displaying {body}

Is this working with version 13
Try adding CSS within the html section. I found sometimes the CSS does not work properly. So I usually add it to the HTML section. Most of the time this worked fine.
I’m trying in v12


