Dears,
How can i add single user to pos profile then prevent the other users from access this profile
Thanks
1 Like
Okay… Here is how I did it (and why I did it).
I use POS Awesome App for my POS and therefore needed a way to assign people to profiles and limit their ability to see other profiles info.
ON EDIT
You may want to read the post I made AFTER this set of instructions. It explains a bit more about why the steps you take here are listed.
Step One - You need to ADD the field for “Naming Series” into the POS profile. You do this by going to “Customize Form” and select “POS Profile” as the form to work on. In the example below you can see that I inserted the Naming Series field right after the “Country” field:
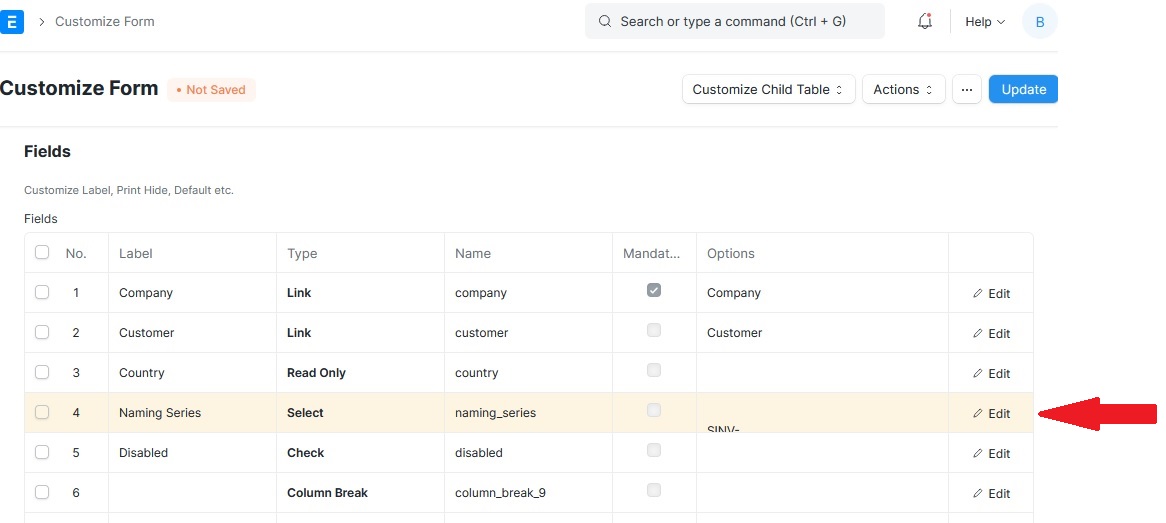
Once you have the field inserted and saved, go back to the field and click on the edit icon in the far right column for the Naming Series field.
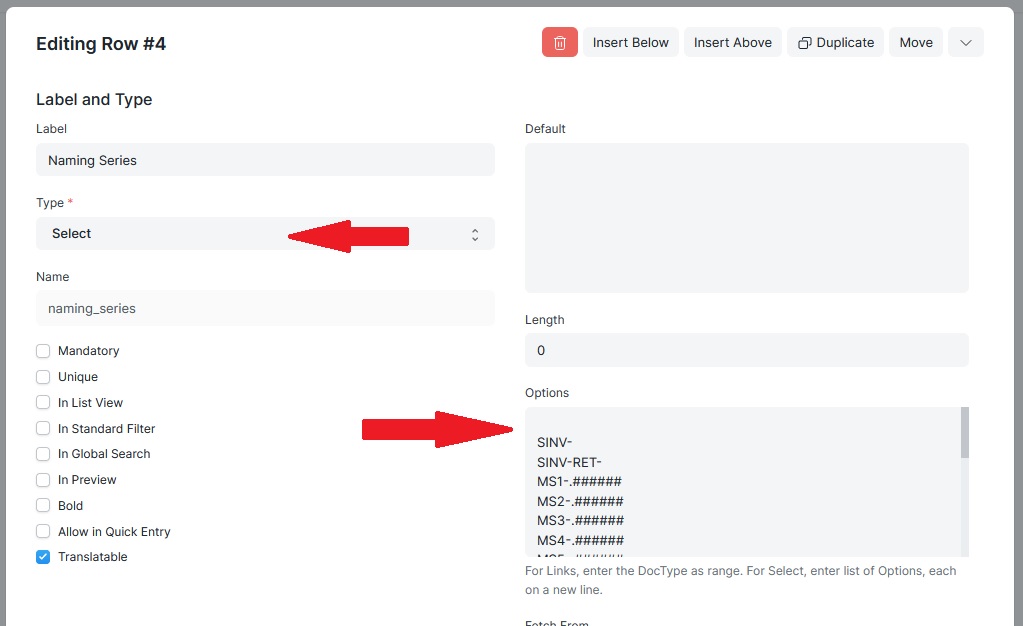
As in the below screenshot, change the “Type” field to “Select” and then copy all of the naming series entries from your “Sales Invoices” and paste them in the “Options” area, then save the record again.
Once this is done, you should click on “reload” to refresh the browser with all of the new form settings. After the reload, got to POS Profiles and select a profile from you list of existing profiles and it should now have the Naming Series field appear on the user interface screen and it is a drop-down selectable field. See Below:

So, up to this point we have given you the ability to select Sales Invoice Naming Series in the POS profile. But that is only half of the solution.
Next you need the ability to block out other people from being able to select a POS Profile that is not their own. To to this we create “User Permission” for each user that needs to select a profile.
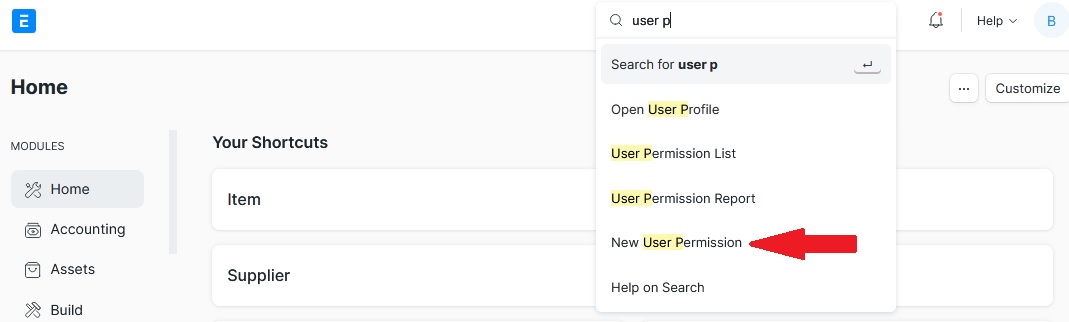
So in the Awesome bar, type “User P” and select “New User Permission” as in screenshot below:
In the new permission window:
1 - Select the User you want to create the limiting permission
2 - In the “Allow” field select or add “POS Profile” here.
3 - in the “For Value” you need to add the name of the POS Profile you want force on this user.
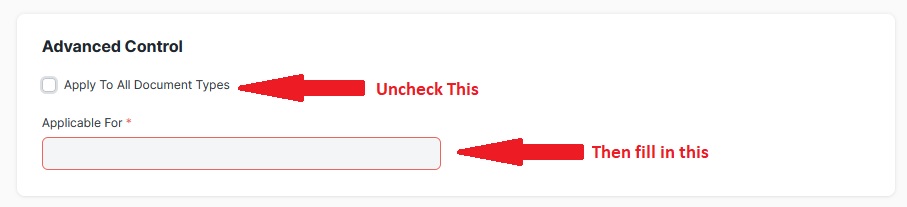
4 - Then you need to uncheck the “Apply to All Document Types” check box.

Once you uncheck the box you will be presented with an additional field labeled “Applicable for” and in this field you add “POS Profile”
Once everything is done you must Click on the blue Save button in the upper right corner to save the new user permission.
Remember to use the "reload " function again to update the browser with all the new permission settings.
From this point you should now see that any user with a user permission limiting them to a single POS Profile will no longer be able to see other profiles when they need to select one (as in when starting a new POS Shift).
Hope this helps.
Make sure you do this on a test server or a sandbox server before trying it on your live production server. I made a few mistakes along the way while figuring this out and it was nice to be able to just restore a sandbox database and start over after a mistake.
As always…
Your Mileage May Vary !! ![]()
BKM ![]()
1 Like
So Sorry. This should have come before the above instructions so that it would be easier to understand why it works and why things were done in this way.
Hmm… I guess I should have explained the Naming Series thing a bit better. In prior versions of ERPNext (v11 and backwards) there was only the native POS and when I first setup a v10 system, I used different sales invoice naming series to identify what store or what mobile sales rep was making the sales. When looking a a list of sales invoices it would be easy to then identify where any give sale was being made.
In my case, places and mobile units were given POS profile names as “MSx-” Where MS stood for “Manager of Sales” and the MS was followed by either a number or more initials to make it easier for me to know what profile was responsible for a sale.
This is why, in my current v13 system, I added the naming series to the POS Profile and once that was done it became simple to start limiting the POS profiles to people as well.
Hope this helps
BKM
2 Likes