Hi.
If you are looking to create a custom app to store custom fields and store this on GitHub (or other online repositories), the following will take you through the process.
The following is for the latest stable ERPNext (V11).
1. Setup GitHub
Although I am using GitHub, you should be able to follow this with other providers such as BitBucket, GitLab, SourceForge, Launchpad etc…
First, Create an account on GitHub.
Next, lock your account down with 2FA (https://github.com/settings/security). Once you have added 2fa, you should not need to use your password but instead create tokens for applications to access your GitHub account. This is usefull if you want to temporarily give someone access to your private repositry but don’t want to give them your master password or provide 2fa codes.
Now create a token for using GIT (https://github.com/settings/tokens). Ensure the token is only able to access the Repo only (repo:status, repo_deployment, public_repo, repo:invite).
Finally, create a new repository and make a note of the link which can be found on clicking green “Clone or download” button. This should end with .git. Choose Private if you don’t want the internet to see your code.
When choosing repository name, do not use dashes or spaces. If you want to space your words, then use underscore (_).
2. Create App
Now we can create the app in Bench. Login to your erpnext and go to you ERPNext folder. This will be the directory where bench/erpnext is installed into. For the purpose of following this, I have created a user bench and installed erpnext into folder erpnext.
cd /home/bench/erpnext
bench new-app erpnext_app
Replace erpnext_app with a new name which should be the same as repository. Please ensure there are no spaces and no dashes. Use underscore ( _ ) if you want to separate words.
You will be prompted to enter the following:
App Title
App Description
App Publisher
App Email
App Icon
App Color
App License
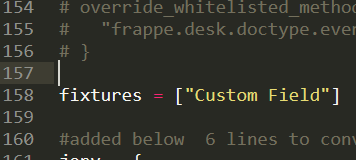
Now edit hooks.py located in cd /home/bench/erpnext/apps/erpnext_app and add the following at the end of the file:
Fixtures
fixtures = [‘Custom Field’]
Now we need to install the app onto your site: assuming your site is erpnext.domain.com
cd /home/bench/erpnext
bench --site erpnext.domain.com install-app erpnext_app
bench --site erpnext.domain.com migrate
3. Export Fixtures
Now we have the app installed, we want Bench to export the Custom Fields you have created into the custom app. Please ensure your mysql is running
cd /home/bench/erpnext
bench export-fixtures
You should now see a new folder called fixtures in /home/bench/erpnext/apps/erpnext_app/erpnext_app which contains a file called custom_field.json. This file will have details of any custom fields you have created.
4. Push app to GitHub
Now we need to push the app to GitHub. Don’t forget to change the username, email and GitHub links when pasting into the shell.
cd /home/bench/erpnext/apps/erpnext_app
git config --global user.name "your github username"
git config --global user.email "Your GitHub email"
git init
git remote add origin https://github.com/GitHubUsername/erpnext_app.git
git checkout -b master
git add .
git commit -m "App Initalised"
git push -f origin master
You will be prompted for username and password. Enter your GitHub username and the token created above.
You app should now be pushed to GitHub. You can double check this by going on the web front end.
Finally, set the branch to remote branch for easy pull/push:
git branch --set-upstream-to=origin/master master
A. Updating App
You can edit your app using any tools and push these changes to GitHub. To incorporate these changes to your ERPNext instance, simply go into the apps directory and issue a git pull command:
cd /home/bench/erpnext/apps/erpnext_app
git pull
Enter your username and token when prompted
Then migrate these into your ERPNext:
cd /home/bench/erpnext
bench --site erpnext.domain.com migrate
Replace domain with your site erpnext.domain.com with your site address.
B. Installing App from GitHub
To install app from your GitHub link for example on a new ERPNext instances:
cd /home/bench/erpnext
bench get-app https://github.com/GitHubUsername/erpnext_app.git
bench install-app erpnext_app
bench --site erpnext.domain.com migrate
C. Uninstalling/Removing App from ERPNext
You can remove the app from ERPNext by
bench --site erpnext.domain.com uninstall-app erpnext_app
bench remove-app erpnext_app
Hope you find this useful.
Thanks.