Summary
ERPNext is an open-source ERP system that helps businesses manage their operations efficiently. This guide will walk you through the process of installing ERPNext version 15 on your server using Docker.

Prerequisites:
Before you begin, ensure you have the following prerequisites in place:
- Operating System: Linux (Ubuntu 20+ recommended)
- Python: Version 3.10.12+
- Node.js: Version 18.x+
- MariaDB: Version 10.6+
- Redis: Latest version
- Docker: Latest version
App Configuration
If you have a custom app follow this step
you have to configure your custom app and Username and Password. here Password means Auth Token not actual password.
export APPS_JSON='[
  {
    "url": "https://github.com/frappe/erpnext",
    "branch": "version-15"
  },
  {
    "url": "https://username:password@github.com/username/<CUSTOM_APP>.git",
    "branch": "main"
  }
]'
If you don’t have a custom app
just only configure the erpnext app
export APPS_JSON='[
  {
    "url": "https://github.com/frappe/erpnext",
    "branch": "version-15"
  }
]'
That’s you can follow the bellow command as usual
export APPS_JSON_BASE64=$(echo ${APPS_JSON} | base64 -w 0)
Get Start 
Step 1
Clone the frappe_docker from the GitHub
git clone https://github.com/frappe/frappe_docker
cd frappe_docker
Step 2
Build the image and I name the image as customapp:1.0.0 as you can see below in the build command
Make sure your using the correct arguments while taking build
FRAPPE_BRANCH=v15.0.0PYTHON_VERSION=3.10.12NODE_VERSION=18.18.2
If Your taking image build correctly everything fine
docker build \
  --build-arg=FRAPPE_PATH=https://github.com/frappe/frappe \
  --build-arg=FRAPPE_BRANCH=v15.0.0 \
  --build-arg=PYTHON_VERSION=3.10.12 \
  --build-arg=NODE_VERSION=18.18.2 \
  --build-arg=APPS_JSON_BASE64=$APPS_JSON_BASE64 \
  --tag=customapp:1.0.0 \
  --file=images/custom/Containerfile .
Step 3
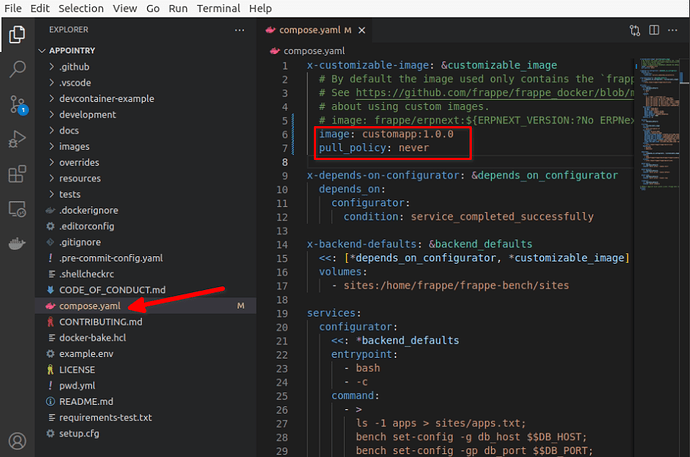
Modify the compose.yaml file inside the frappe_docker folder like this
x-customizable-image: &customizable_image
  image: customapp:1.0.0
  pull_policy: never
in coming commands you have to run inside the frappe_docker folder keep in mind
Step 4
Create a directory with the name of gitops
mkdir ~/gitops
Step 5
Here Im assume im using the domain ziptor.com but its not exist in real. you can change your domain where ever you see ziptor.com the reason instead of giving example.com I’m giving this. but in one file example.com will be there we have to correct there that’s why I’m giving some random domain example keep in mind
echo 'TRAEFIK_DOMAIN=ziptor.com' > ~/gitops/traefik.env
echo 'EMAIL=admin@ziptor.com' >> ~/gitops/traefik.env
echo 'HASHED_PASSWORD='$(openssl passwd -apr1 changeit | sed 's/\$/\\\$/g') >> ~/gitops/traefik.env
Step 6
Up the traefik container
docker compose --project-name traefik \
  --env-file ~/gitops/traefik.env \
  -f overrides/compose.traefik.yaml \
  -f overrides/compose.traefik-ssl.yaml up -d
Step 7
Note: change the DB_PASSWORD with some more secure basically this command creates a file inside the gitops folder with the name of mariadb.env if not create create manually add the DB_PASSWORD=changeit
echo "DB_PASSWORD=changeit" > ~/gitops/mariadb.env
Step 7
Make sure running these all commands inside the frappe_docker folder
Deploy the mariadb container
docker compose --project-name mariadb --env-file ~/gitops/mariadb.env -f overrides/compose.mariadb-shared.yaml up -d
Step 8
Please do this step very carefully change the required data and run the command
change your domain and DB Password here you can see the erp.example.com don’t change that one only change the domain where you see the ziptor.com. please do it carefully
cp example.env ~/gitops/erpnext-one.env
sed -i 's/DB_PASSWORD=123/DB_PASSWORD=changeit/g' ~/gitops/erpnext-one.env
sed -i 's/DB_HOST=/DB_HOST=mariadb-database/g' ~/gitops/erpnext-one.env
sed -i 's/DB_PORT=/DB_PORT=3306/g' ~/gitops/erpnext-one.env
sed -i 's/SITES=`erp.example.com`/SITES=\`ziptor.com\`/g' ~/gitops/erpnext-one.env
echo 'ROUTER=erpnext-one' >> ~/gitops/erpnext-one.env
echo "BENCH_NETWORK=erpnext-one" >> ~/gitops/erpnext-one.env
Step 9
Create erpnext-one.yaml
docker compose --project-name erpnext-one \

--env-file ~/gitops/erpnext-one.env \

-f compose.yaml \

-f overrides/compose.redis.yaml \

-f overrides/compose.multi-bench.yaml \

-f overrides/compose.multi-bench-ssl.yaml config > ~/gitops/erpnext-one.yaml
Step 10
Deploy erpnext-one containers:
docker compose --project-name erpnext-one -f ~/gitops/erpnext-one.yaml up -d
Step 11
Create sites ziptor.com
Change your site instead of ziptor.com
In this command the site password is changei and DB password is changeit so please change those and make it secure. where ever you see changeit in the command change with a secure one.
docker compose --project-name erpnext-one exec backend \

bench new-site ziptor.com --no-mariadb-socket --mariadb-root-password changeit --install-app erpnext --admin-password changeit
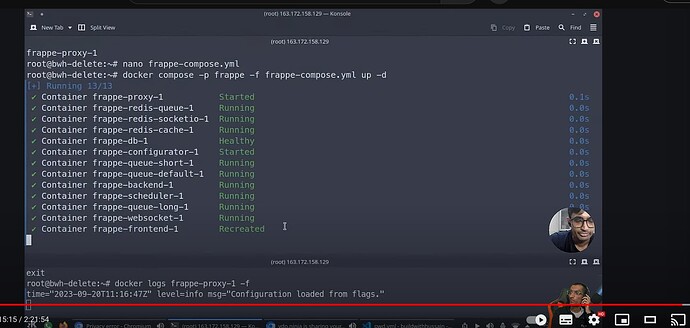
After the command you can see like this
To enable sceduler login inside the backend container using this command
docker exec -it <CONTAINER_NAME> bash
example
docker exec -it erpnext-one-backend-1 bash
Before enabling the scheduler if you have a backup database restore it. After Enable Schedular
Here the enabling command
bench --site ziptor.com enable-scheduler
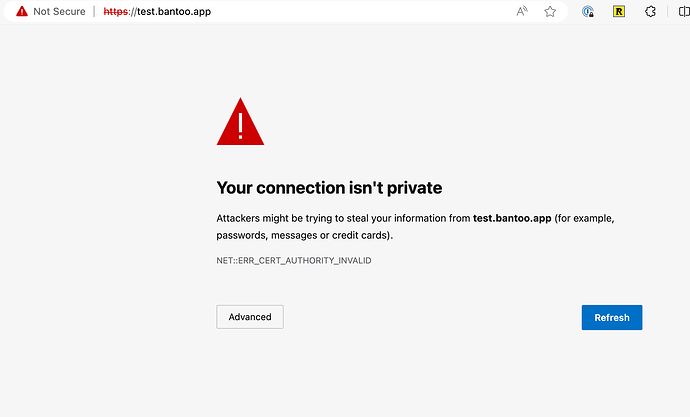
If site not working
Check the the site is working if not working down and up the container
Down the container
docker compose --project-name erpnext-one -f ~/gitops/erpnext-one.yaml down
Up the container
docker compose --project-name erpnext-one -f ~/gitops/erpnext-one.yaml up -d
even though its not working try 2 or three times down and up.
Contact
Github : Antony-M1 · GitHub
Linkedin : Antony


